

This guide walks you through configuring a custom domain to serve content from Onidel Object Storage, enabling you to host static websites or serve files using your own domain name instead of the default Onidel storage URLs.
Prerequisites
Before starting, ensure you have:
-
An active Onidel Object Storage service.
-
A registered domain name that you control
-
Access to your domain's DNS management panel
-
A Cloudflare account (recommended for SSL and CDN capabilities)
Overview
Onidel Object Storage supports static website hosting with custom domains through a straightforward configuration process. By creating a specially-named bucket and configuring DNS records, you can serve your content directly from your own domain with full SSL support through Cloudflare's proxy service.
Step 1: Create a Domain-Matched Bucket
The first requirement is creating a bucket with a name that exactly matches your intended domain.
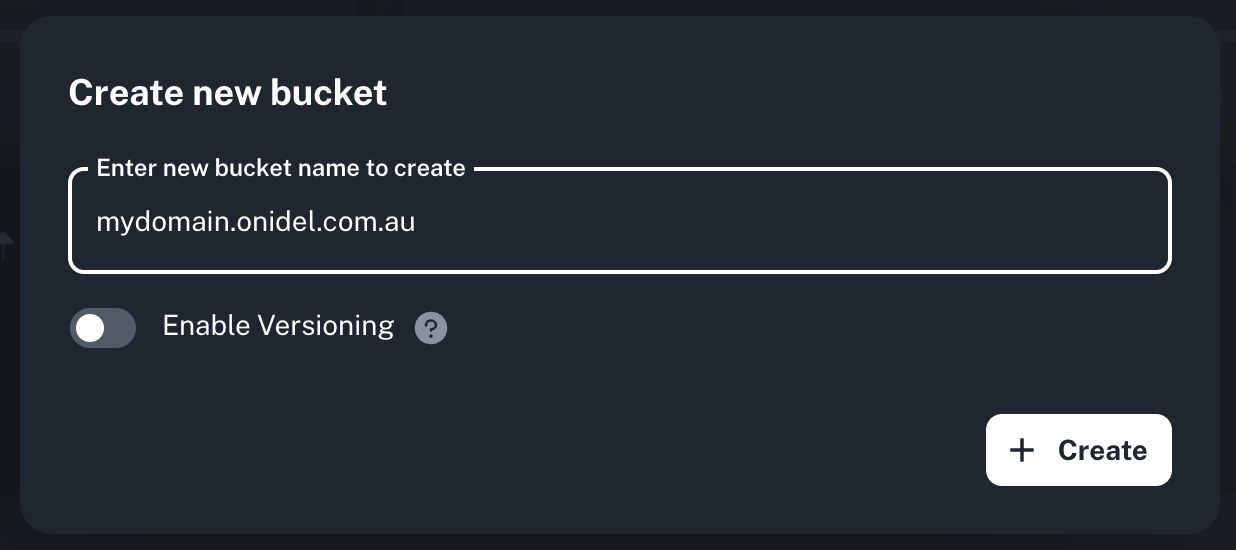
Creating the Bucket
Navigate to your Onidel Object Storage dashboard and create a new bucket. The bucket name must precisely match the domain or subdomain you plan to use.
Examples:
-
For
example.com, create a bucket namedexample.com -
For
cdn.example.com, create a bucket namedcdn.example.com -
For
assets.mysite.io, create a bucket namedassets.mysite.io
The bucket name must match the full domain including any subdomains. This naming convention is essential for the routing system to correctly map requests to your bucket.
Throughout this tutorial, we use a setup based on the domain mydomain.onidel.com.au.
Step 2: Configure Bucket Visibility
After creating your bucket, you need to modify its access permissions to allow public access for web hosting.
Changing Visibility Settings
-
Access your bucket through the Onidel Object Storage dashboard
-
Navigate to the Settings tab for your bucket
-
Locate the Bucket Visibility in Access & Versioning section
-
Change the setting from Private to Public
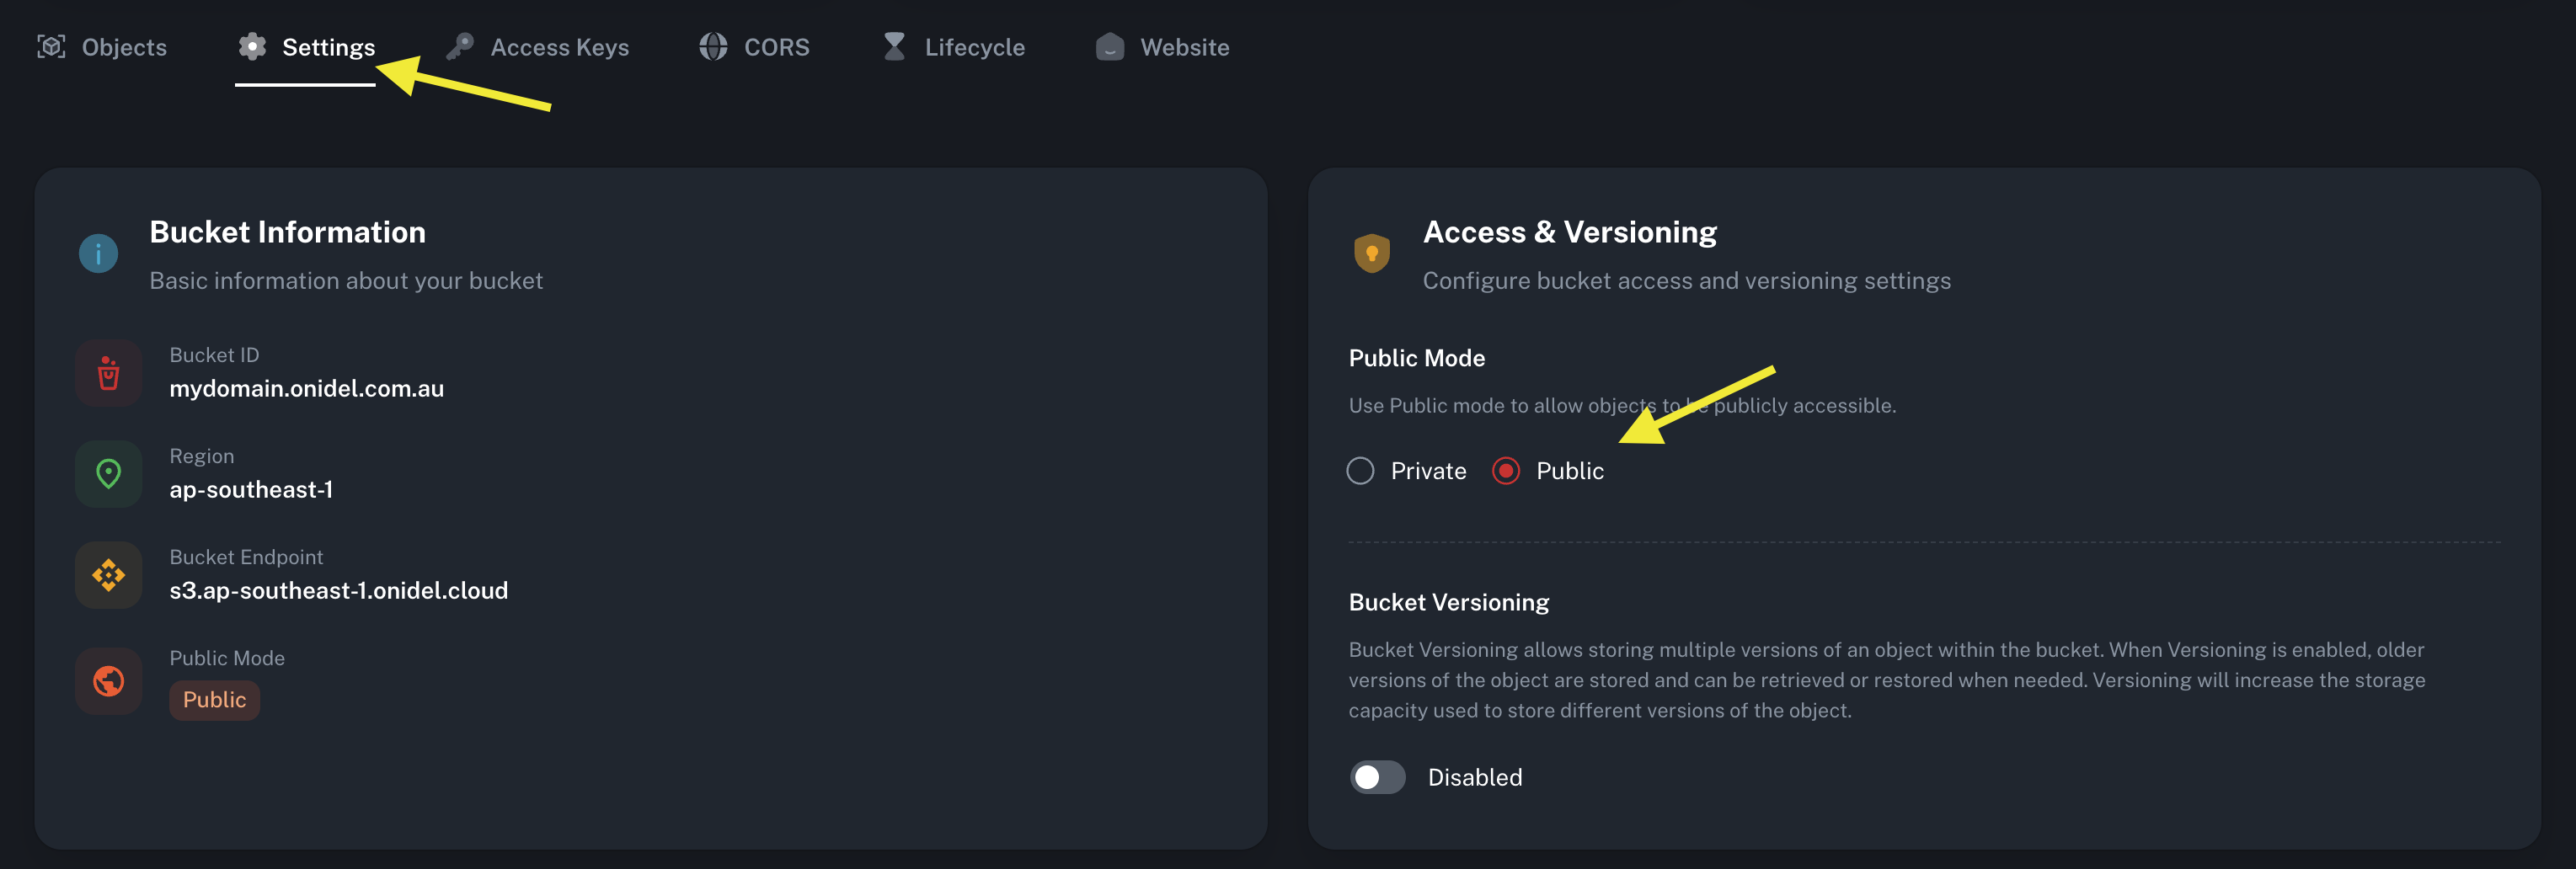
This modification allows anonymous users to read objects in your bucket, which is necessary for serving website content to visitors.
Step 3: Enable Static Website Hosting
With your bucket configured for public access, the next step is enabling static website hosting functionality.
Activating Website Hosting
-
Navigate to the Website tab for you bucket.
-
Enable the static website hosting option
-
Configure the following settings as needed:
a. Index Document: Specify your default page (typically
index.html)b. Error Document: Define your custom error page (typically
404.htmlorerror.html) -
Save your configuration
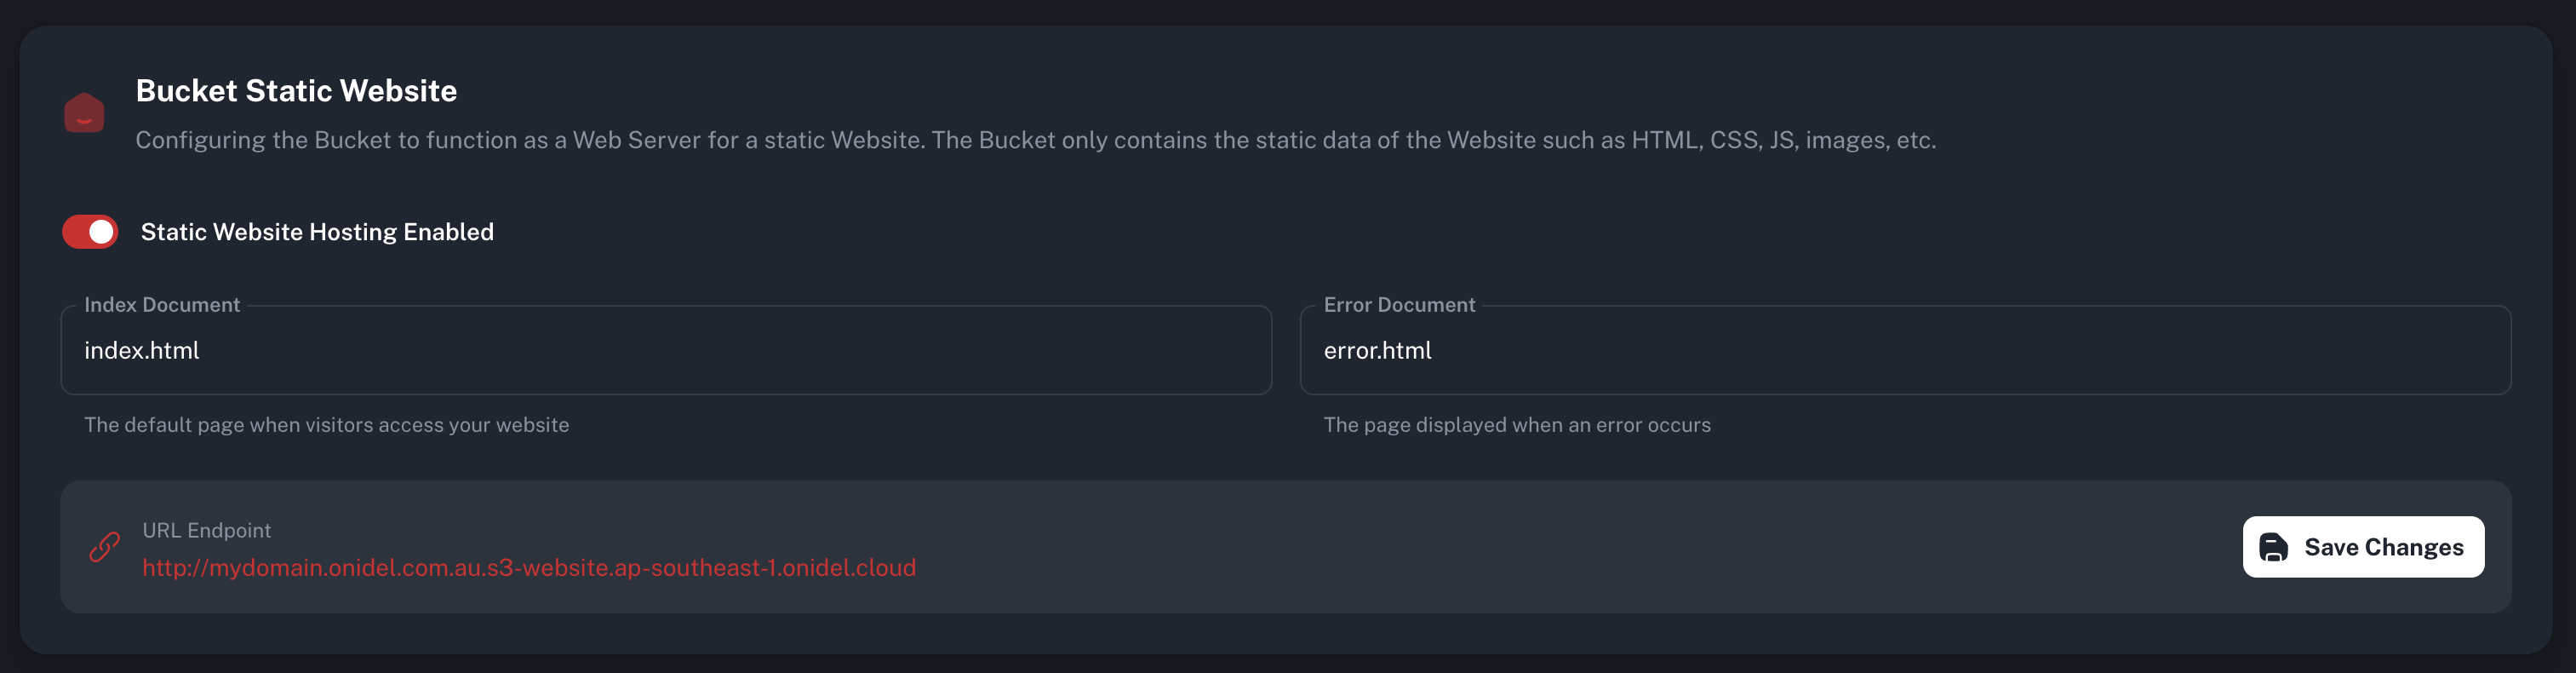
Understanding Your Website Endpoint
Once static website hosting is enabled, Onidel Object Storage generates a unique website endpoint for your bucket. This endpoint follows a specific format based on your bucket's region:
http://<your-domain>.s3-website.<region>.onidel.cloud
Make note of this endpoint URL as you'll need it for DNS configuration in the next step.
Step 4: Configure DNS Records
The final step involves pointing your domain to the Onidel Object Storage endpoint through DNS configuration.
Access your domain's DNS management panel (this might be through your domain registrar, Cloudflare, or another DNS provider) and create a CNAME record pointing to the endpoint from step 3. We recommend using Cloudflare to take advantages of automatic SSL/TLS encryption, CDN caching and DDoS protection:

Verifying Your Configuration
After completing the setup, verify your configuration:
-
DNS Propagation: Wait 5-15 minutes for DNS changes to propagate
-
Test Access: Navigate to your domain in a web browser
-
SSL Verification: If using Cloudflare proxy, verify HTTPS access works
Your custom domain is now configured to serve content from Onidel Object Storage. Visitors accessing your domain will receive files directly from your bucket (with SSL encryption through Cloudflare's proxy if using Cloudflare).
If you encounter any issues during setup, please open a support ticket through your dashboard and we'll be happy to assist.