
Onidel dashboard has built in support for firewall. It can be useful to filter incoming traffic on a layer above your VM guest Operating System. Any incoming traffic filtered out on that layer is not counted towards your server's data usage.
Firewall is managed with Firewall Groups which allow you to create reusable groups of rules that can be applied to multiple Virtual Machines simultaneously.
IP Lists are used to group IP addresses and subnets. Later, the firewall rules can be applied to them. That is especially useful when using external CDNs like Cloudflare or AWS Cloudfront, monitoring tools or services you want to only expose to trusted networks.
Creating a Firewall Group
Firewall Groups are sets of firewall rules which can be reused across multiple VMs in different locations.
-
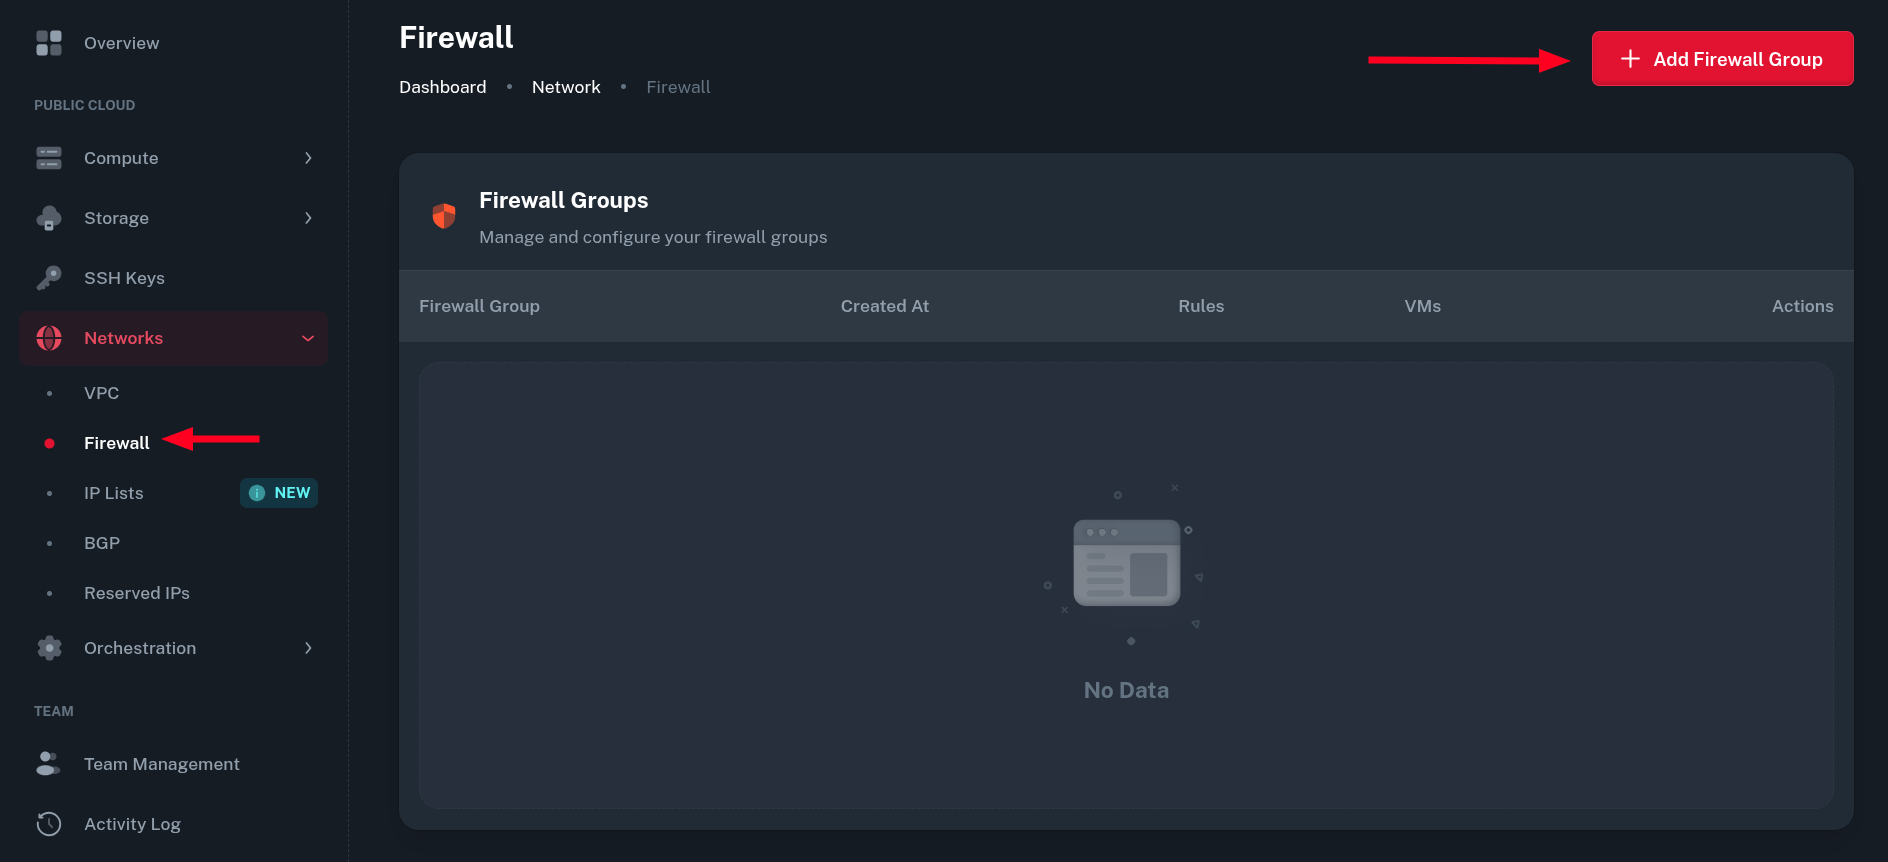
Go to Networks > Firewall and click Add Firewall Group button.
-
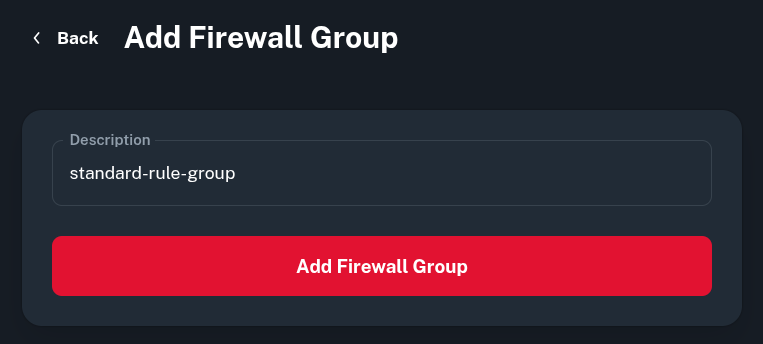
Create a name for the Firewall Group. Ideally, it should describe what the rules defined there will achieve together.
-
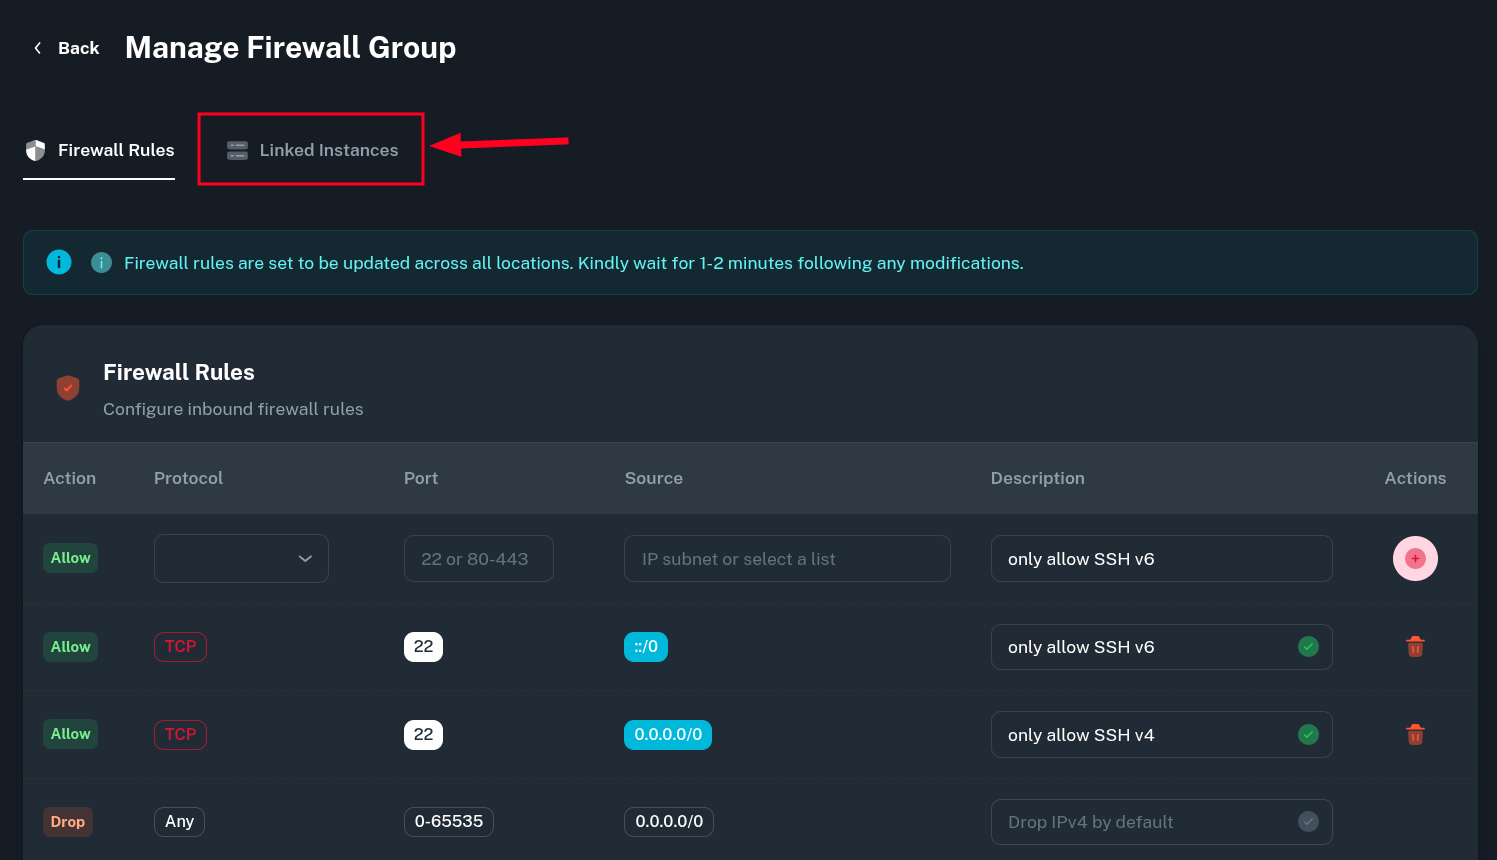
 Now, you can add rules in the firewall group by clicking the pen icon in Actions column.
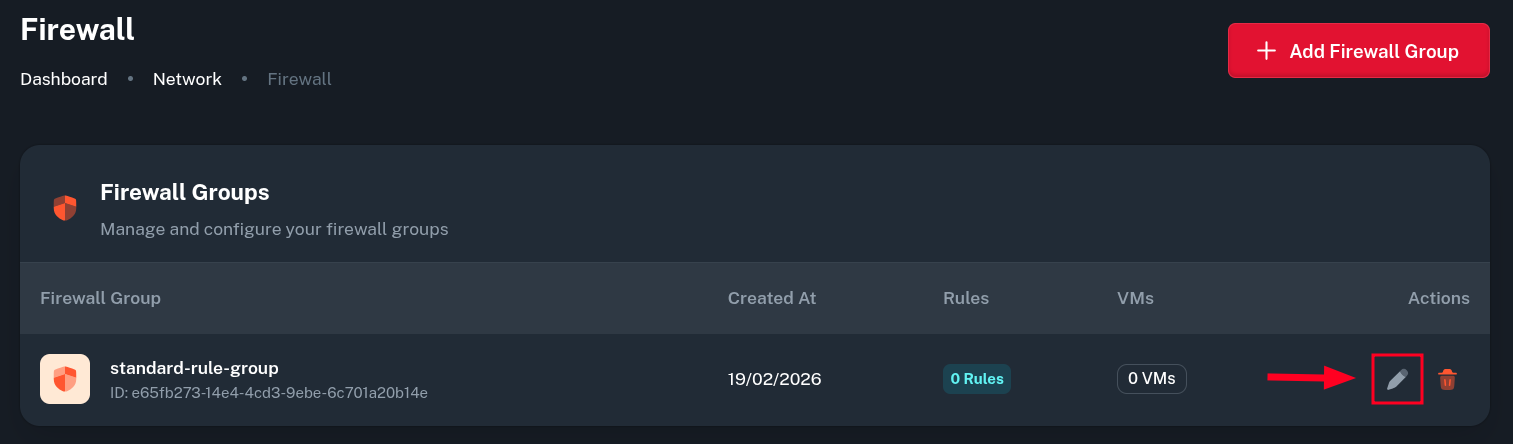
-
Select a protocol or application, destination ports and source IP range to allow access from. After that click Save button on the right and the rule will be added to the list.
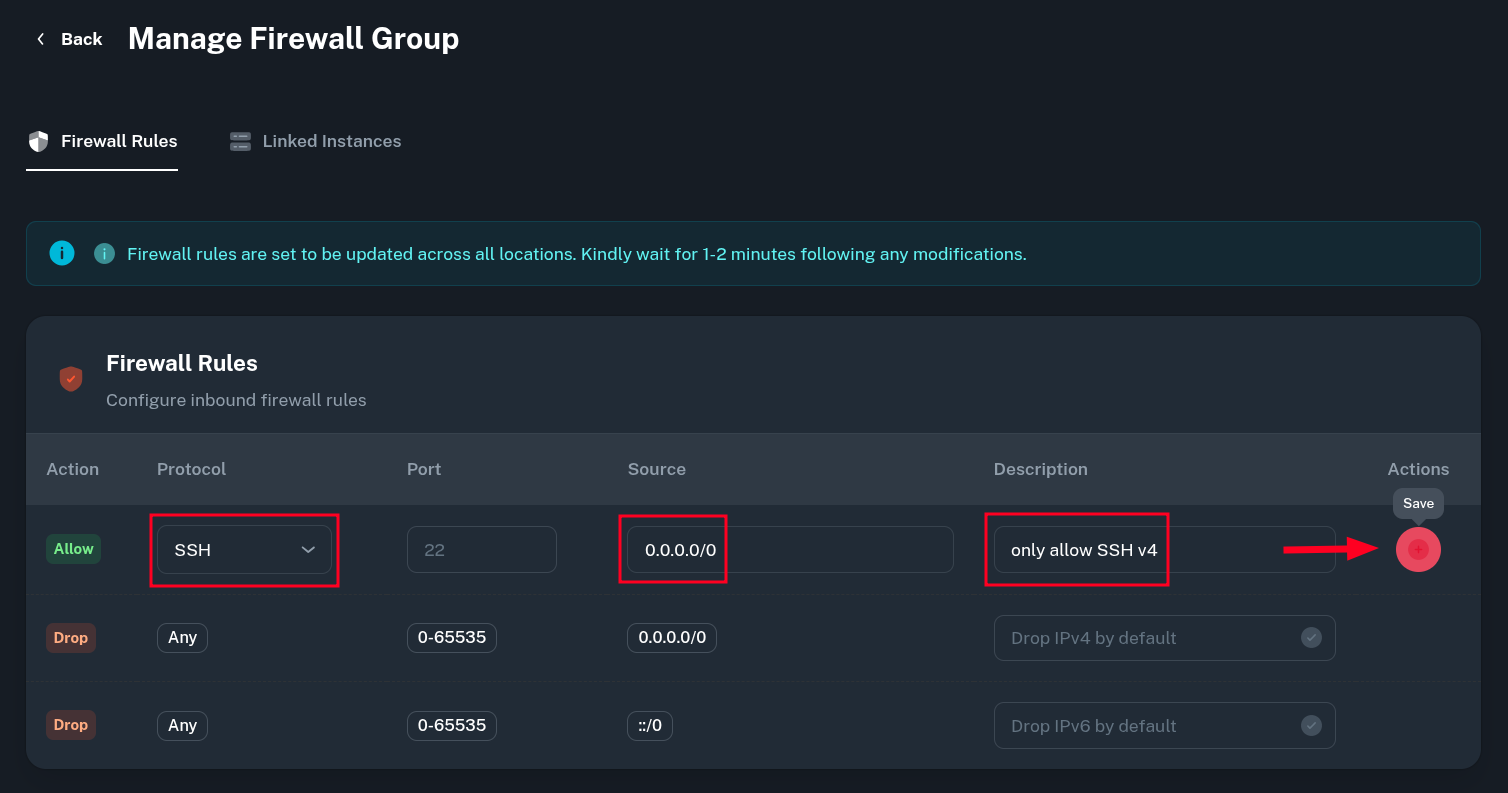 The two rules at the bottom are permanent, they drop all incoming traffic. We use deny-by-default approach, user-created allow rules will take higher precedence according to how high they are on the list.
There is no distinction between IPv4 and IPv6 in firewall rules. If you want a rule to work with specific address family, just define the Source as either IPv4 or IPv6 subnet.
-
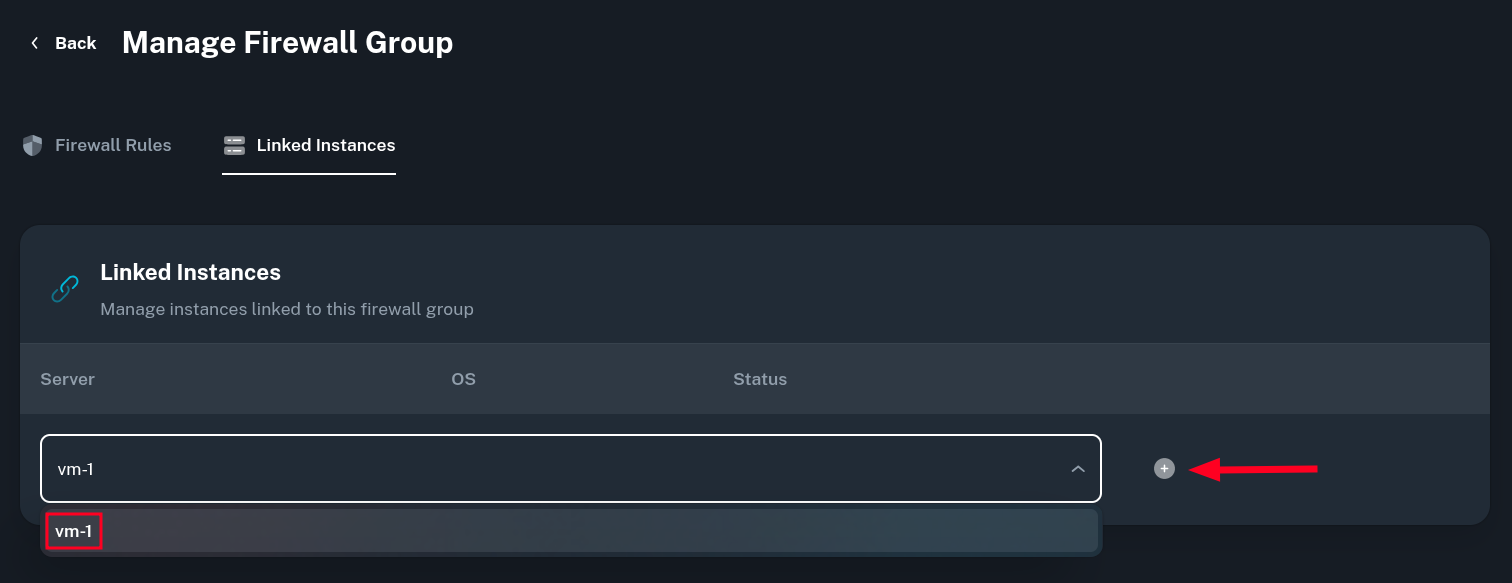
After all the rules are added, click on Linked Instances to apply Firewall Group to your VMs.
-
From there, select your VM name and click the button on the right to apply the defined rules.
-
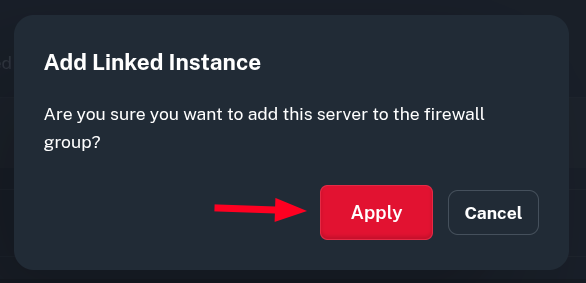
You will be asked for a confirmation of linking the set of rules to the VM instance. The VM won't reboot but it can take up to 2 minutes for the new rules to be applied.
-
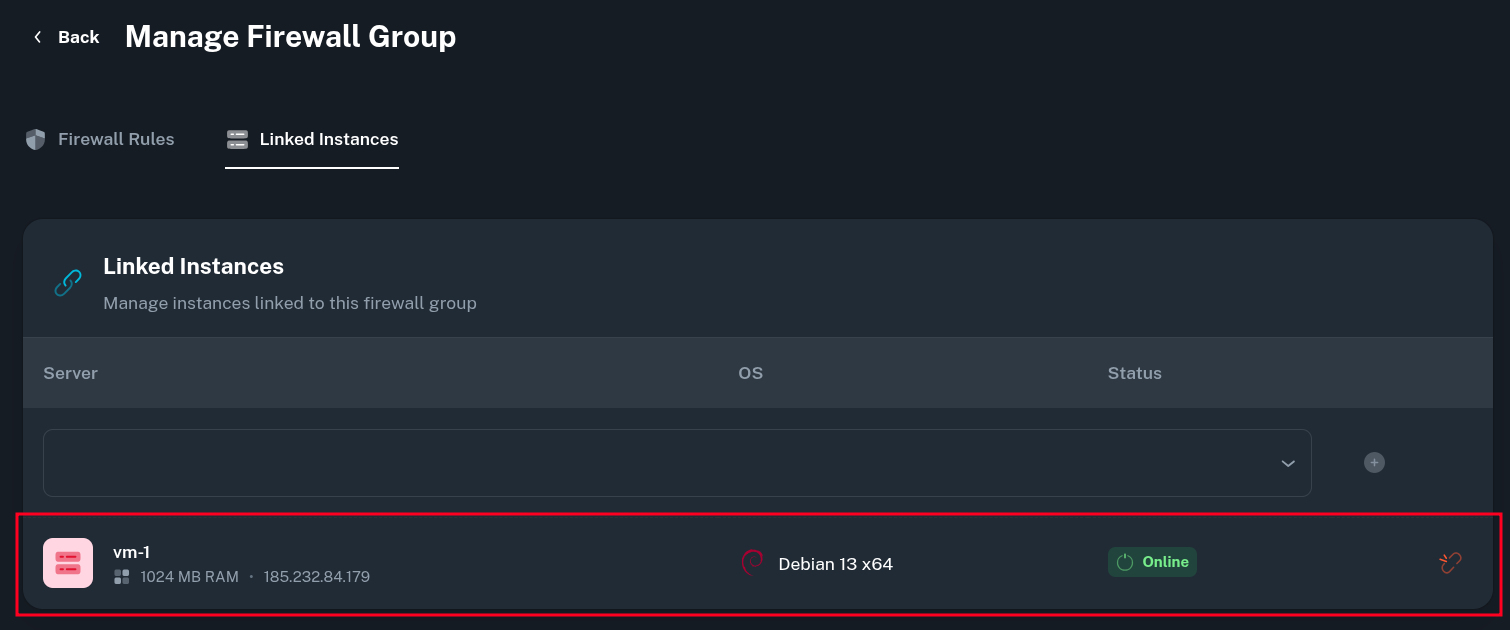
Now, the rule has been applied to selected VM. The instance should also be visible in the Linked Instances tab.
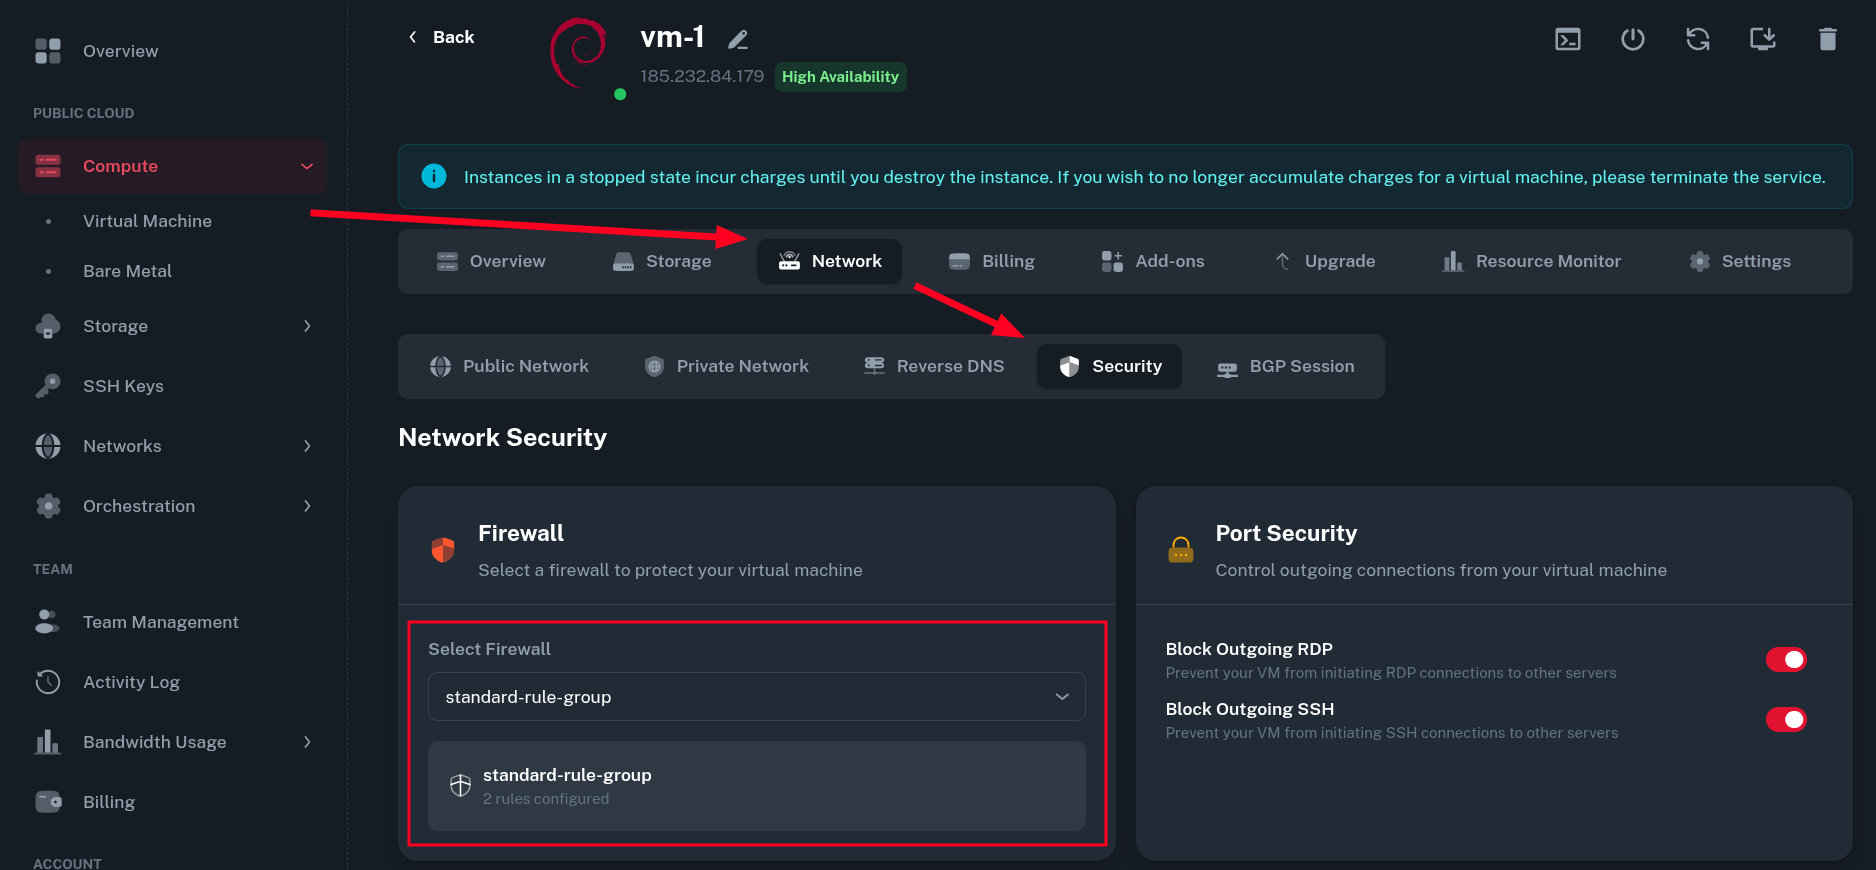
Additionally, going to Compute > Virtual Machine > (select your VM) > Network > Security should also show and let you change the rule group being used for your VM.
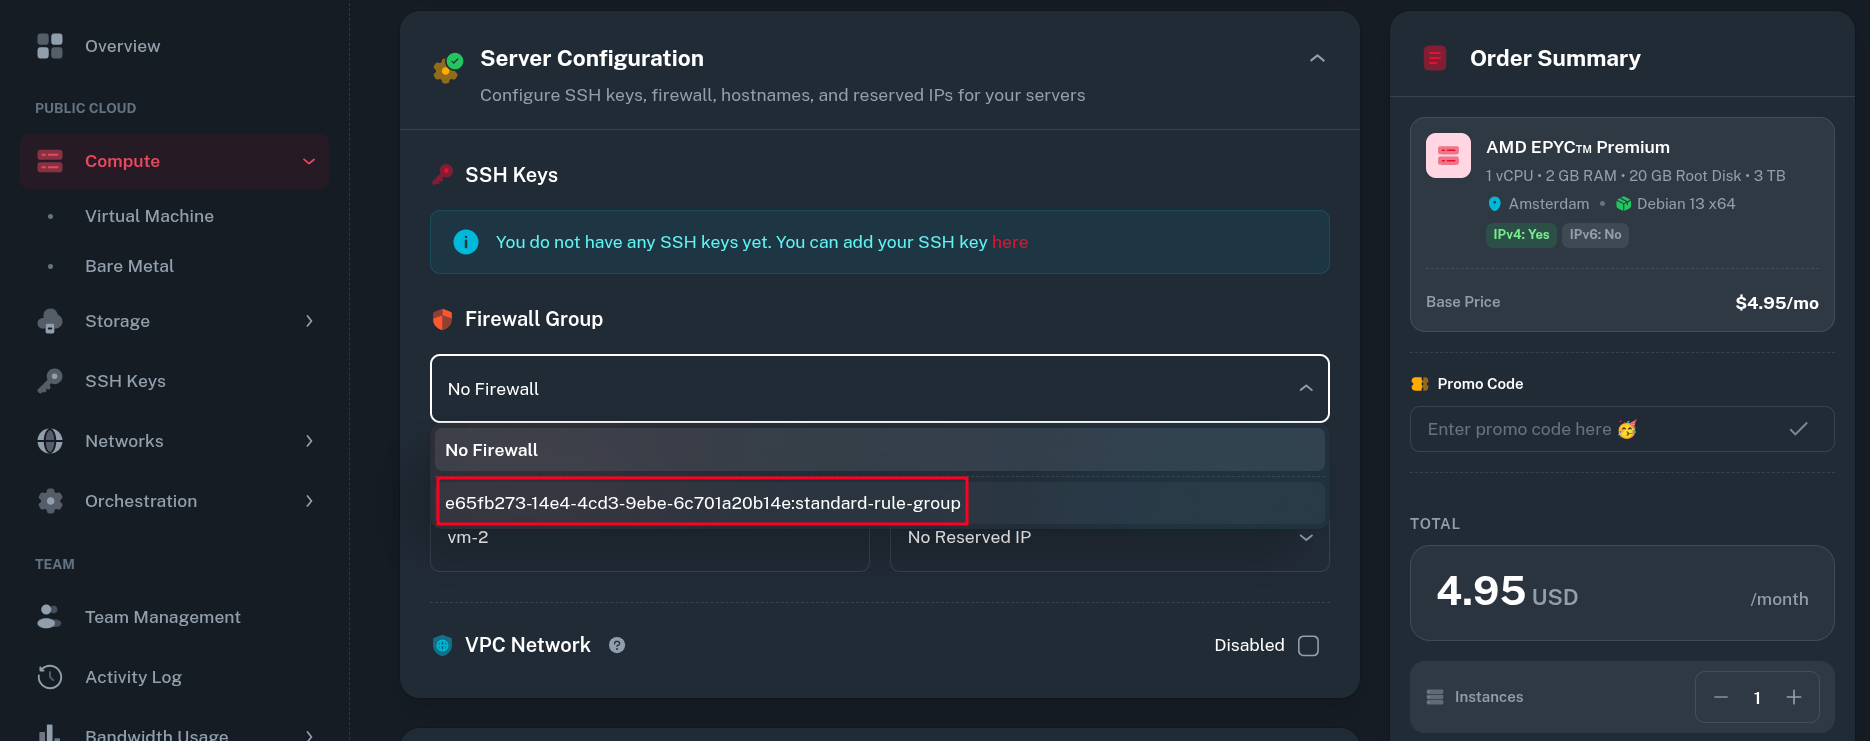
Your firewall group can now also be selected when creating a New VM in the panel.
-
The firewall group can be modified even after VMs were linked to it and the new rules will take effect on all the VMs where given rule is set.
Testing Firewall Rules
To verify the rules were applied correctly, I initially started an nginx service running on port 80 (that was not covered by inbound rules added in the group).
-
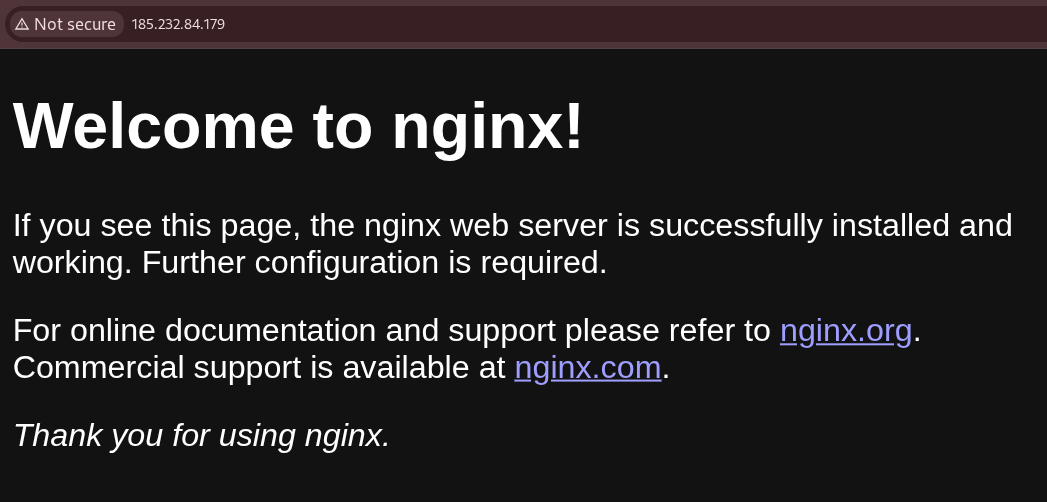
Without firewall the web service was accessible with no restrictions:
-
After adding the VM to Firewall Group, the service is firewalled off and not accessible anymore:
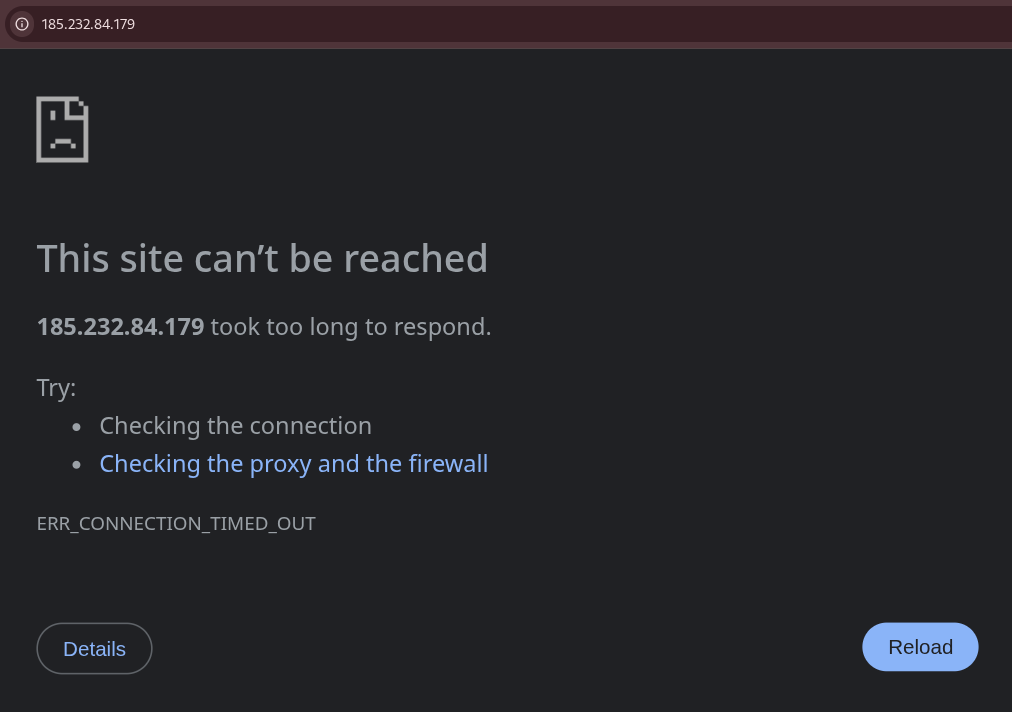
The default firewall deny policy is to DROP packets which causes timeout on filtered connections instead of rejecting them immediately.
Using IP Lists
Onidel provides a predefined set of IP Lists used for common reverse proxies, monitoring services or other known subnets which one may want to have allowed to access services on their VM.
Currently the panel has predefined IP Lists for:
-
Cloudflare (reverse proxy)
-
AWS CloudFront (reverse proxy)
-
HetrixTools (monitoring)
-
UptimeRobot (monitoring)
-
Onidel (our IP ranges)
Built-in
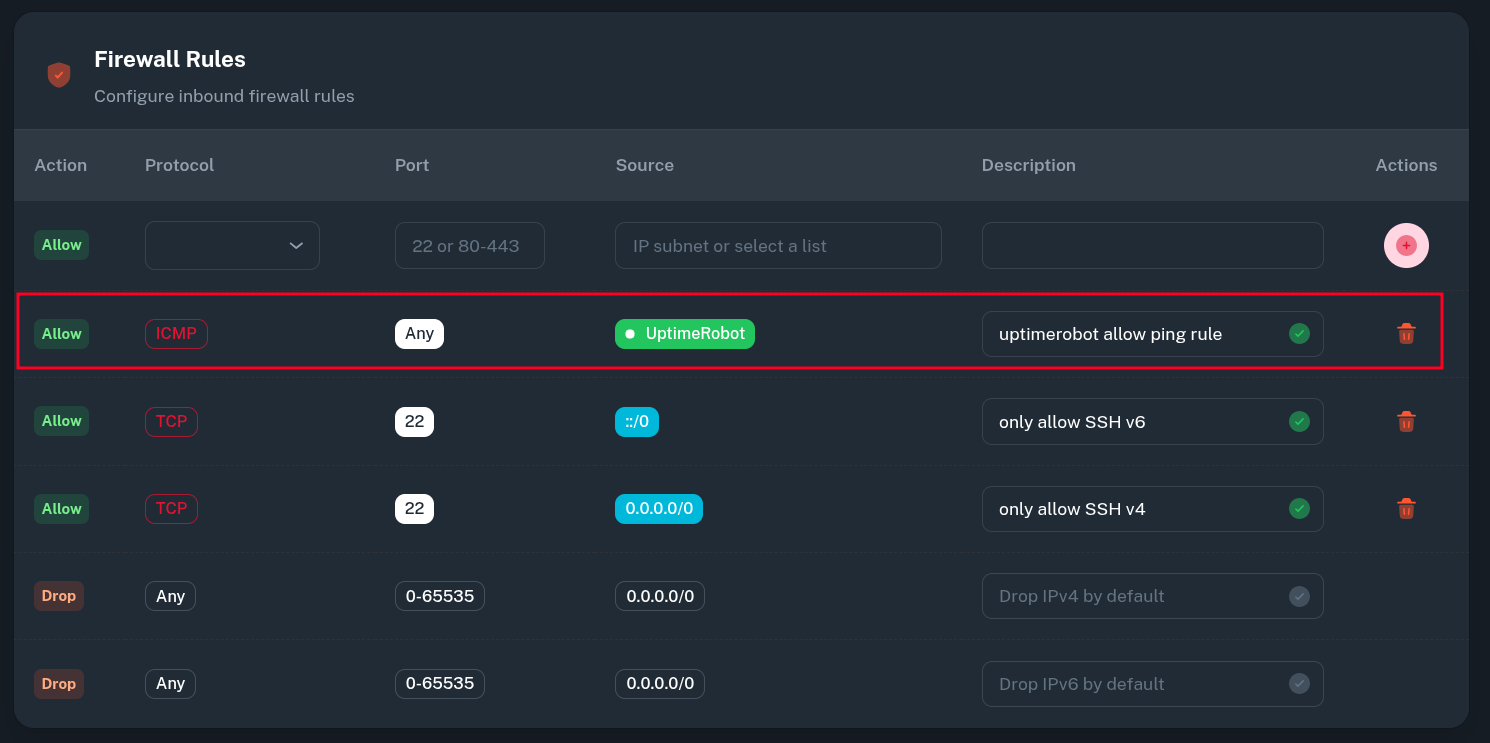
To give certain service access to your VM, go to Networks > Firewall > (Select Firewall Group) and add a new Rule selecting IP List as a Source.
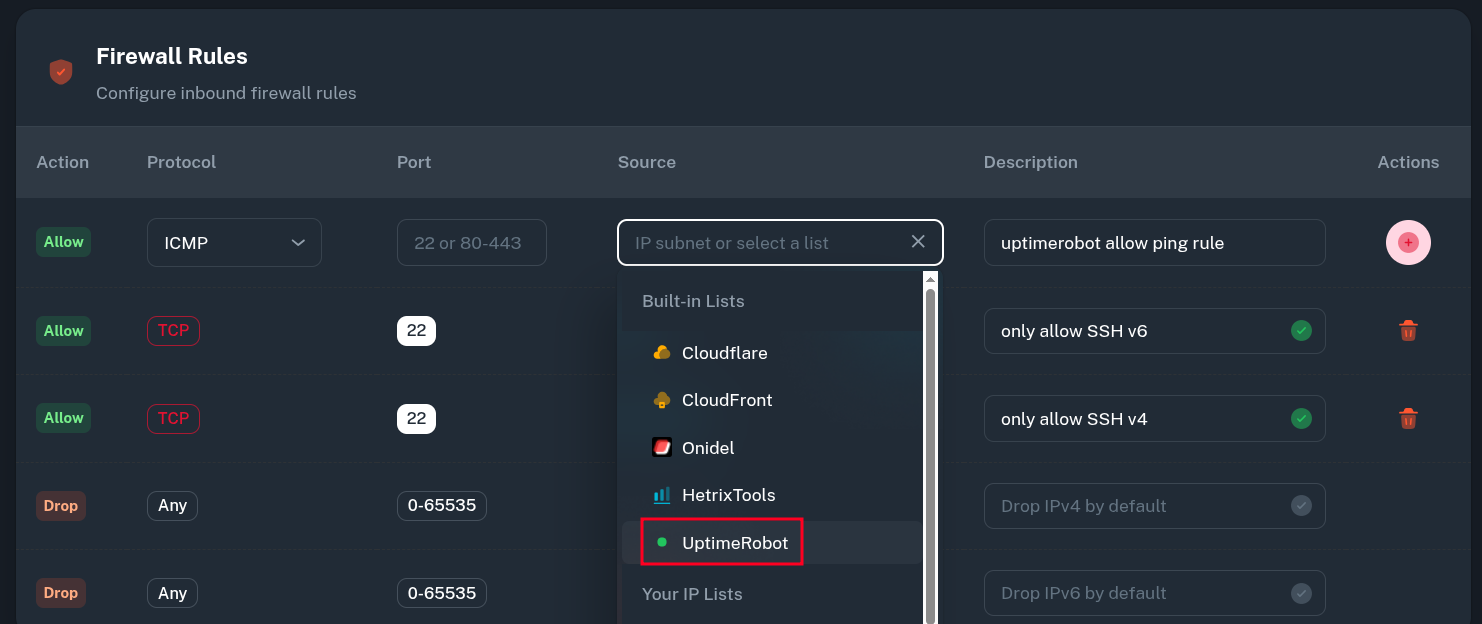 Here, we allow 3rd party UptimeRobot service to send ICMP packets to all VMs using this Firewall Group.
 The VMs do not respond to pings from the outside:
PING 104.250.118.70 (104.250.118.70) 56(84) bytes of data.

--- 104.250.118.70 ping statistics ---
4 packets transmitted, 0 received, 100% packet loss, time 3084ms
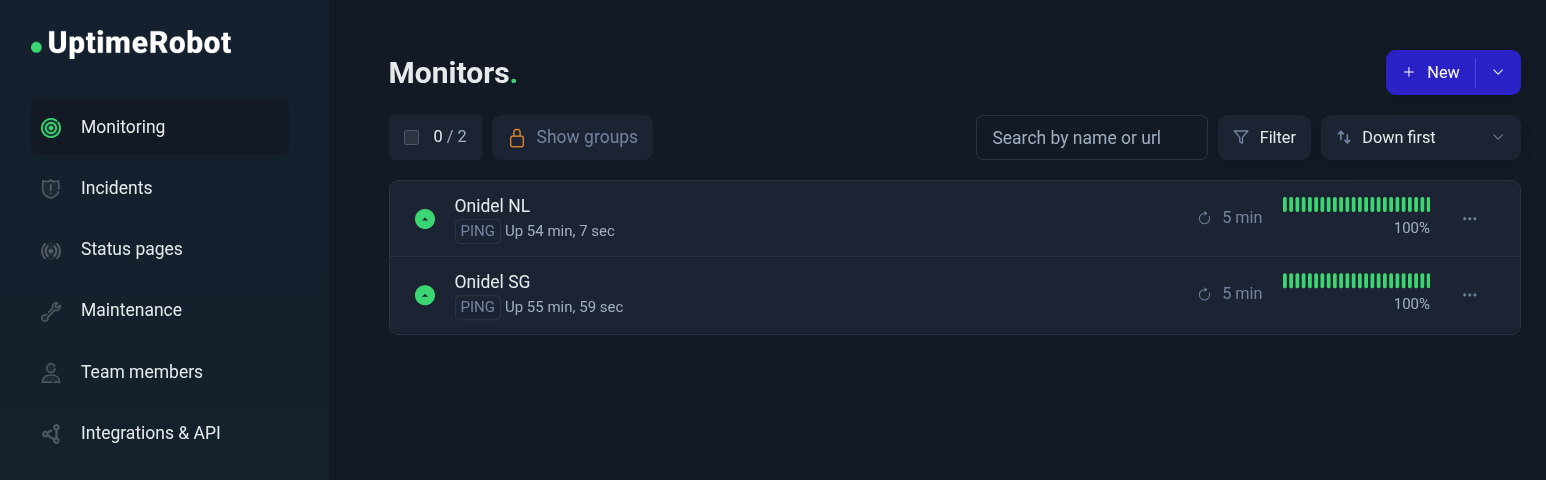
However UptimeRobot can monitor them just fine with the PING checks:
Custom
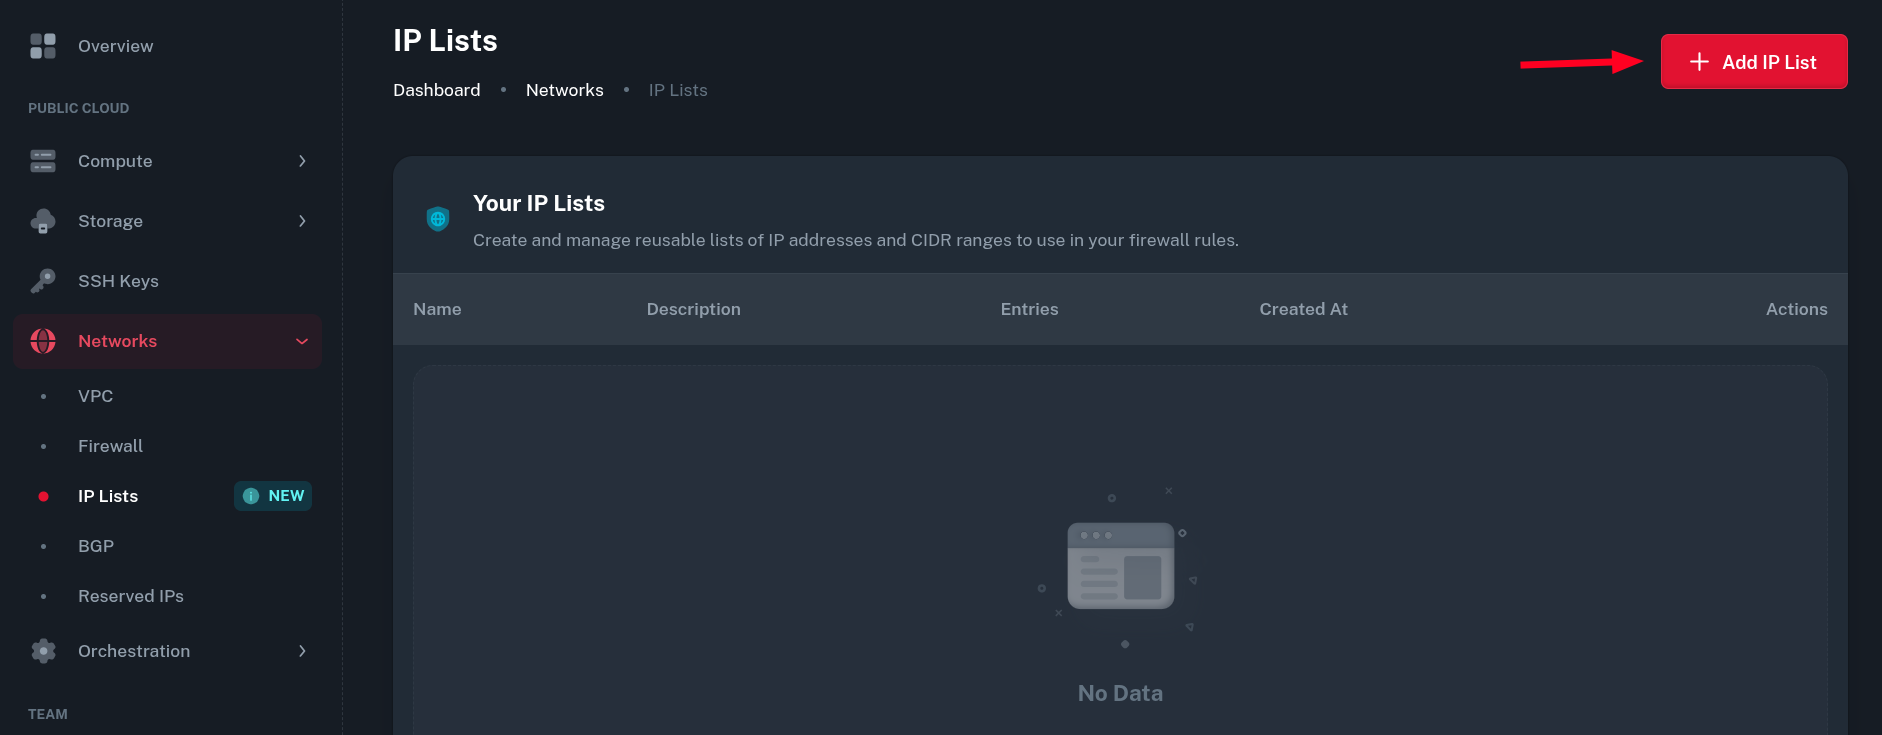
If you want to define your own list of source addresses and subnets use in Firewall rules, you can use IP Lists.
-
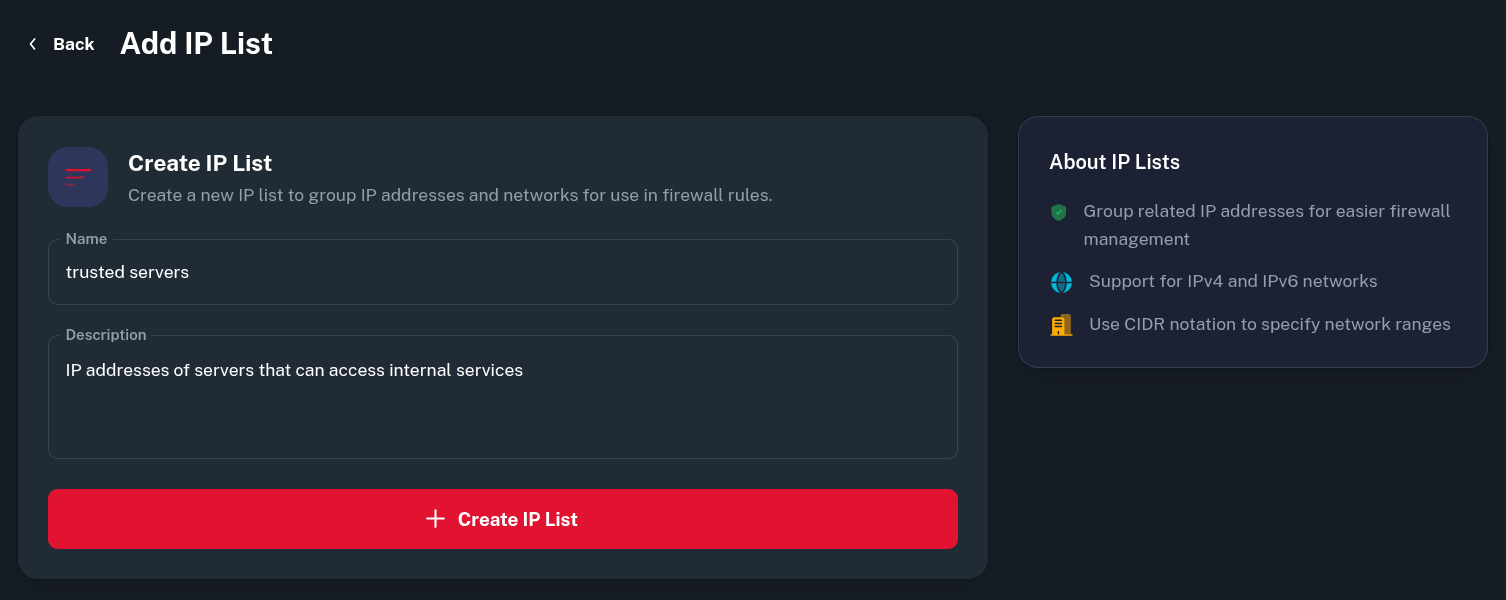
In the Onidel Dashboard, go to Network > IP Lists and create a new one by clicking on Add IP List button.
-
Create a name and description for the IP List.
-
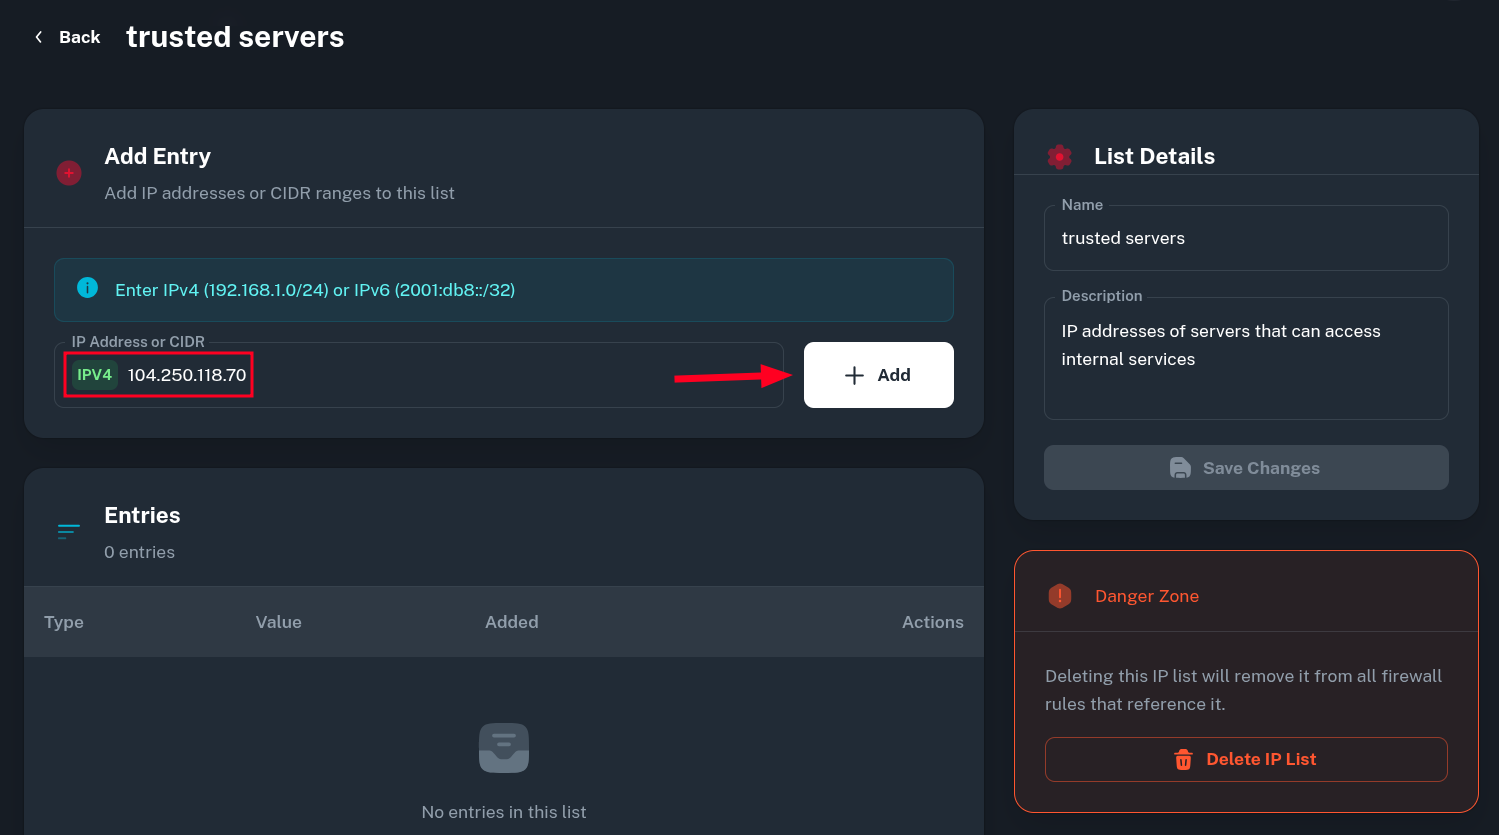
Then, you can add multiple IPv4/IPv6 addresses or subnets to the set. Just put it in the input field and click the Add button.
 *Note: you can not add an entry for subnet with
 /0zero prefix size. We use hash:net set to match addresses within subnet and such notation is not supported there. If you really need to add entire address space to IP List, you would need to split the subnet into two/1s, like explained *here. -
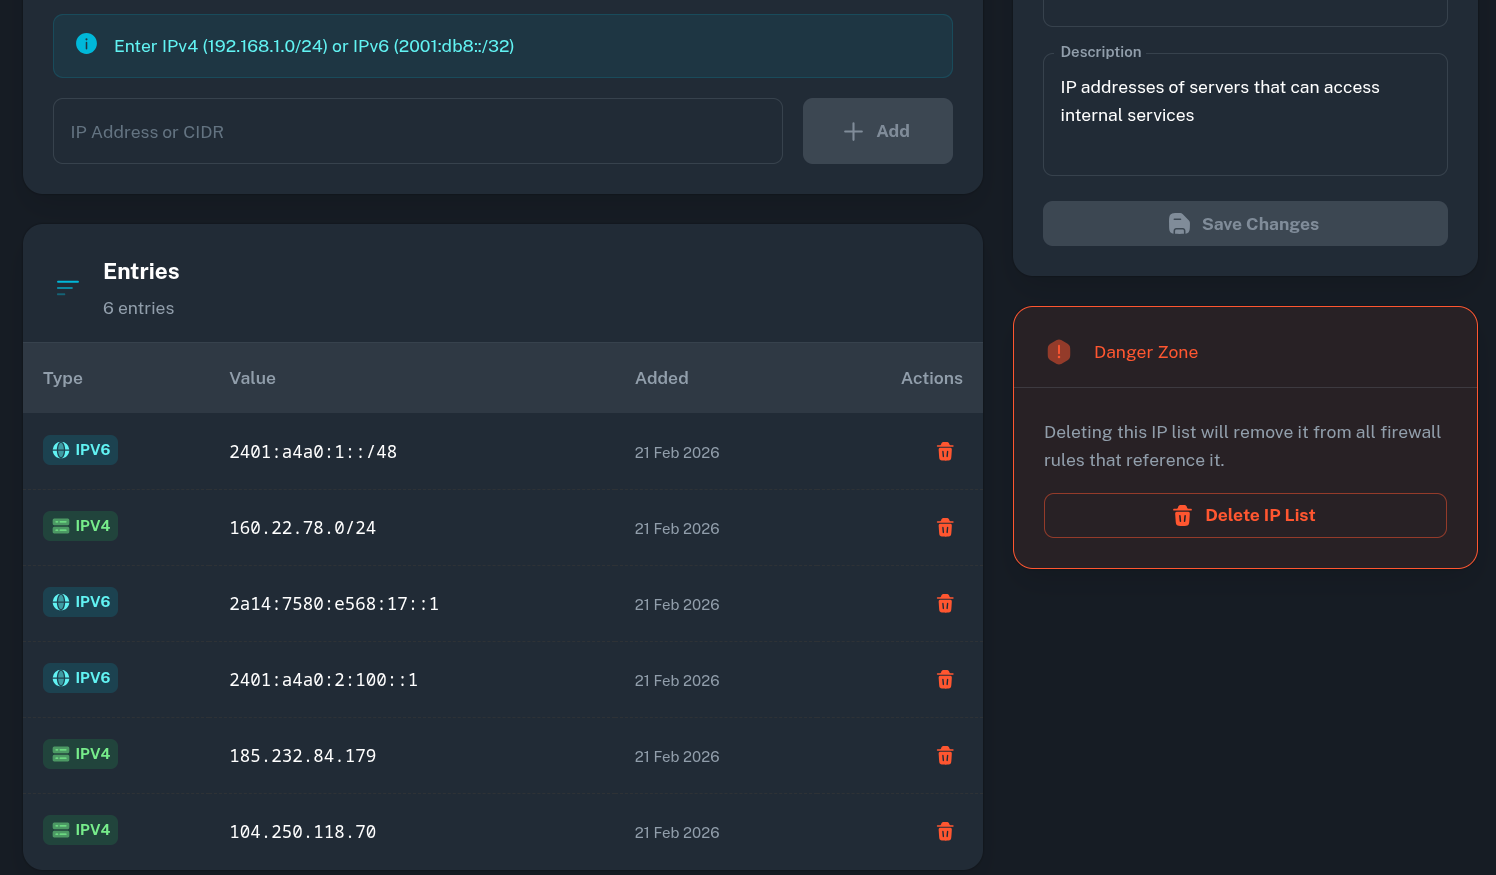
In this example, I added IP addresses of my other servers as well as some IPv4 and IPv6 ranges I consider trusted.
-
When you're done, just go back to Firewall Groups and the Firewall Group we were working with before. Then just add a new rule, selecting newly created IP List as a Source.
-
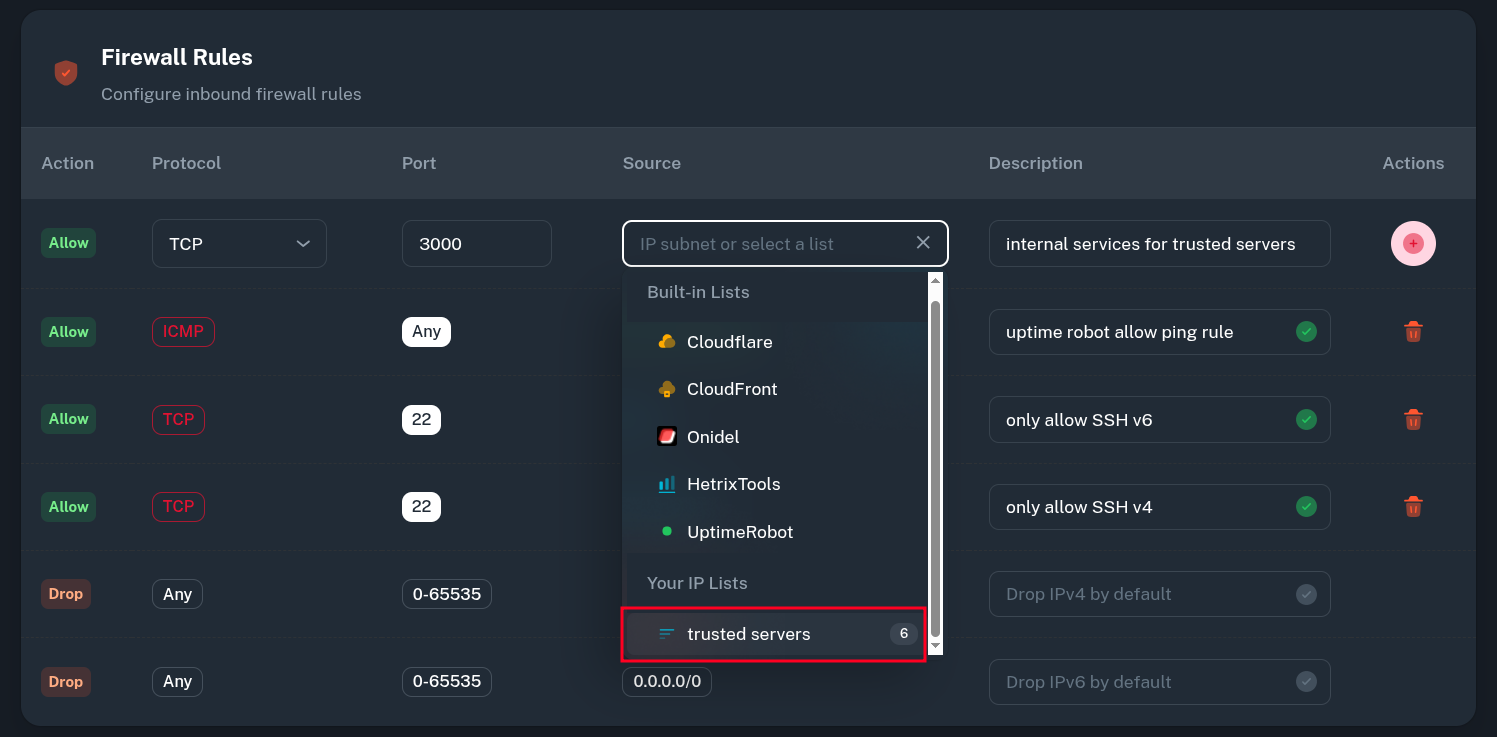 After this, only the IP addresses defined in IP List should be able to access to the restricted internal service.