Onidel Cloud supports VPC (Virtual Private Cloud) in every location. Private Networking allows Virtual Machines within one location to connect directly without reaching to the internet. This reduces the security risks by eliminating the need to expose internal services to the public.
Private Networks usually offer higher throughput when sending data between VMs and they are not accounted for the used traffic.
Creating and using Private Networks (VPCs) is completely free of charge.
Prerequisites
It is required to have at least two VMs in the same location to make meaningful use of the VPC network.
Creating a Private Network
-
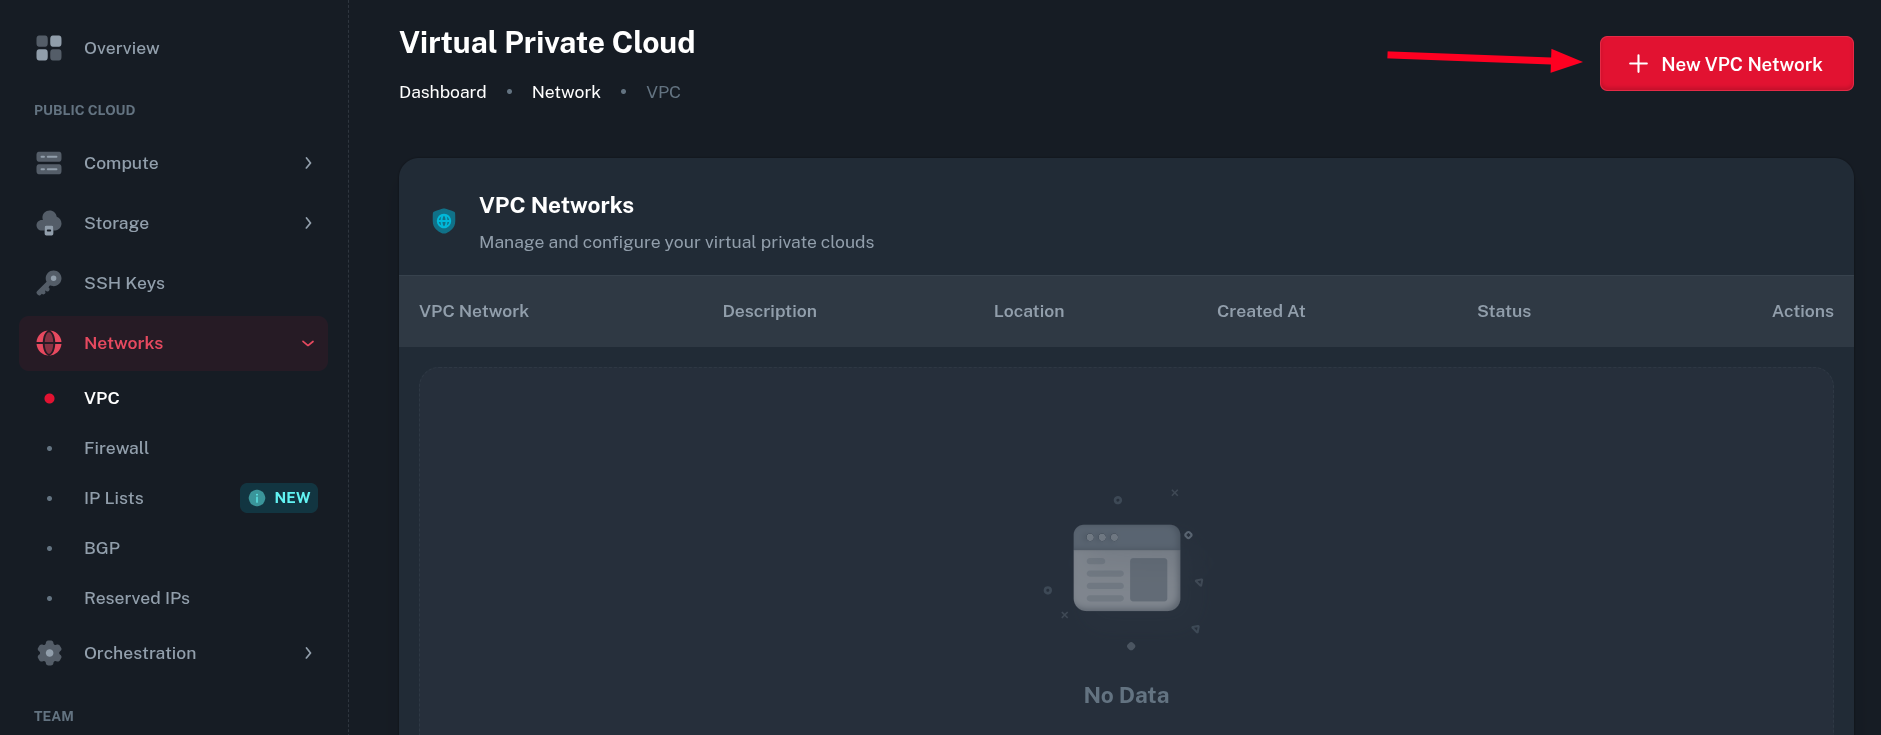
In Onidel Dashboard, go to Networks > VPC and click the New VPC Network button.
-
Then select the location you want the network to be created in. The location needs to be the same as the VMs from the Prerequisites section.

-
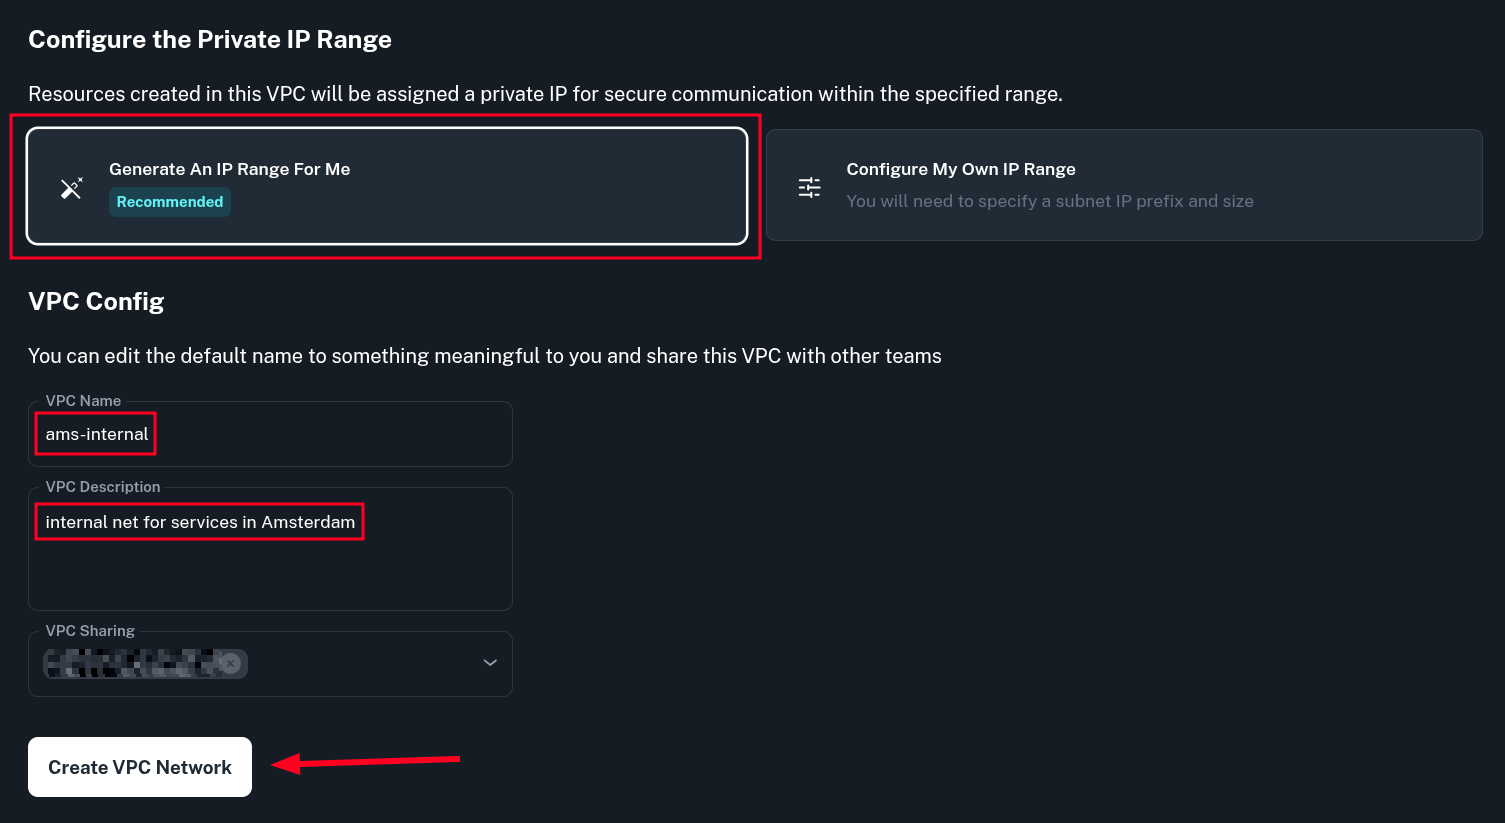
In the Private IP Range configuration, select Generate An IP Range For Me. There is also an option to Configure Your Own IP Range. Usually not needed unless you need to use a specific private address space for the internal network.
In VPC Config enter the name and description of the private network and click Create VPC Network.
-
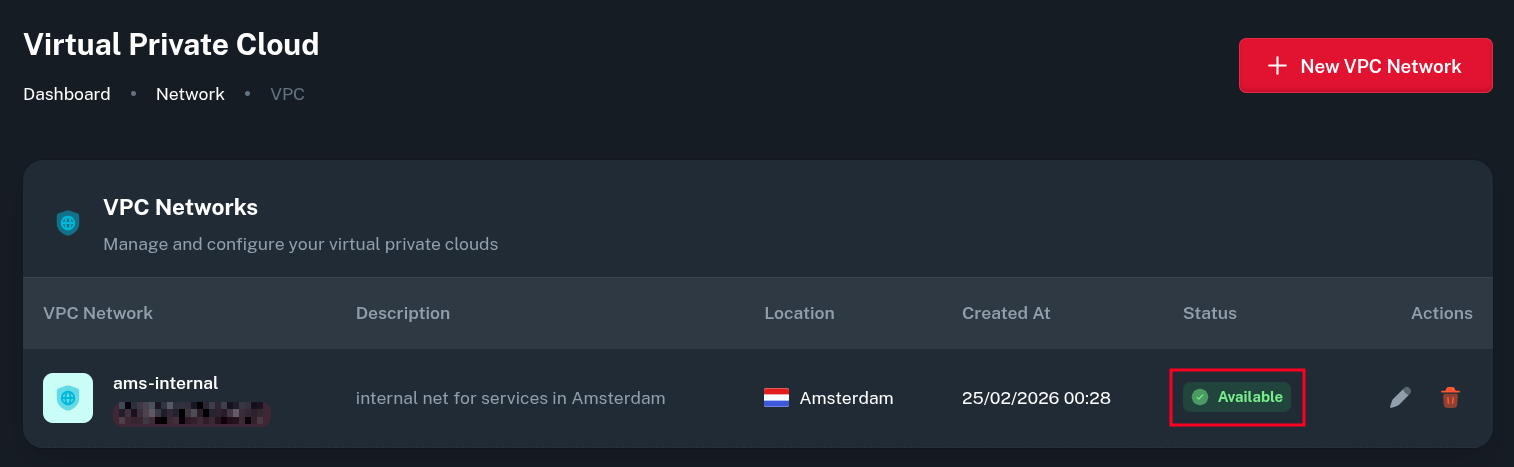
After that, the VPC Network will be created. You may need to wait up to 5 minutes for it to become Available.
Adding Virtual Machines to VPC
WARNING
SSH host keys of your Virtual Machine may be regenerated after joining a new Private Network. This is because adding a new network interface changes the instance-id value which cloudinit uses to track instance metadata changes.
You may get warning about the change of keys on the host when trying to SSH into VM after adding it to VPC:
@@@@@@@@@@@@@@@@@@@@@@@@@@@@@@@@@@@@@@@@@@@@@@@@@@@@@@@@@@@
@    WARNING: REMOTE HOST IDENTIFICATION HAS CHANGED!     @
@@@@@@@@@@@@@@@@@@@@@@@@@@@@@@@@@@@@@@@@@@@@@@@@@@@@@@@@@@@
IT IS POSSIBLE THAT SOMEONE IS DOING SOMETHING NASTY!
Someone could be eavesdropping on you right now (man-in-the-middle attack)!
It is also possible that a host key has just been changed.
To prevent this behavior you need to create a file inside /etc/cloud/cloud.cfg.d/ directory inside the VM before proceeding with later steps:
$ echo 'ssh_deletekeys: false' > /etc/cloud/cloud.cfg.d/99-keep-ssh-keys.cfg
-
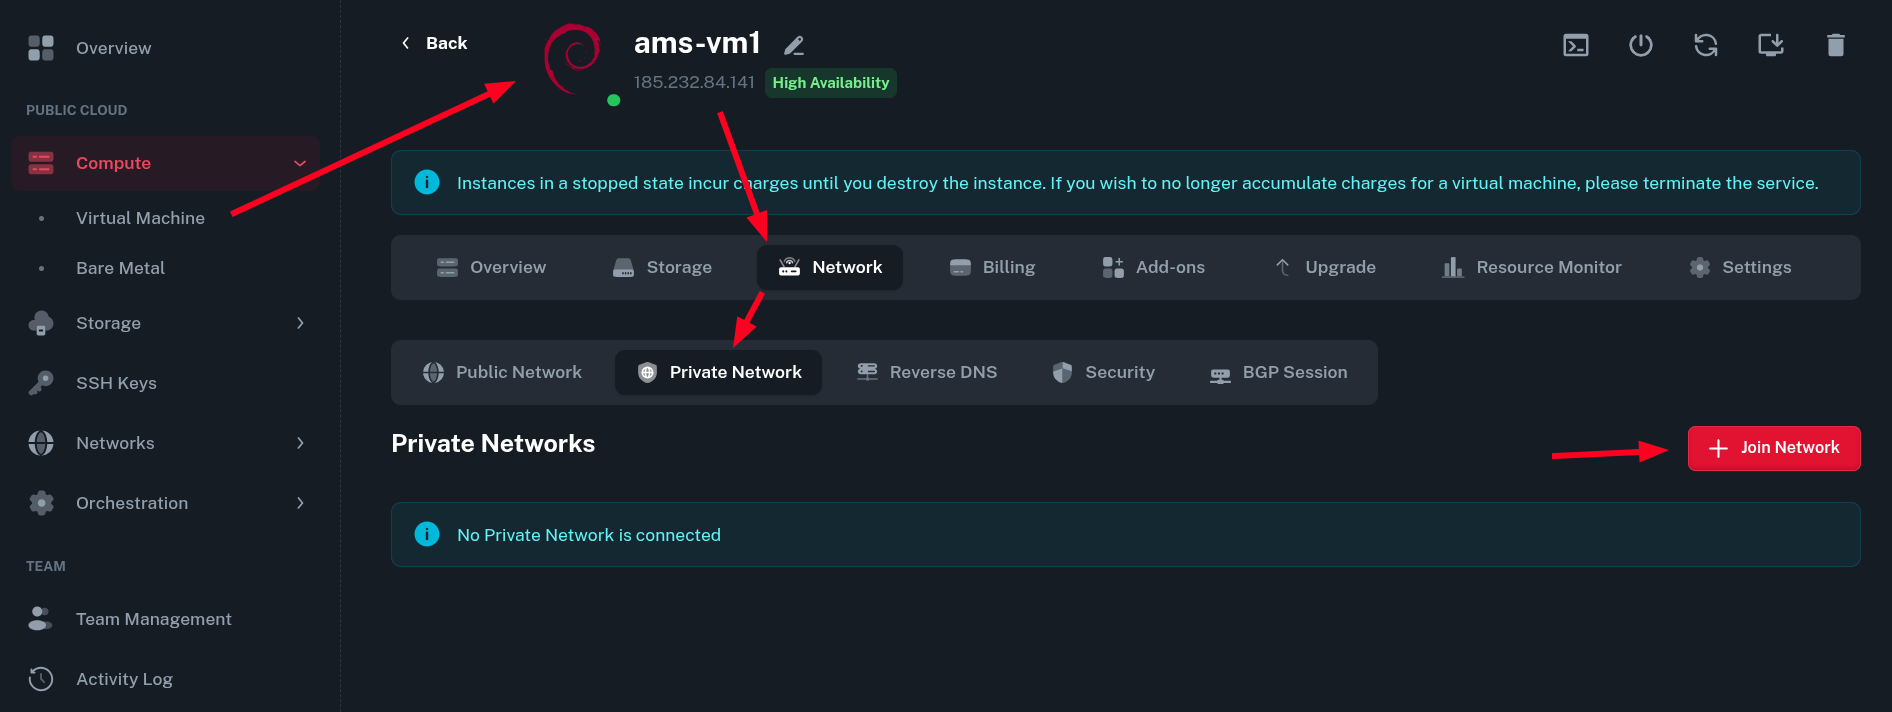
Going to Compute > Virtual Machine > (select your VM) > Network > Private Network, you can add a VM to newly created private network by clicking the Join Network button.
-
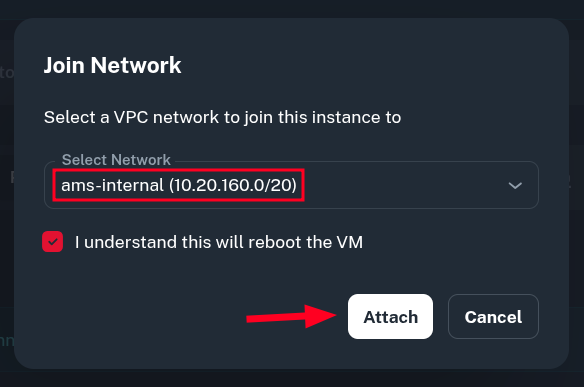
You will be asked to select the VPC from the list and then to confirm joining the network. The VM will be rebooted to apply changes.
-
Once the VM joins network successfully, you will see your VPC listed in Private Networks tab.

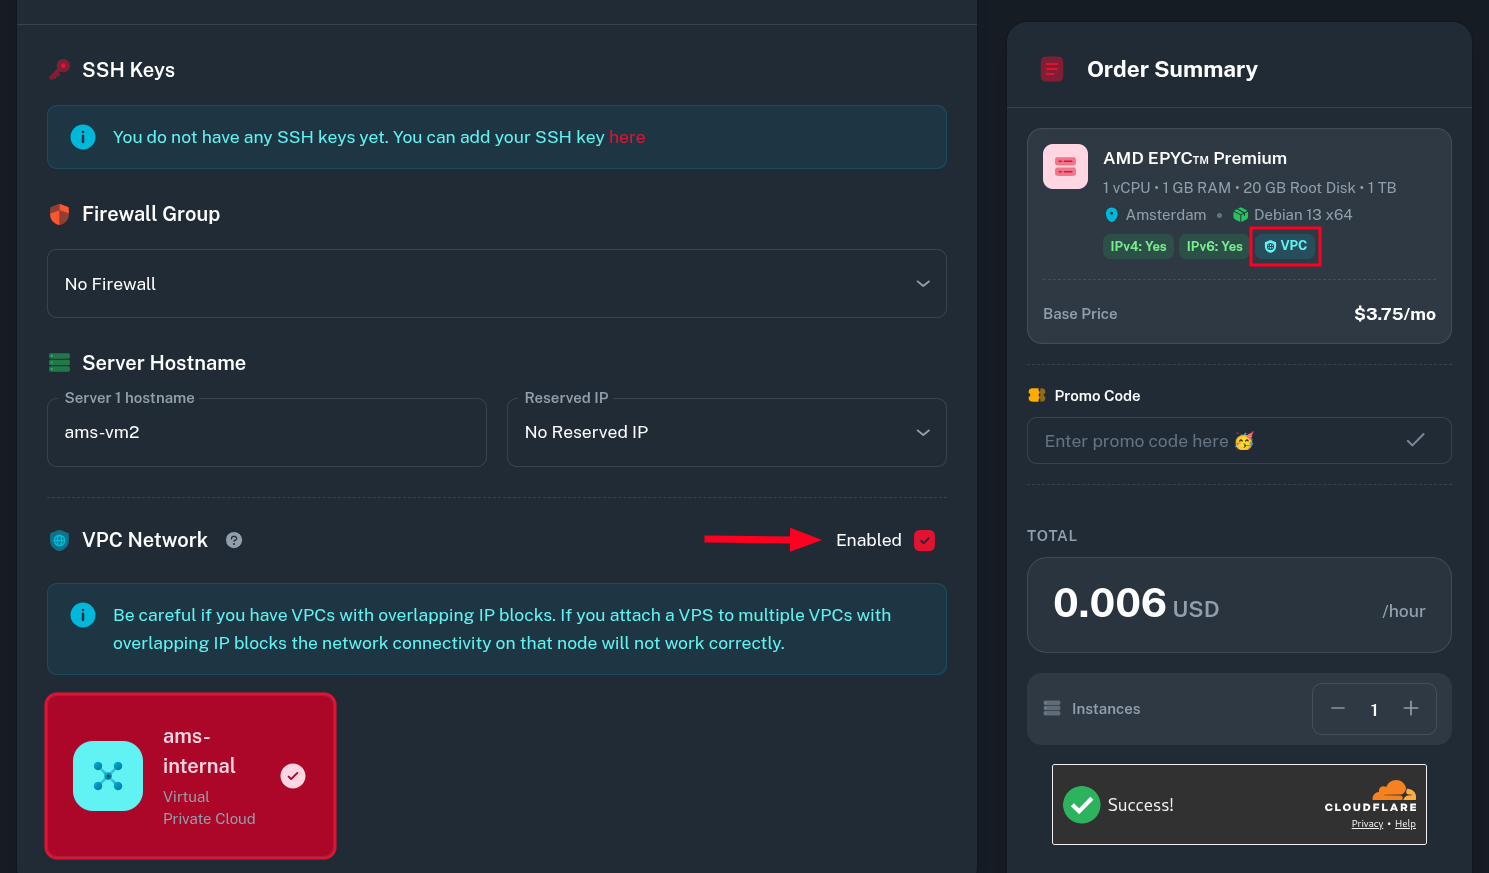
Assigning a VPC during VM creation
When creating a new Virtual Machine instance, there is an option to enable VPC Network and select one for VM to be in.
Using the VPC
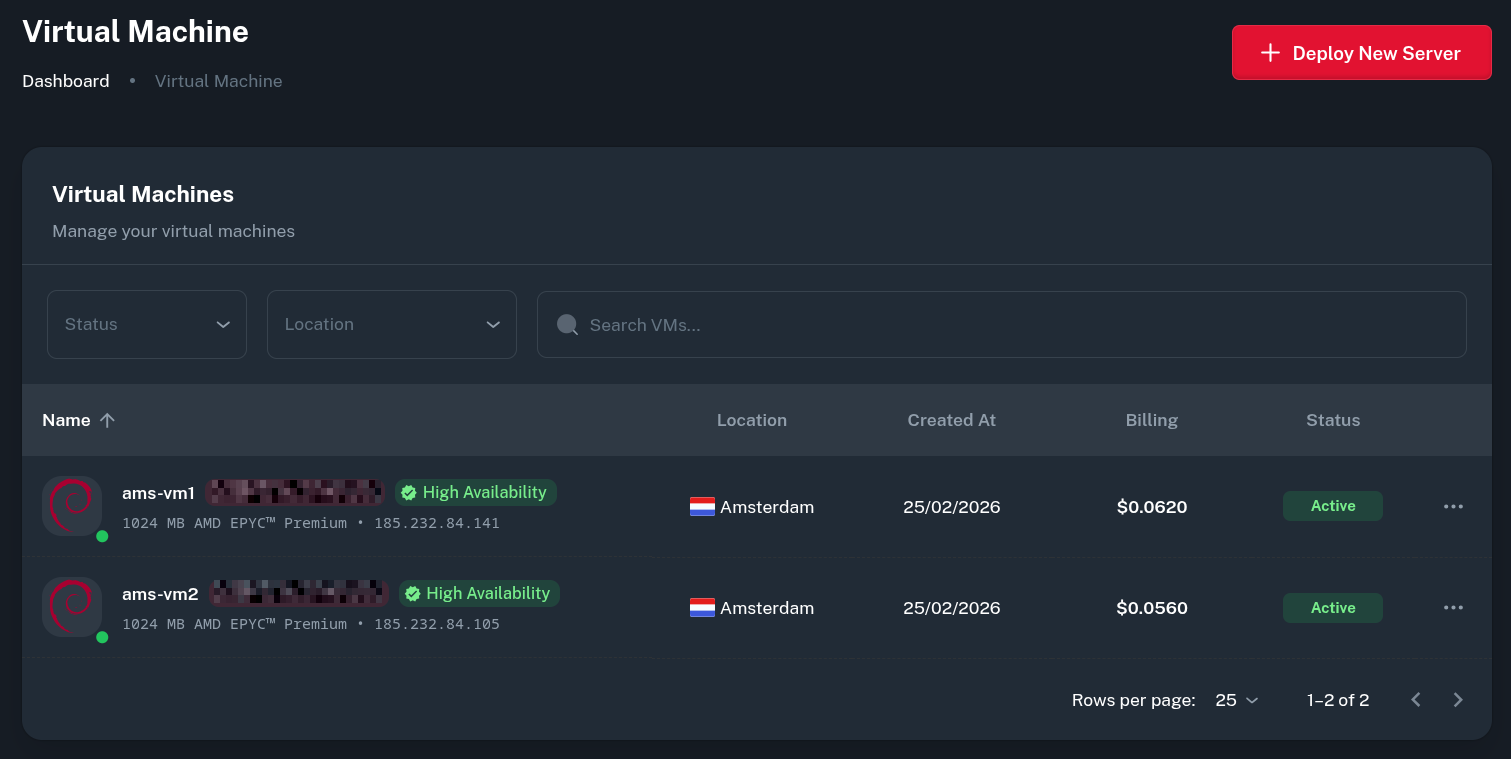
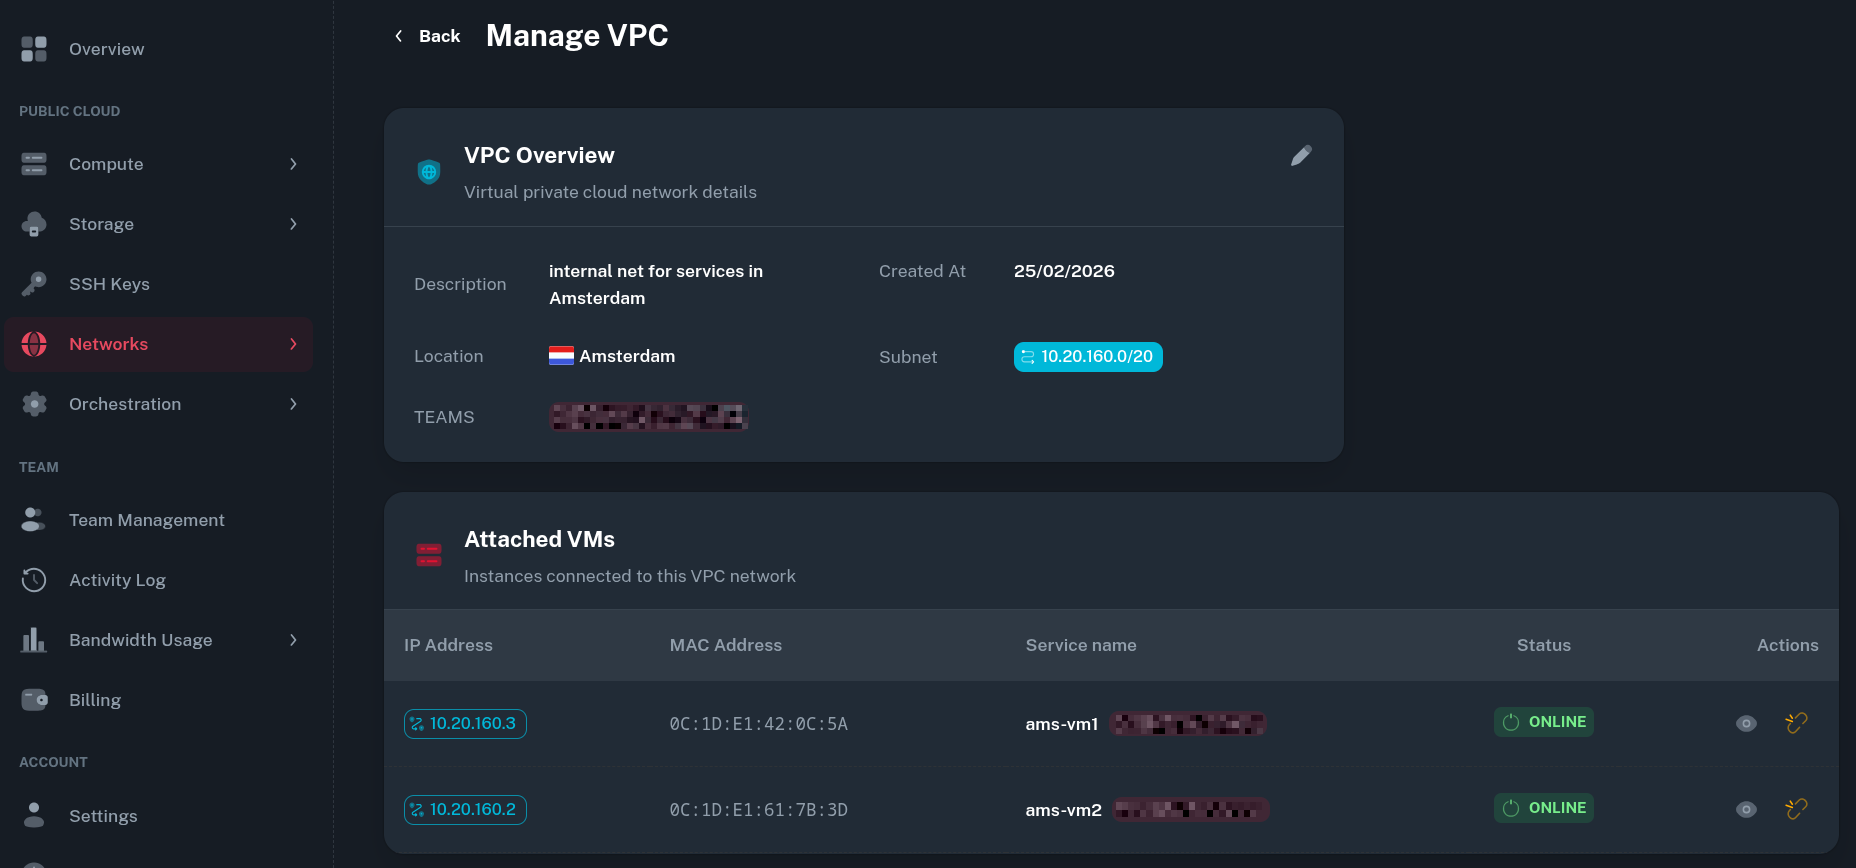
In this example setup, we have added 2 VMs in Amsterdam to the Private Network. You can see both of the VMs being listed in the VPC tab by going to Networks > VPC > (your VPC).
-
After logging into the VM you should see an additional interface with a private IPv4 address associated with it.
$ ip a
...
3: ens19: <BROADCAST,MULTICAST,UP,LOWER_UP> mtu 1450 qdisc fq_codel state UP group default qlen 1000
    link/ether 0c:1d:e1:42:0c:5a brd ff:ff:ff:ff:ff:ff
    altname enp6s19
    altname enx0c1de1420c5a
    inet 10.20.160.3/20 brd 10.20.175.255 scope global ens19
       valid_lft forever preferred_lft forever
    inet6 fe80::e1d:e1ff:fe42:c5a/64 scope link proto kernel_ll
       valid_lft forever preferred_lft forever
Since we use VXLANs as the transport protocol for VPC Networks, the MTU of this interface must be set to 1450 bytes.
-
You should also be able to ping the other VM via its private address.
$ ping -c4 10.20.160.2 PING 10.20.160.2 (10.20.160.2) 56(84) bytes of data. 64 bytes from 10.20.160.2: icmp_seq=1 ttl=64 time=0.399 ms 64 bytes from 10.20.160.2: icmp_seq=2 ttl=64 time=0.352 ms 64 bytes from 10.20.160.2: icmp_seq=3 ttl=64 time=0.406 ms 64 bytes from 10.20.160.2: icmp_seq=4 ttl=64 time=0.404 ms --- 10.20.160.2 ping statistics --- 4 packets transmitted, 4 received, 0% packet loss, time 3069ms rtt min/avg/max/mdev = 0.352/0.390/0.406/0.022 ms -
From there, you can communicate between VMs using the VPC interface.
Additional notes
Bandwidth and Traffic Accounting
I have used iperf3 utility to test the throughput between two VMs on via the private network. It was roughly 3Gbps (which is 3x the faster than the public interface).
$ iperf3 -c 10.20.160.2 -t 120
Connecting to host 10.20.160.2, port 5201
[  5] local 10.20.160.3 port 60338 connected to 10.20.160.2 port 5201
[ ID] Interval           Transfer     Bitrate         Retr  Cwnd
[  5]   0.00-1.00   sec   363 MBytes  3.04 Gbits/sec    0   1.63 MBytes
[  5]   1.00-2.00   sec   359 MBytes  3.01 Gbits/sec    0   1.63 MBytes
...
[  5] 118.00-119.00 sec   364 MBytes  3.06 Gbits/sec    0   2.90 MBytes
[  5] 119.00-120.00 sec   370 MBytes  3.10 Gbits/sec  529   1.52 MBytes
- - - - - - - - - - - - - - - - - - - - - - - - -
[ ID] Interval           Transfer     Bitrate         Retr
[  5]   0.00-120.00 sec  41.9 GBytes  3.00 Gbits/sec  3438            sender
[  5]   0.00-120.00 sec  41.9 GBytes  3.00 Gbits/sec                  receiver

iperf Done.
The speed generally depends on the location and other factors of shared environment so it is not guaranteed you will get the same result.
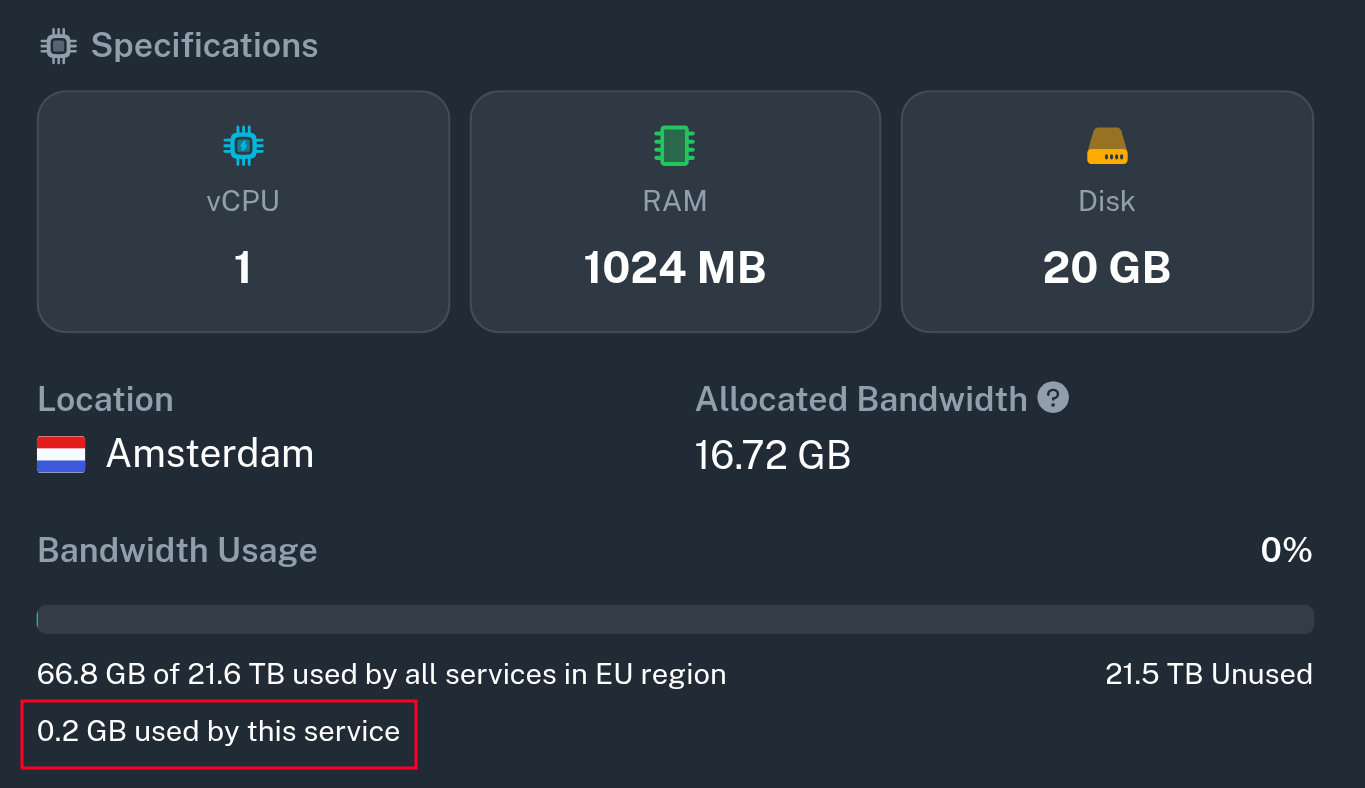
During this test, over 40 GB of transfer was used but since all packets were transmitted over the private network, the traffic usage was not accounted to the VM.