
WireGuard is a modern, fast, and secure VPN protocol.
In this tutorial, we will set up a private WireGuard VPN Server running on a Virtual Machine in Onidel Cloud. We will configure the server, enable network routing so your clients can access the internet through the VPN, and configure a client device to connect to it.
Prerequisites
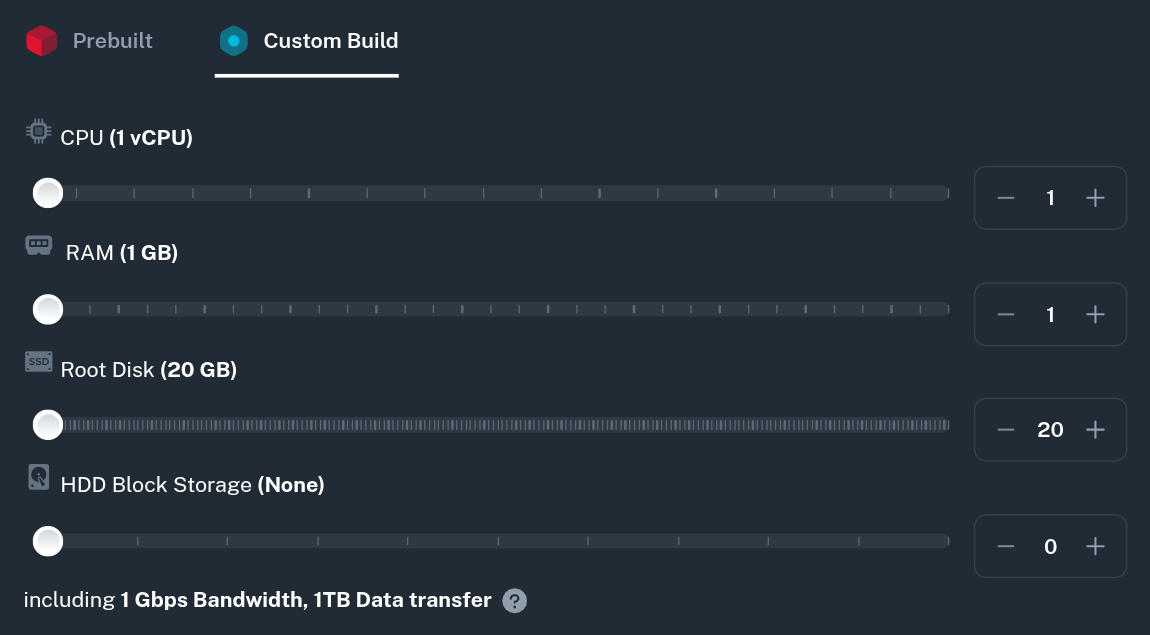
You will need a running VM with your Linux distribution of choice installed. The specs can be very modest as WireGuard will run well on basically any modern hardware.
Hardware
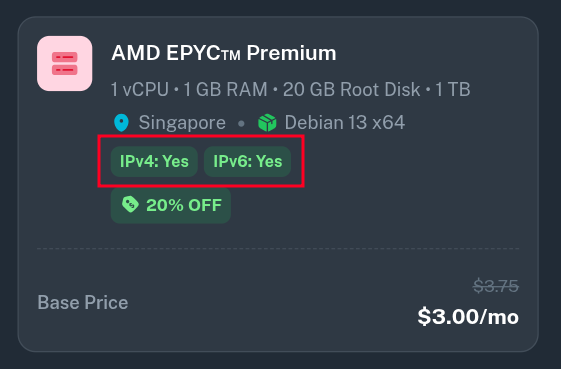
Our smallest plan with 1 vCPU, 1 GB RAM and 20 GB SSD should be more than enough to follow this tutorial.
Network and Traffic
More important factor for VPN server may be the traffic allocation - for a personal VPN however you will most likely not use more than a few hundred gigabytes per month.
If you plan to share the VPN with your family and friends, you may consider purchasing additional bandwidth or polling with another VM in the same region.
Additionally remember that if you want to host a public VPN, you must follow and enforce Onidel's Terms of Service and Acceptable Usage Policy onto the users. Thus, providing public VPN services is generally discouraged.
Connectivity
The tutorial assumes your server has both IPv4 and IPv6 connectivity. It's recommended to enable IPv6 on the VM either at purchase time or later by going to (Your VM) > Network > Public Network > Enable IPv6.
Install Dependencies
To run WireGuard, you need to install the WireGuard kernel module and the userspace tools that allow you to generate keys and manage the VPN interface. You will also need iptables to configure traffic routing.
Both of those can be installed in different ways depending on your Linux distribution of choice:
Debian/Ubuntu
$ apt update && apt upgrade
$ apt install wireguard iptables
CentOS/RHEL/Alma/Rocky
$ dnf install -y epel-release elrepo-release
$ dnf update
$ dnf install kmod-wireguard wireguard-tools iptables-services
Set up IP Forwarding
Routing internet traffic via your VPS server requires IPv4 and IPv6 to be forwarded by your OS. You can enable it by setting net.ipv4.ip_forward and net.ipv6.conf.all.forwarding parameters in sysctl.
$ nano /etc/sysctl.d/99-wireguard.conf
net.ipv4.ip_forward=1
net.ipv6.conf.all.forwarding=1
Those rules will now apply after a reboot, but you can also apply them it immediately with sysctl -p command:
$ sysctl -p /etc/sysctl.d/99-wireguard.conf
Generate server keys
WireGuard utilizes a public and private key pair for cryptography. Let's generate the keys for your server.
Navigate to the WireGuard directory and set your umask to 077 so that the generated key files are only readable by the root user:
$ cd /etc/wireguard
$ umask 077
$ wg genkey | tee server_private_key | wg pubkey > server_public_key
You can view the contents of these files using cat server_private_key and cat server_public_key. You will need them in the next step.
Create the Wireguard Interface Configuration
-
Note: While this guide assumes your primary network interface is
eth0(the default on Onidel Cloud VMs), yours might be named differently (e.g.ens3orenp6s18).Verify your interface name using the
ip acommand:$ ip a 2: eth0: <BROADCAST,MULTICAST,UP,LOWER_UP> mtu 1500 qdisc fq_codel state UP group default qlen 1000 link/ether 0c:1d:e1:cd:56:32 brd ff:ff:ff:ff:ff:ff inet 104.250.118.103/24 brd 104.250.118.255 scope global eth0 valid_lft forever preferred_lft forever ...If your interface is not
eth0, make sure to replaceeth0with your actual interface name in thePostUpandPostDownlines below.
Next, create the configuration file for the WireGuard interface (wg0):
$ nano /etc/wireguard/wg0.conf
Add the following configuration. Be sure to replace <SERVER_PRIVATE_KEY> with the contents of your server_private_key file.
[Interface]
Address = 10.8.8.1/24, fd88::1/64
ListenPort = 51820
PrivateKey = <SERVER_PRIVATE_KEY>

PostUp = iptables -A FORWARD -i %i -j ACCEPT; iptables -t nat -A POSTROUTING -o eth0 -j MASQUERADE; ip6tables -A FORWARD -i %i -j ACCEPT; ip6tables -t nat -A POSTROUTING -o eth0 -j MASQUERADE
PostDown = iptables -D FORWARD -i %i -j ACCEPT; iptables -t nat -D POSTROUTING -o eth0 -j MASQUERADE; ip6tables -D FORWARD -i %i -j ACCEPT; ip6tables -t nat -D POSTROUTING -o eth0 -j MASQUERADE
The PostUp and PostDown commands ensure that traffic from the VPN interface (wg0) is masqueraded as it leaves the server's public interface (eth0), granting internet access to connected clients.
Start the WireGuard Server
Enable the WireGuard service to start automatically on system boot, and then start it:
$ systemctl enable wg-quick@wg0
$ systemctl start wg-quick@wg0
Verify that the interface is up and running:
$ wg show
interface: wg0
  public key: SNYVqnhP7qXO7idORIxBg+gtKcEHtExWOkXGYjDmim0=
  private key: (hidden)
  listening port: 51820
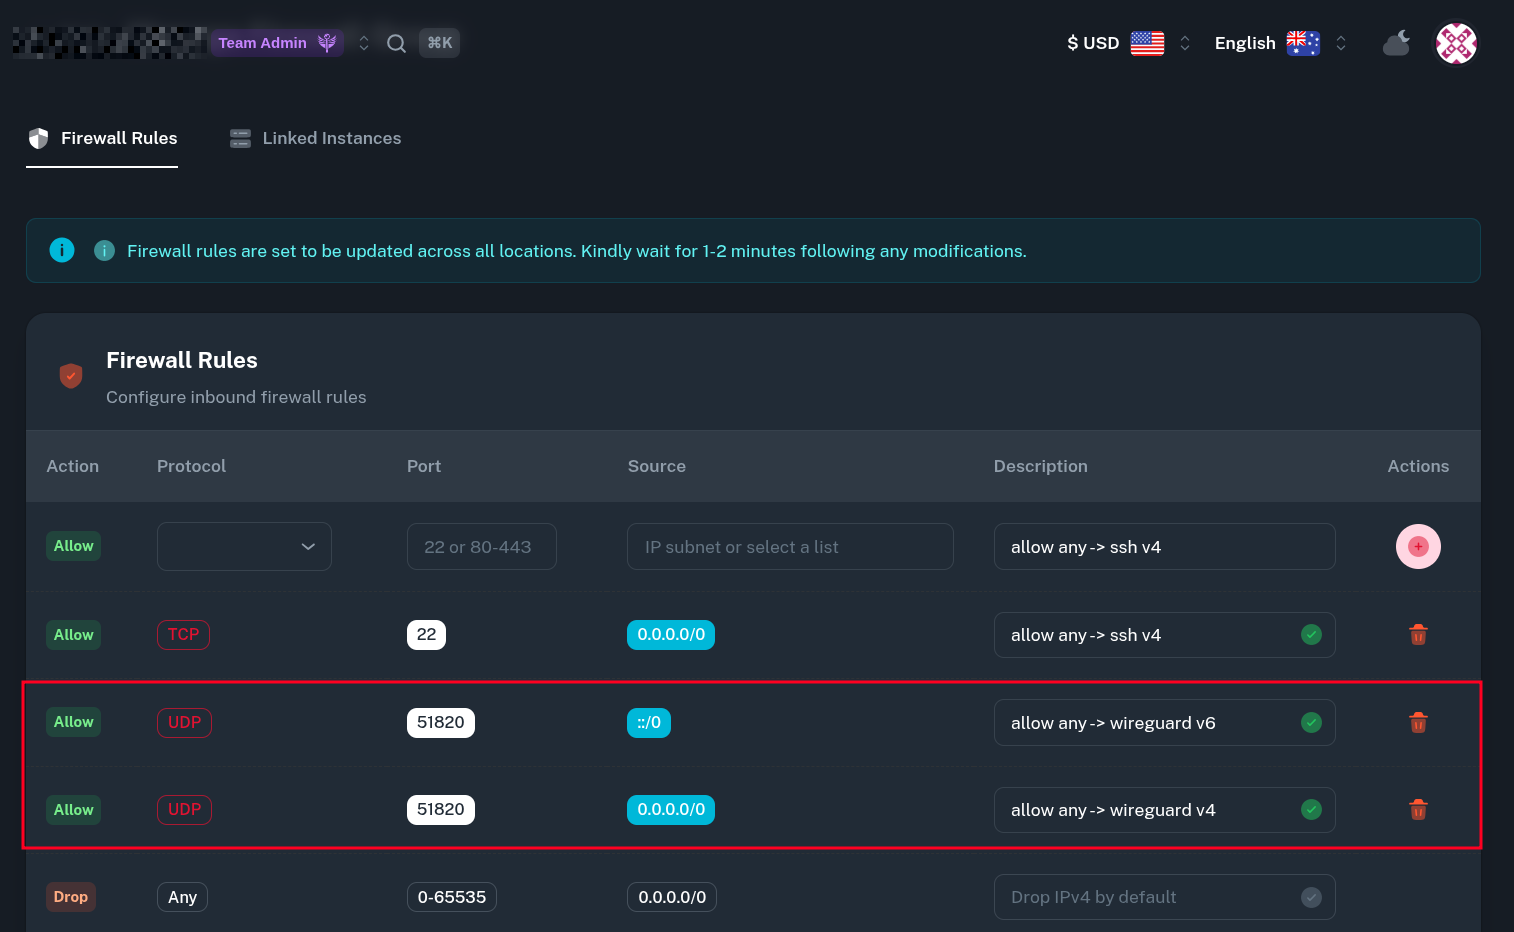
Configure the Firewall
If you want to configure Firewall for your server, remember to add a traffic rule in the Firewall Group to allow UDP connections on WireGuard ListenPort. In this example, we will add two rules - for both IPv4 and IPv6 traffic.
Add a Client
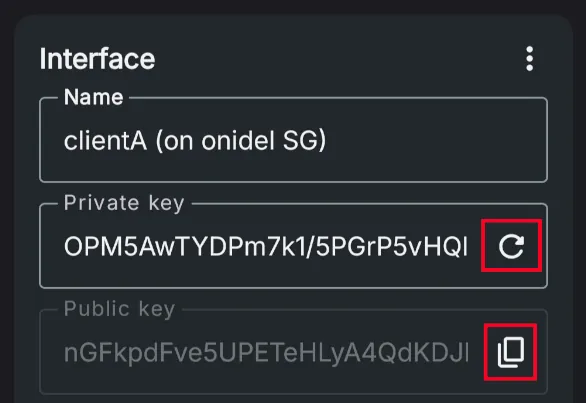
To connect a client device (like a phone or laptop), you must generate a separate key pair for it and register its public key on the server. This should ideally be done on a trusted/client device so the server does now have the private key of a client.
$ wg genkey | tee clientA_private_key | wg pubkey > clientA_public_key
You may need to install WireGuard Userspace tools on the trusted device. Some WireGuard clients also let you generate client keys right from the app.
Now, edit your server's WireGuard configuration to recognize this client:
$ nano /etc/wireguard/wg0.conf
Append the client's peer information at the bottom of the file. Replace <CLIENT_PUBLIC_KEY> with the contents of clientA_public_key (or public key generated by the app).
[Peer]
PublicKey = <CLIENT_PUBLIC_KEY>
AllowedIPs = 10.8.8.2/32, fd88::2/128
Restart the WireGuard interface to apply the changes:
$ systemctl restart wg-quick@wg0
Create the Client Configuration File
Now, construct the configuration file (client.conf) that you will import into the WireGuard app on your client device.
Replace the placeholders with your actual generated keys and your VPS's public IP address (or a domain pointing to it).
[Interface]
PrivateKey = <CLIENT_PRIVATE_KEY>
Address = 10.8.8.2/24, fd88::2/64
DNS = 9.9.9.9, 2620:fe::fe, 1.1.1.1, 2606:4700:4700::1111

[Peer]
PublicKey = <SERVER_PUBLIC_KEY>
Endpoint = <YOUR_VPS_PUBLIC_ADDRESS>:51820
AllowedIPs = 0.0.0.0/0, ::/0
Setting AllowedIPs = 0.0.0.0/0, ::/0 tells the client to route all of its internet traffic (IPv4 and IPv6) through the VPN.
Verify the Connection
Once you import client.conf into your device's WireGuard application and connect, go back to your server and run:
$ wg show
interface: wg0
  public key: SNYVqnhP7qXO7idORIxBg+gtKcEHtExWOkXGYjDmim0=
  private key: (hidden)
  listening port: 51820

peer: zH3EfBN2E+mXZHd8D4vb9pxihVWRHe+7IRtZDBaBuSs=
  endpoint: [redacted]:38445
  allowed ips: 10.8.8.2/32, fd88::2/128
  latest handshake: 6 seconds ago
  transfer: 11.95 KiB received, 27.34 KiB sent
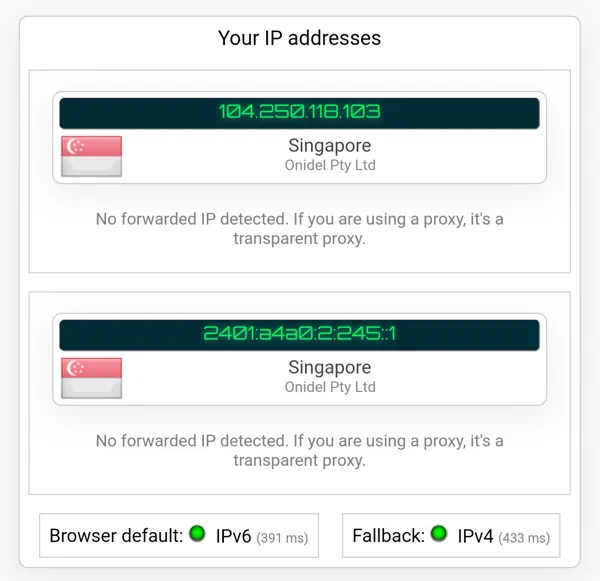
On the client you should be able to access websites with both IPv4 and IPv6:
Next Steps
Congratulations! You have successfully set up a private WireGuard VPN server on Onidel Cloud VM and connected a client securely.
Now, you can add more clients to your server assigning each of them a different internal IP address.