
To simplify Debian Installation from an ISO Image on Onidel Cloud, you may use a preseeded config.
note: this tutorial will only work for Debian Linux installed from an ISO
What is Preseed
Preseed is an automation mechanism used by the Debian Installer that allows you to answer installation prompts in advance. It eliminates most of manual steps required by the plan Debian Installer and helps build more reproducible/custom environments.
The Preseed file is a plaintext configuration that provides predefined answers to the questions normally asked during installation such as locale, keyboard layout, disk partitioning, network settings, user accounts, and package selection. These answers map directly to the installer's internal debconf database, which is the system responsible for managing configuration questions. This configuration file can be included in the ISO or loaded from an external HTTP server before the installation phase.
You can find an up-to-date list of all debconf options available for your Debian release on this dedicated page.
What is cloud-init
cloud-init is a first-boot initialization system designed to automatically configure a newly installed or provisioned machine when it starts for the first time. While preseed handles the installation phase, cloud-init operates after the system boots, applying runtime configuration to make the system immediately usable.
In our case, cloud-init will pull the configuration from Onidel Cloud and automatically configure the networking, SSH keys and root password. You may specify a Startup Script to perform one-time custom after-install configuration of your own (adding users, hardening the system, etc).
While cloud-init is not strictly required when installing an OS manually, it helps a lot with initial system configuration. You can also choose to configure everything yourself with using preseed options or post-installation scripts, however this is outside of scope of this tutorial.
Example Preseed File
Below is an example preseed configuration file. It will stop at the disk partitioning step and ask you to configure disk layout yourself, from there you may choose to perform an installation with LUKS encrypted partition. It is provided as a base and assumes cloud-init will do post-install steps on first boot. Feel free to change and tweak this configuration to your liking.
# Preseed file to install Debian from ISO on Onidel Cloud
# Verified to work on Debian 13.4

# keyboard and locale settings
d-i debian-installer/locale string en_US.UTF-8
d-i keyboard-configuration/xkb-keymap select us

# ipv4 network configuration using DHCP on default interface
d-i netcfg/disable_autoconfig boolean false
d-i netcfg/choose_interface select auto

# choosing default worldwide mirror
d-i mirror/country string manual
d-i mirror/http/hostname string deb.debian.org
d-i mirror/http/directory string /debian
d-i mirror/http/proxy string

# root account configuration
d-i passwd/root-login boolean true
# this password should be automatically changed by cloud-init on first boot
d-i passwd/root-password password temp_root_password
d-i passwd/root-password-again password temp_root_password

# do not setup additional user (can be done after install)
d-i passwd/make-user boolean false

# clock and timezone configuration
d-i clock-setup/utc boolean true
d-i time/zone string UTC
d-i clock-setup/ntp boolean true

# partitioning step is left to the you - the installer will ask you for desired disk layout
# from there, you may choose to encrypt the drive with LUKS2 supplying the temporary password
# highly recommended to change the LUKS password afterwards from inside the installed OS
# if you wish this step to be automated as well, you may use partman-auto directives in preseed file

# enable non-free and contrib repositories
d-i apt-setup/non-free-firmware boolean true
d-i apt-setup/non-free boolean true
d-i apt-setup/contrib boolean true

# installation profile: standard, no gui, with SSH server
tasksel tasksel/first multiselect standard, ssh-server

# installing necessary packages - you may tweak this if needed
d-i pkgsel/include string curl wget nano htop sudo cloud-init systemd-resolved
d-i pkgsel/upgrade select full-upgrade
popularity-contest popularity-contest/participate boolean false

# bootloader configuration
d-i grub-installer/only_debian boolean true
d-i grub-installer/with_other_os boolean true
d-i grub-installer/bootdev string default
# important when sev-snp is enabled, the OS will only look for bootloader in generic efi directory
grub-installer/force-efi-extra-removable boolean true

d-i preseed/late_command string \
    mkdir -p /target/etc/cloud/cloud.cfg.d; \
    echo 'system_info:' > /target/etc/cloud/cloud.cfg.d/99-network-renderer.cfg; \
    echo '  network:' >> /target/etc/cloud/cloud.cfg.d/99-network-renderer.cfg; \
    echo '    renderers: ["networkd"]' >> /target/etc/cloud/cloud.cfg.d/99-network-renderer.cfg; \
    in-target systemctl enable systemd-networkd; \
    in-target systemctl enable systemd-resolved; \
    in-target ln -sf /run/systemd/resolve/stub-resolv.conf /etc/resolv.conf;

d-i finish-install/reboot_in_progress note
Debian Installation
Serve the Preseed file
The easiest way to get the custom preseed file (preseed.cfg) into a VM with Debian installer is to serve it over the network (HTTP). That requires you to have an IPv4 address with at least one TCP port available.
In this example, we used another Onidel server to host the file temporarily using Python's built in http.server module. It has to be launched from the same directory the preseed.cfg file is in:
$ python3 -m http.server
Serving HTTP on 0.0.0.0 port 8000 (http://0.0.0.0:8000/) ...
If you don't have a way to host the preseed configuration, you may also embed it into the ISO itself, however that is out of scope of this guide.
Boot from Debian ISO
As explained in a dedicated Custom ISO guide, you need to first upload the Debian ISO into Onidel Cloud to later boot a VM from it.

Navigating to Compute > Virtual Machine > (Your VM) > Settings, you should change the Boot Mode to UEFI.
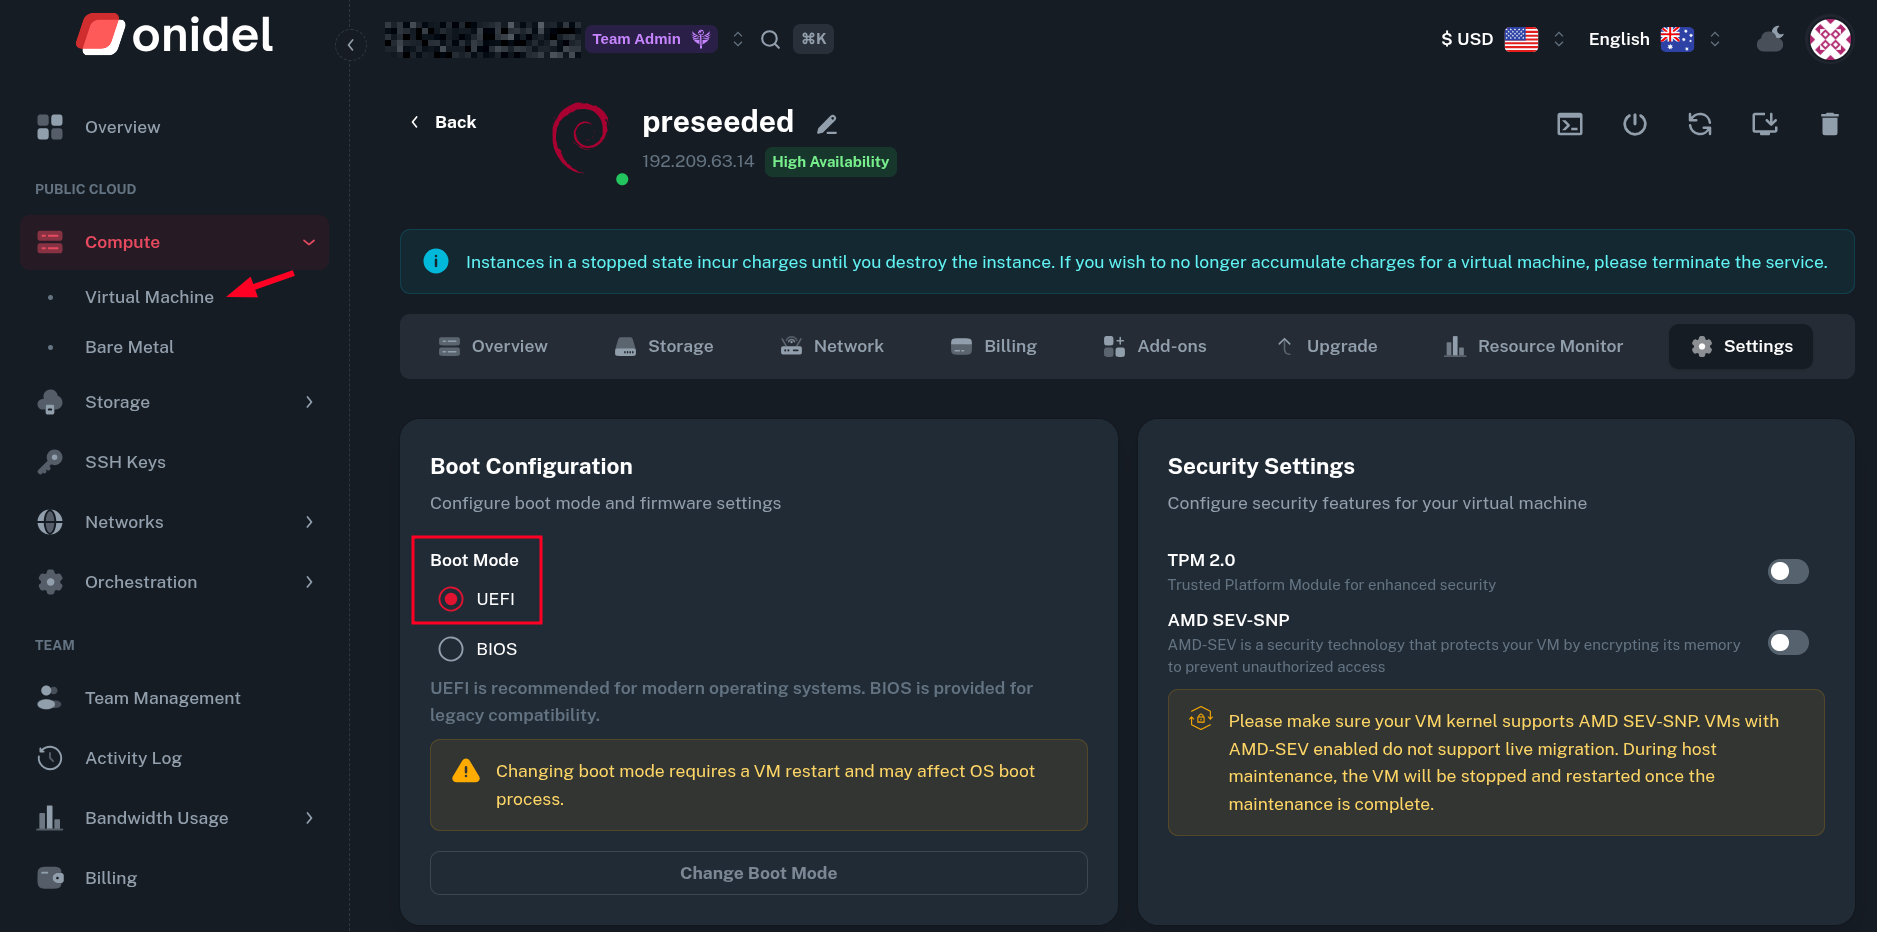 This is optional, but highly recommended. UEFI boot mode is required for enabling SEV-SNP later. The custom install is boot mode specific, so if installed on BIOS it has to be manually converted to UEFI and vice-versa.
Next, attach the ISO to your VM.
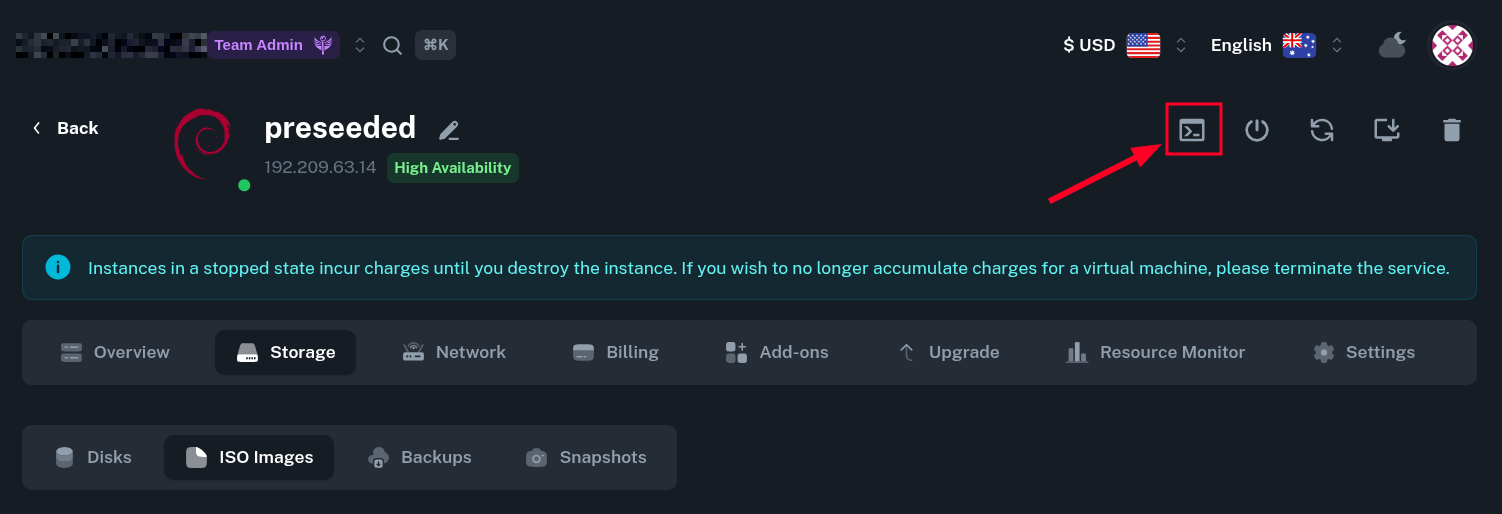
 The VM should automatically reboot into the ISO image. You can then open the VM console to set necessary preseed parameters and perform the installation.
Specify Preseed Source
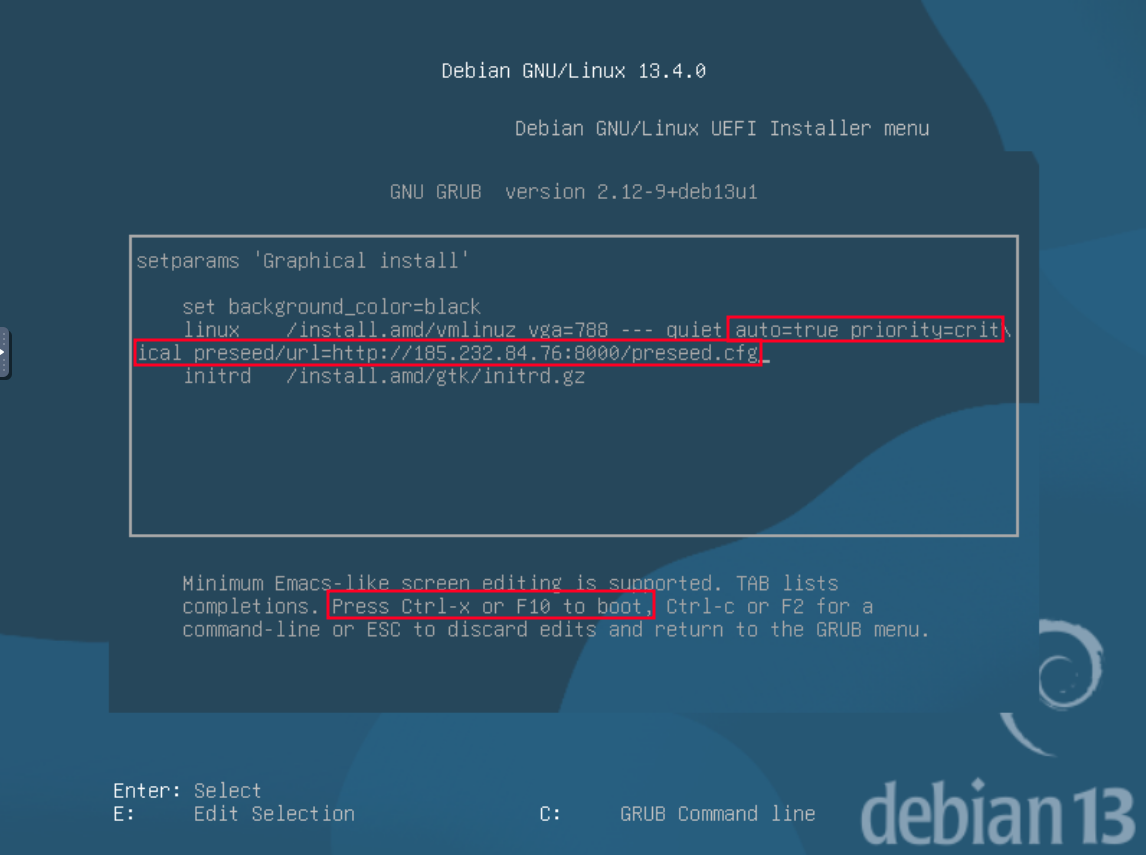
In the console you will see the GRUB bootloader configuration of Debian installer. To modify kernel boot parameters, press the e key.
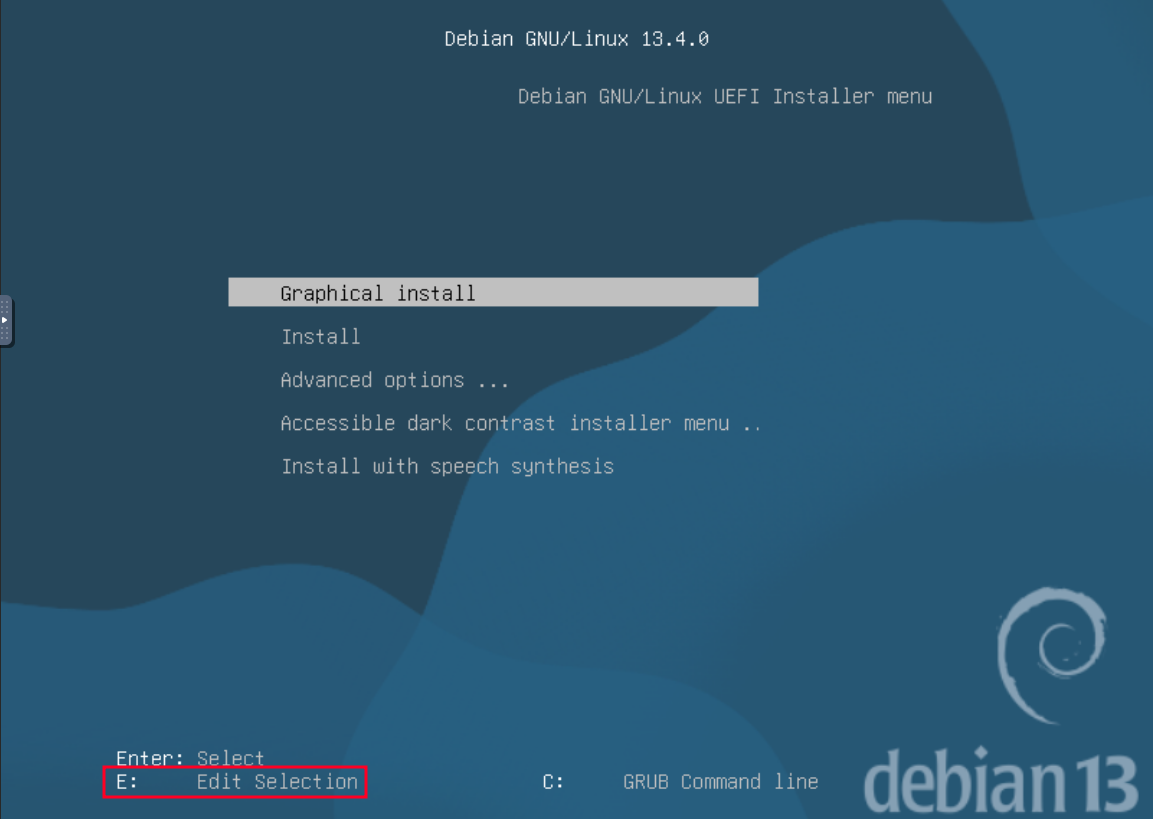
At the end of the line starting with linux add the following special options:
auto=true priority=critical preseed/url=http://[static-server-ip]:[port]/preseed.cfg
Remember to replace the server IP and port with ones you serve the preseed config from. Then press Ctrl+x or F10 to boot with those custom parameters.
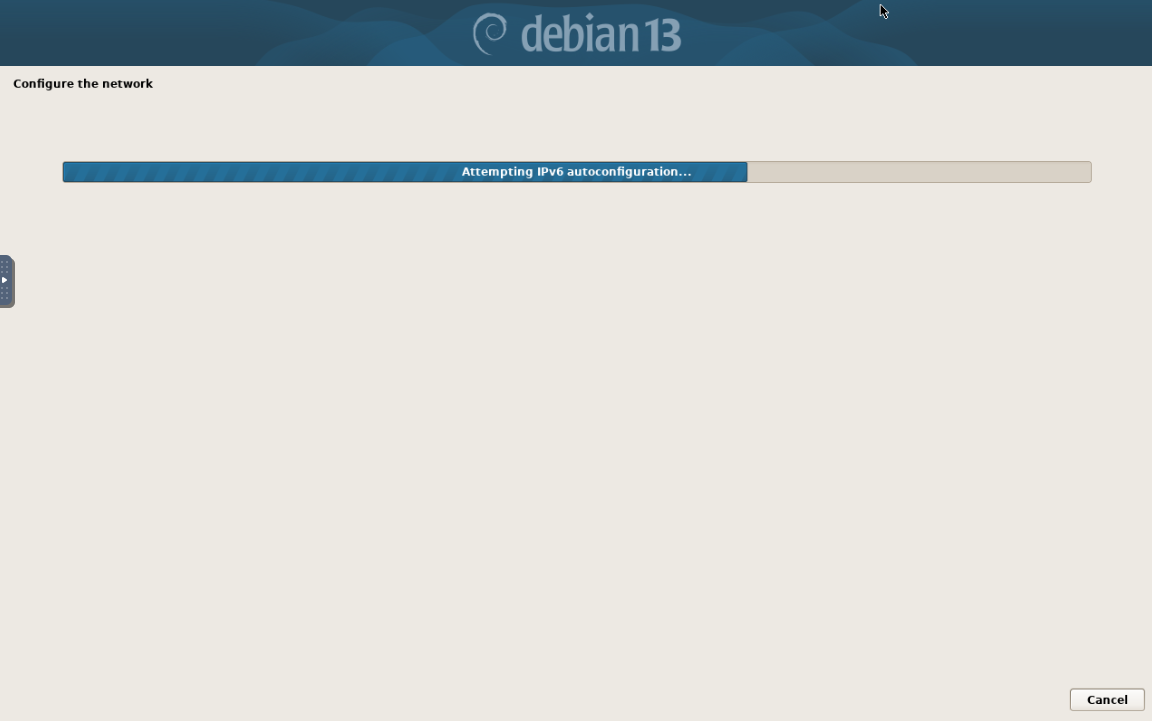
 Then the installer will start booting. It will first configure the network, then try to pull the
 preseed file from preseed/url specified.
 At some point, you should see the request from the VM coming to your HTTP server. This means the preseed was obtained properly.
192.209.63.14 - - [05/Apr/2026 07:38:04] "GET /preseed.cfg HTTP/1.1" 200 -
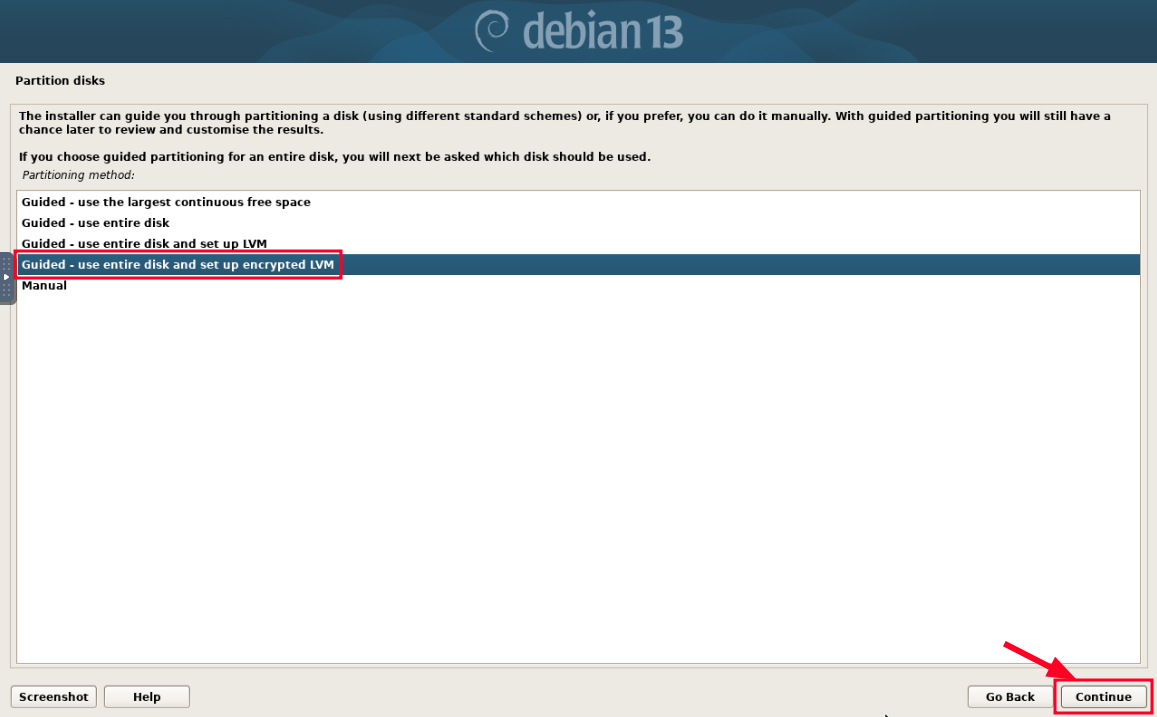
Installation will pause at the Disk Partitioning stage. This one is left up to you. We recommend you set up encrypted root partition using the installer's built-in partman interface.
Partition the Drives
Additionally, if you want to configure automatic disk unlocking later, it's encouraged to create a separate unencrypted /boot partition for initramfs and kernel. This is the default behavior of Debian installer when Encrypted LVM is selected.
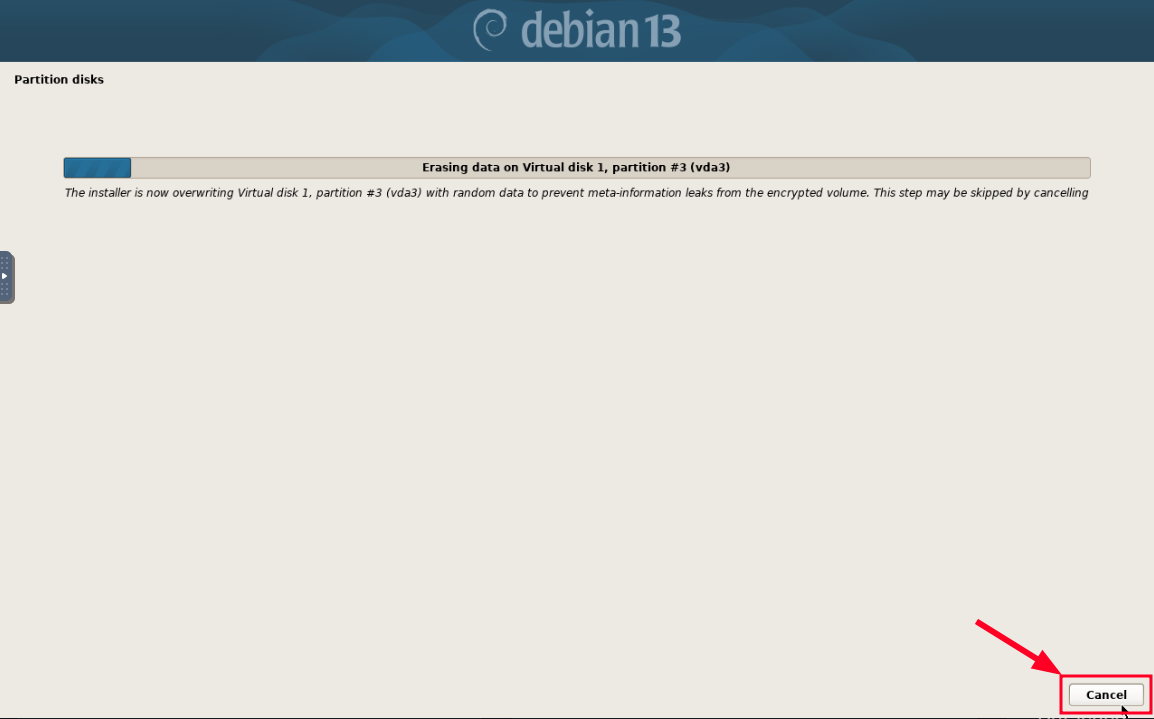
After the drive is selected, the installer will start overwriting the virtual disk with random data. This is primarily meant to wipe data remaining on physical drives and not necessary in cloud environments, so you can safely cancel it.
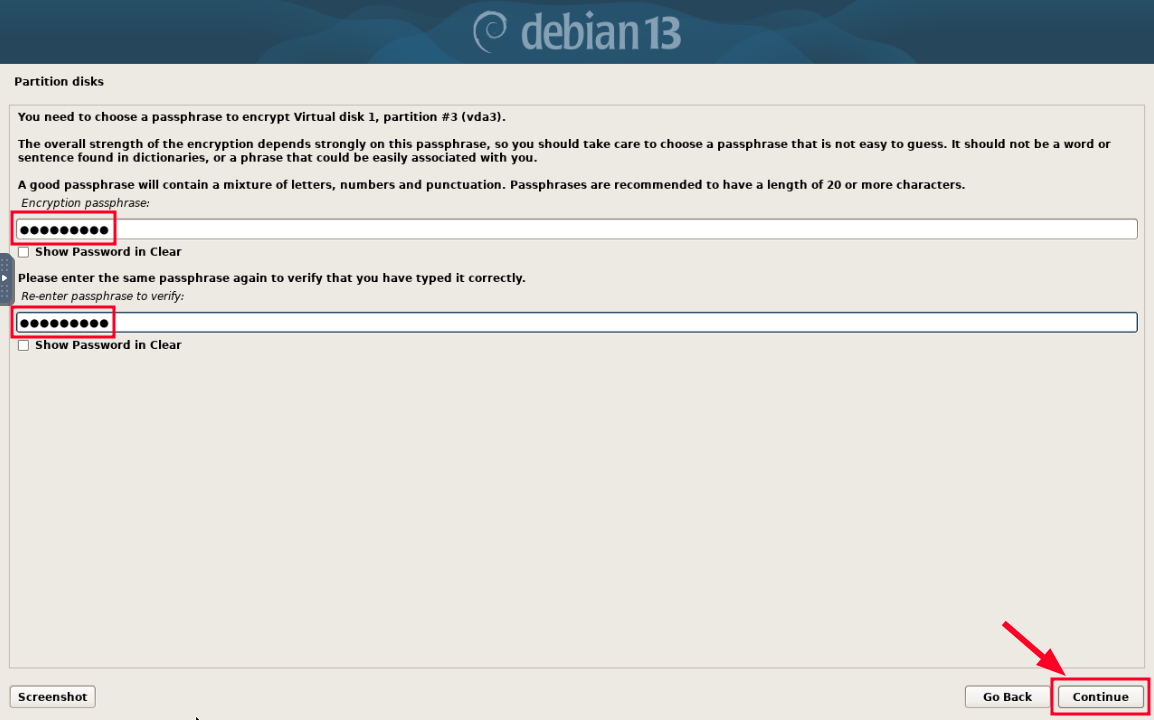
Now, you will be asked for drive encryption password and confirmation.
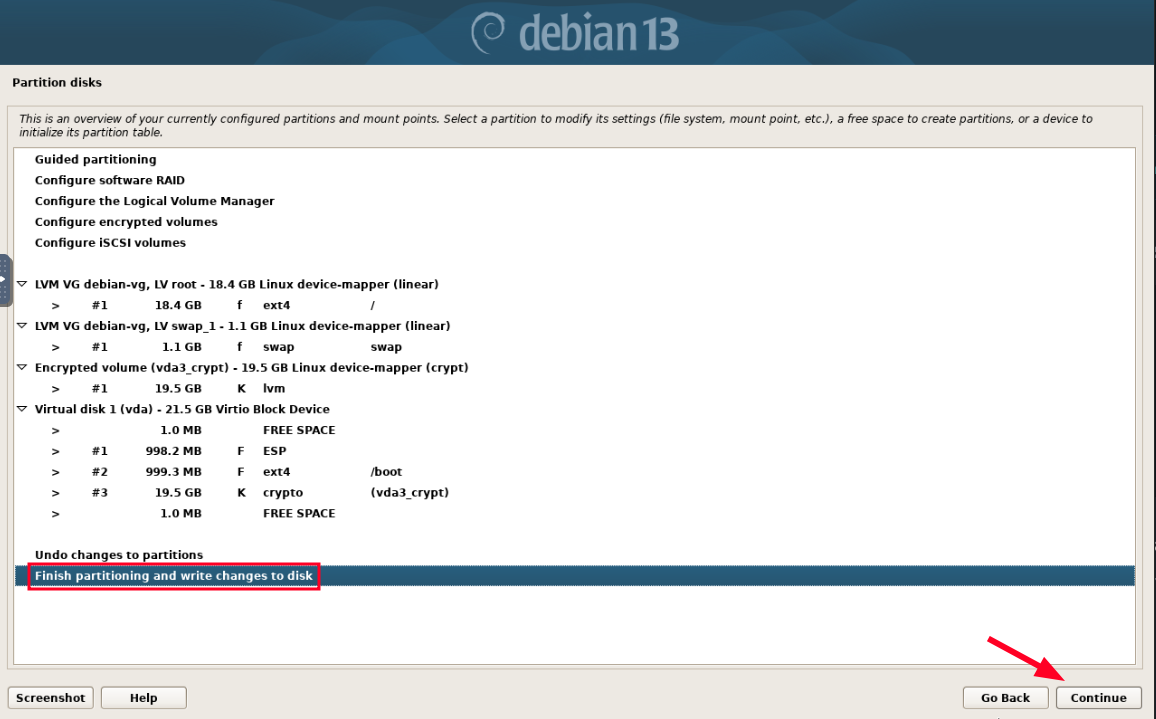
 And here is how the desired partition layout may look like. You can choose to Write changes to disk and Continue.
 From now on, the installation should continue uninterrupted until the end. The system will automatically reboot once it's completed.

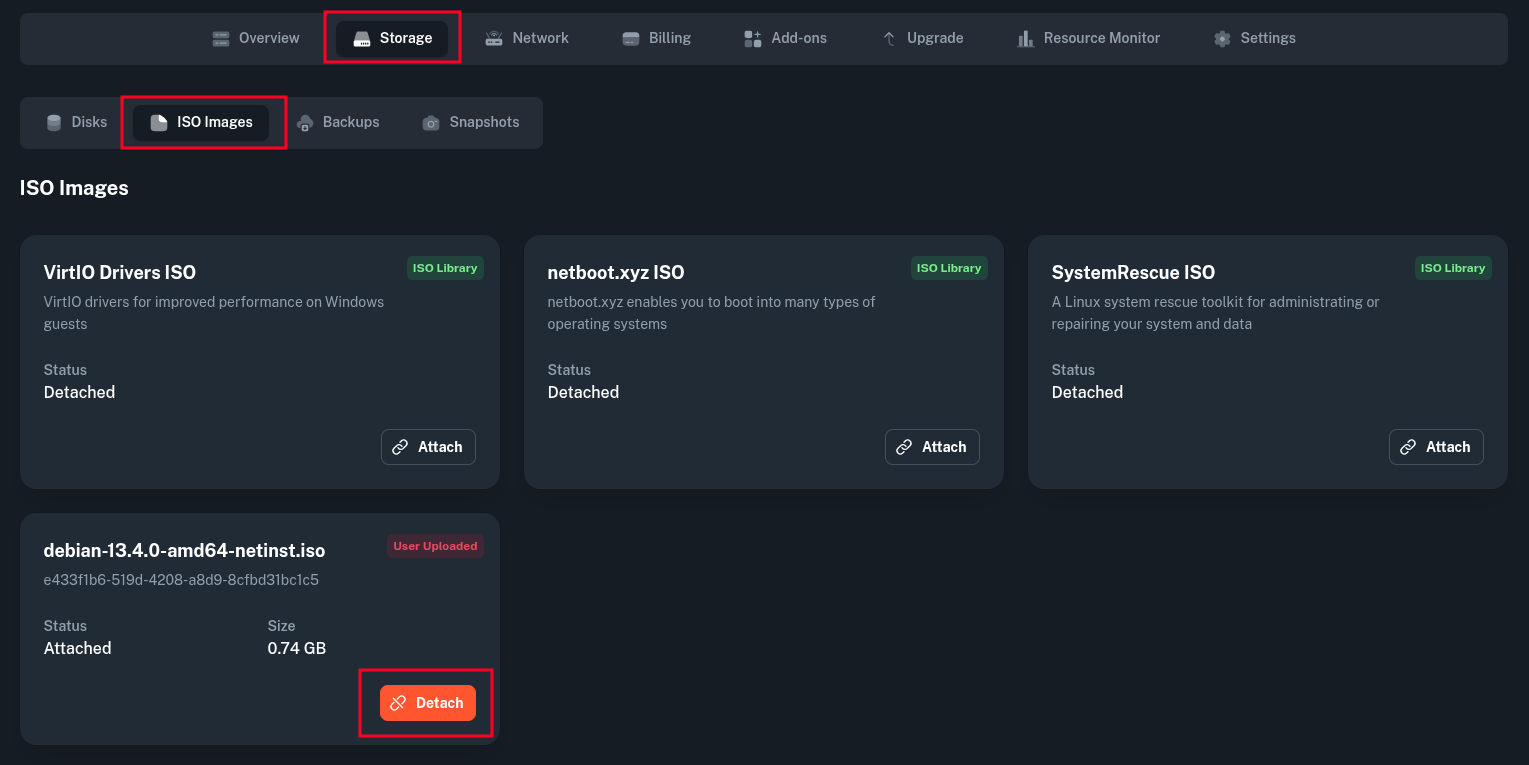
Detach the ISO
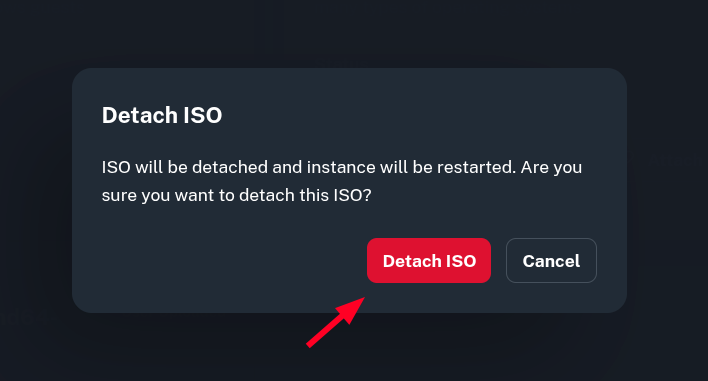
After the VM is rebooted, you will likely be met with the GRUB bootloader of the installer again. You can now detach the ISO from Onidel Panel and wait for the VM to boot from the drive.
Unlock the drive
Right now, when going to the Console again, you should be prompted for drive encryption password.
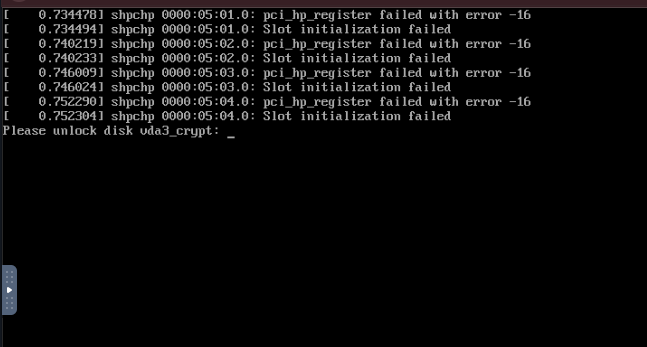 After it's provided, your VM should boot and perform necessary cloud-init setup. Once that's done, you will be able to login into the VM and confirm its custom disk layout.
$ ssh [email protected]
Linux preseeded 6.12.74+deb13+1-amd64 #1 SMP PREEMPT_DYNAMIC Debian 6.12.74-2 (2026-03-08) x86_64

The programs included with the Debian GNU/Linux system are free software;
the exact distribution terms for each program are described in the
individual files in /usr/share/doc/*/copyright.

Debian GNU/Linux comes with ABSOLUTELY NO WARRANTY, to the extent
permitted by applicable law.
root@preseeded:~# lsblk
NAME                    MAJ:MIN RM  SIZE RO TYPE  MOUNTPOINTS
sr0                      11:0    1 1024M  0 rom
sr1                      11:1    1    4M  0 rom
vda                     254:0    0   20G  0 disk
├─vda1                  254:1    0  952M  0 part  /boot/efi
├─vda2                  254:2    0  953M  0 part  /boot
└─vda3                  254:3    0 18.1G  0 part
  └─vda3_crypt          253:0    0 18.1G  0 crypt
    ├─debian--vg-root   253:1    0 17.1G  0 lvm   /
    └─debian--vg-swap_1 253:2    0 1008M  0 lvm   [SWAP]
Next Steps
Change LUKS password
Since in theory, actions performed in the VNC window are not encrypted end-to-end, you may want to change the LUKS drive encryption password from inside your VM via SSH using luksChangeKey:
root@preseeded:~# cryptsetup luksChangeKey /dev/vda3
Remote Unlocking
To not have to go into the VNC window each time you reboot the server, you may consider configuring remote unlocking at initramfs stage using either: