

Onidel Automatic Backup provides a reliable and efficient solution to safeguard your data with minimal effort. Designed for speed and flexibility, this feature ensures your critical information is securely stored and easily recoverable when needed.
Key Features
High-Performance SSD Storage
Backups are stored on SSD storage, enabling lightning-fast backup creation and restoration. This ensures minimal downtime and quick access to your data when you need it most.
Retention of Recent Backups
The system retains the two most recent backup versions, giving you peace of mind with access to both your latest data and a previous backup. This dual-version approach enhances your recovery options.
Customisable Backup Schedules
Tailor the backup frequency to suit your needs:
-
Daily: Ideal for environments with frequent changes.
-
Weekly: Perfect for less dynamic workloads.
-
Monthly: Suitable for long-term archival needs.
Choose the schedule that aligns with your operational requirements.
Cost Structure
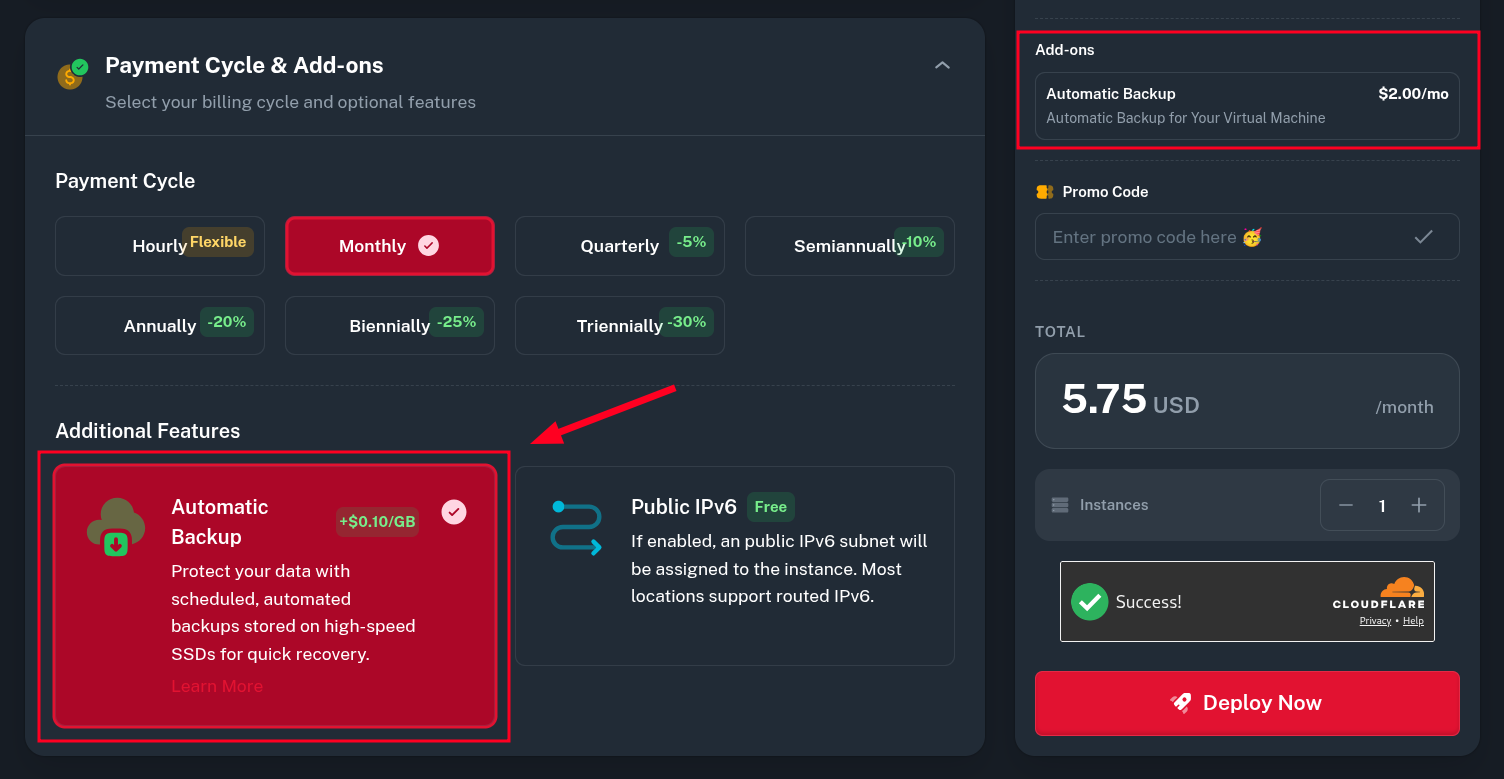
Backups are priced at $0.10 per GB, calculated based on the size of the backed up disk.
Flexible Recovery Options
Onidel Automatic Backup offers versatile ways to access and utilise your backups:
-
Restore: Revert your instance to a selected backup version, ensuring quick recovery to a previous state.
-
Download Locally: Retrieve backups for local storage or disaster recovery planning.
-
Attach to Running Instance: Mount backups directly to an active instance for seamless individual file or system recovery.
These options empower you to recover data on your terms.
How to Enable Automatic Backup
Enabling Automatic Backup is straightforward and can be done at different stages depending on your preference.
During Order
Activate automatic backups directly when placing your initial order. This ensures your instance is protected from day one with no additional setup required.
VM Add-on
If you didn't enable backups initially, you can turn them on later through the Add-ons tab on the VM management page.
-
Go to Compute > Virtual Machines > (Select Your VM) > Add-ons tab, and click on Add New button.
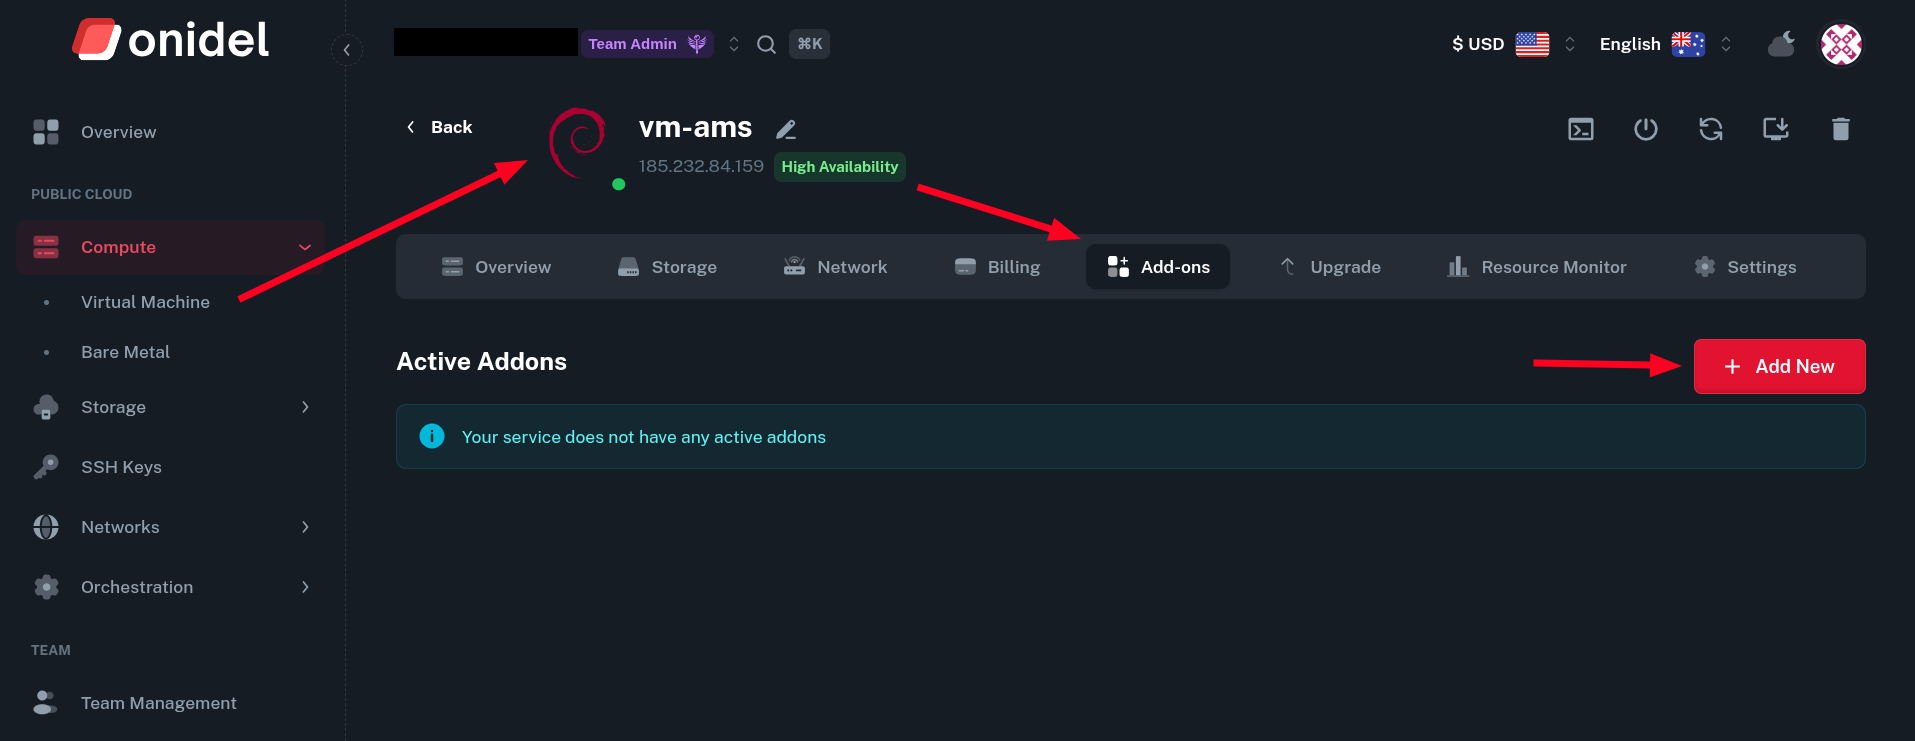
-
There, you will see the option to buy various add-ons for your VPS.
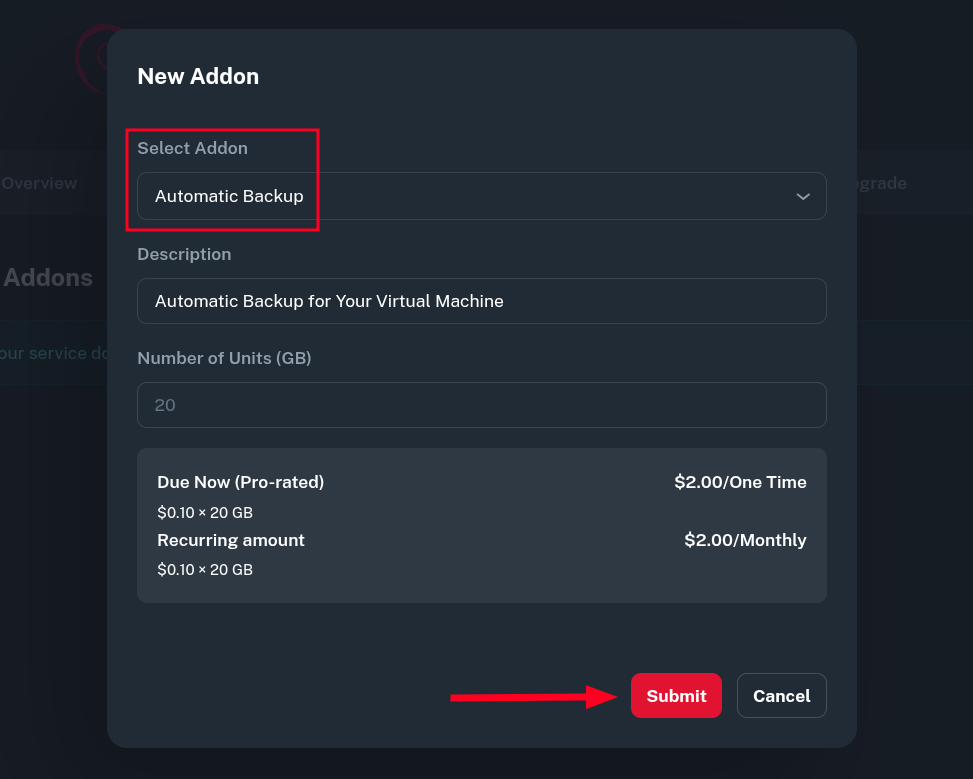
For this tutorial, you will need to use the Automatic Backup one. To purchase it, click Submit and pay the generated invoice.
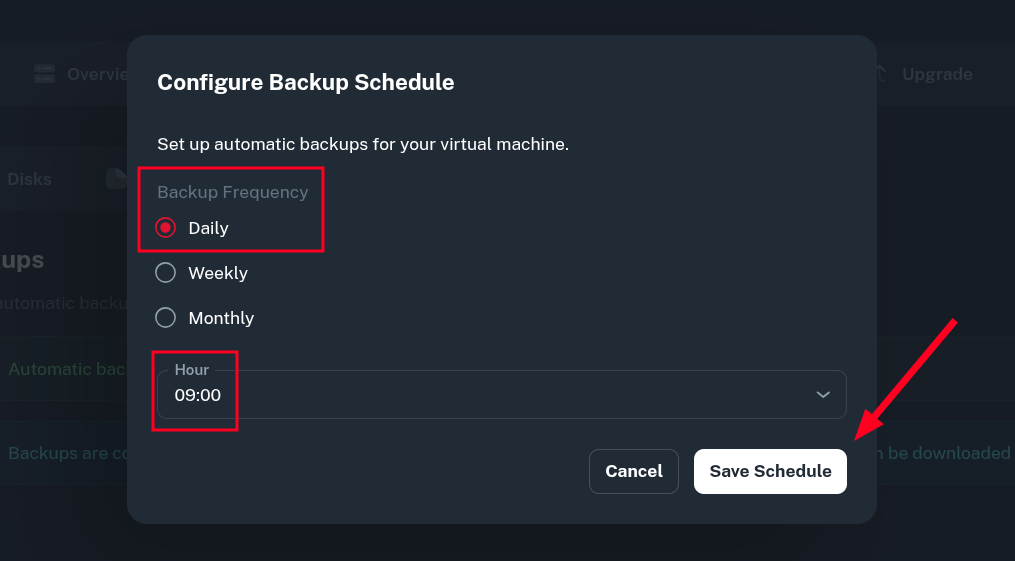
Configuring Automatic Backup
-
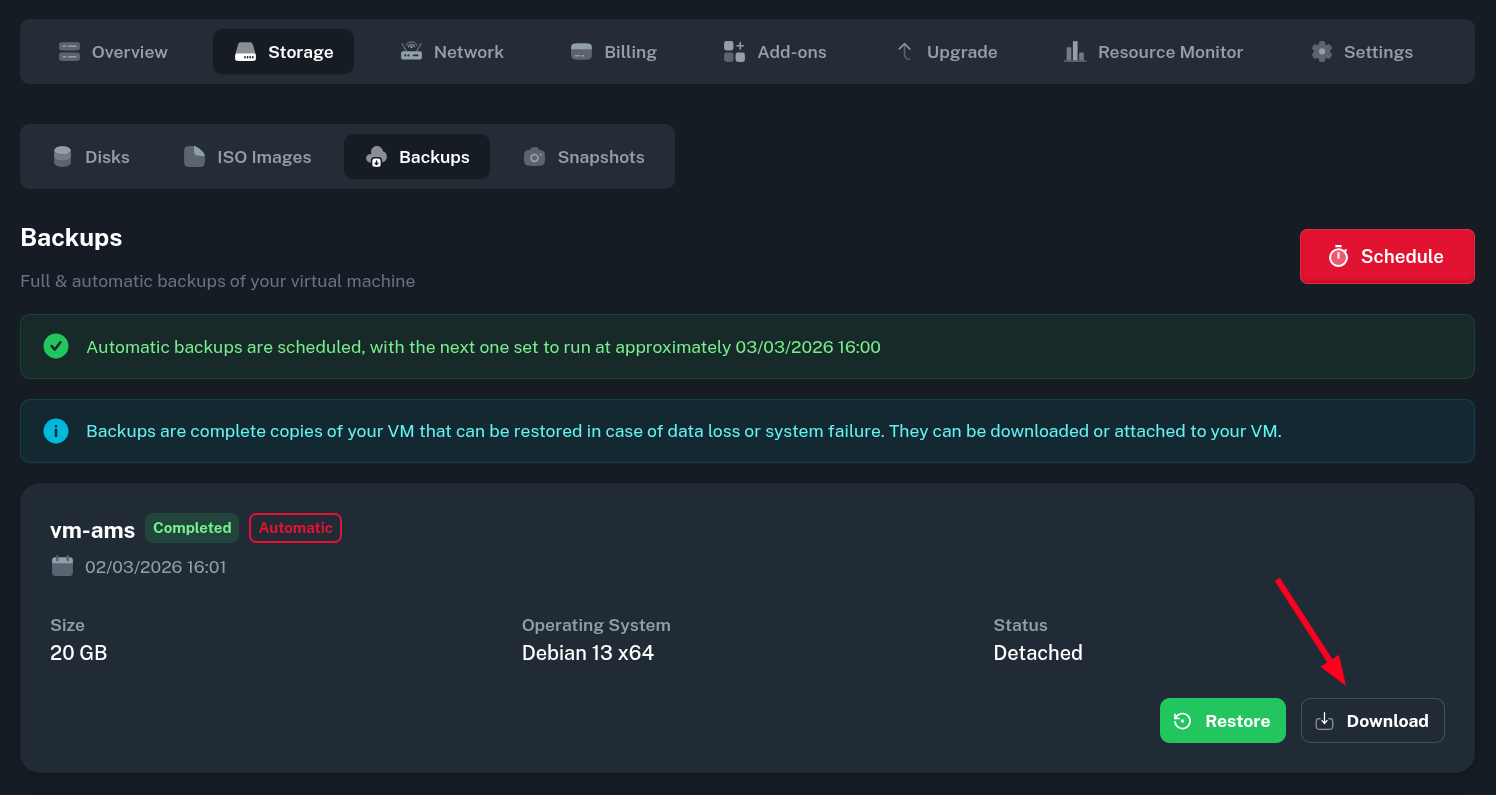
After the Automatic Backup feature has been purchased, go to Storage > Backups tab of your VM and Schedule an automatic backup.

-
From there, you can choose the desired backup frequency. The schedule uses AEDT (UTC+11) as a timezone.
In the Weekly and Monthly schedules, you will be asked to choose a day of the week/month.
Click Save Schedule once you're finished setting it up.
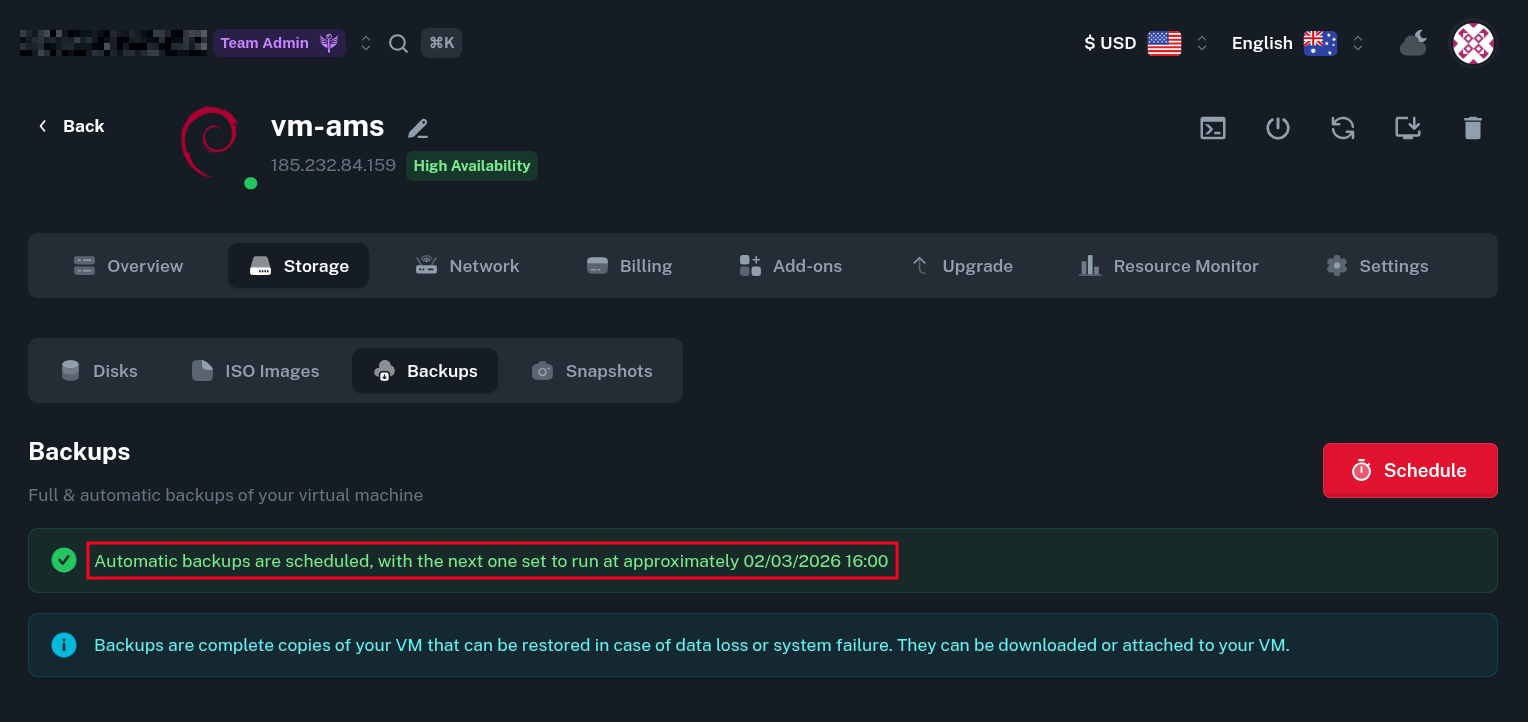
-
Now, the automatic backups are enabled and you should see a notice about when the next one will be taken at. Note that here, the next backup schedule is shown in your local timezone.
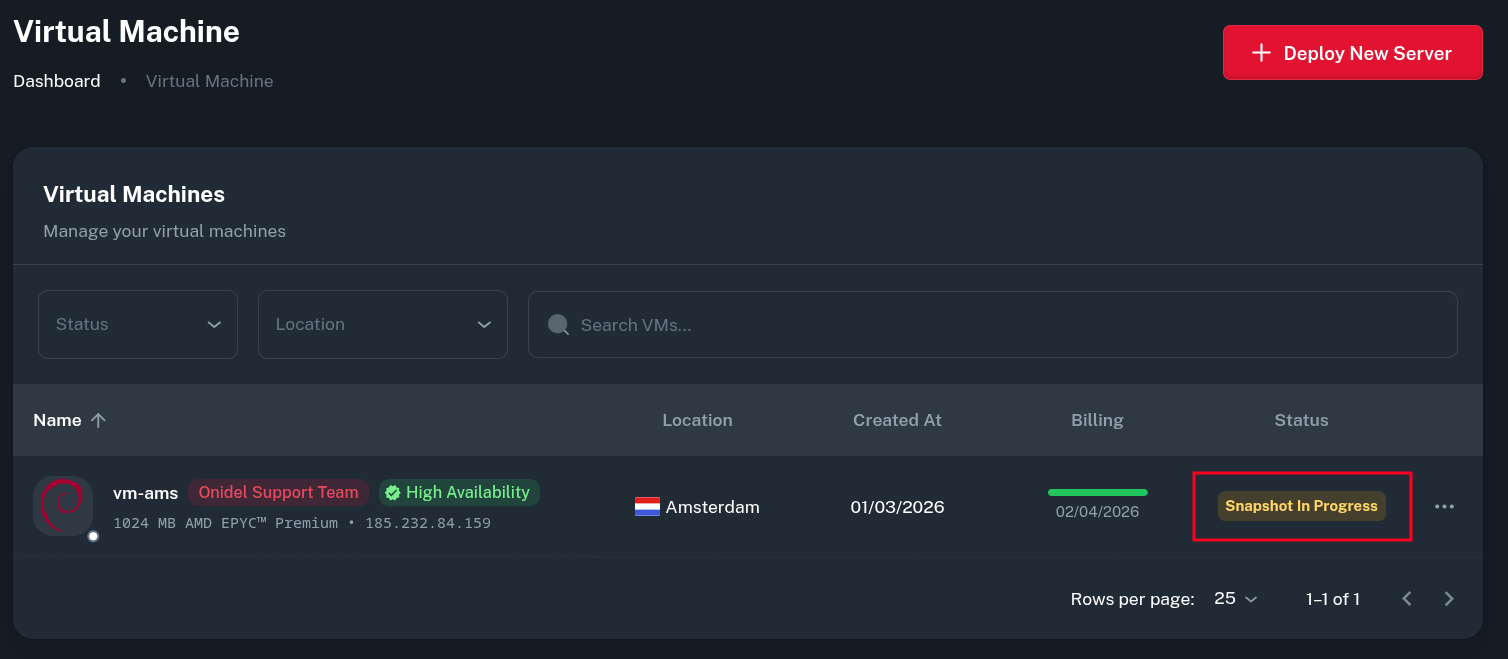
-
When there comes the time for backup, your VM will change its status to Snapshot In Progress.
Your VM will remain online during this time, however you can not change its configuration while backup is in progress.
Restoring from a Backup
-
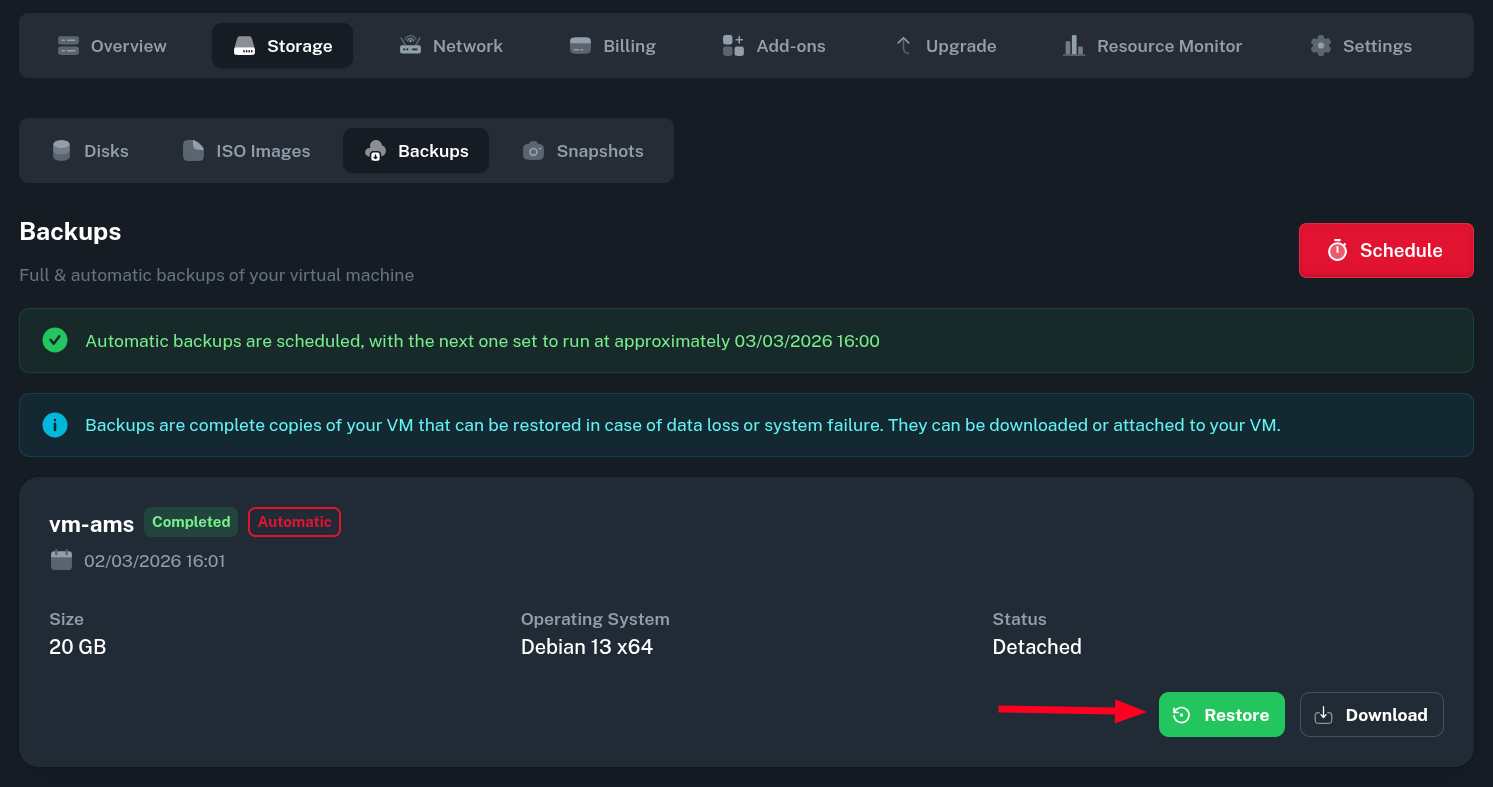
After the backup was successfully created, you should see it in the list under Storage > Backups. To restore from one, just click the Restore button.
-
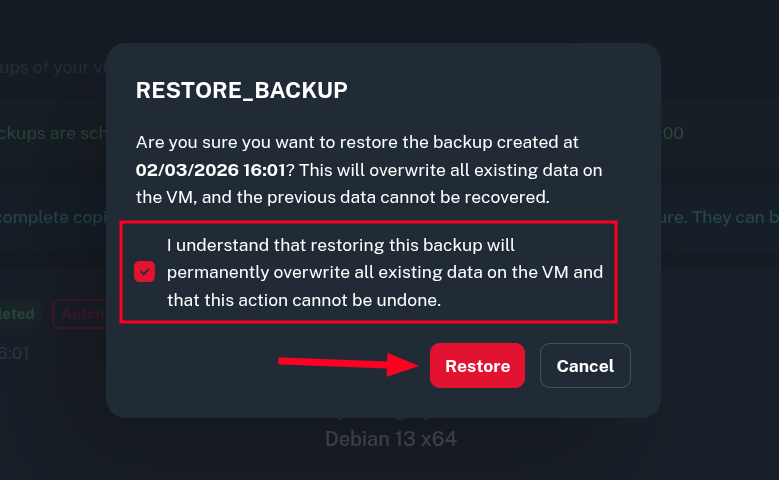
You will get a warning about the restoration being a destructive operation. Restoring from a backup will overwrite all data on your drive.
If you are sure you want to restore this backup, just confirm by clicking Restore.
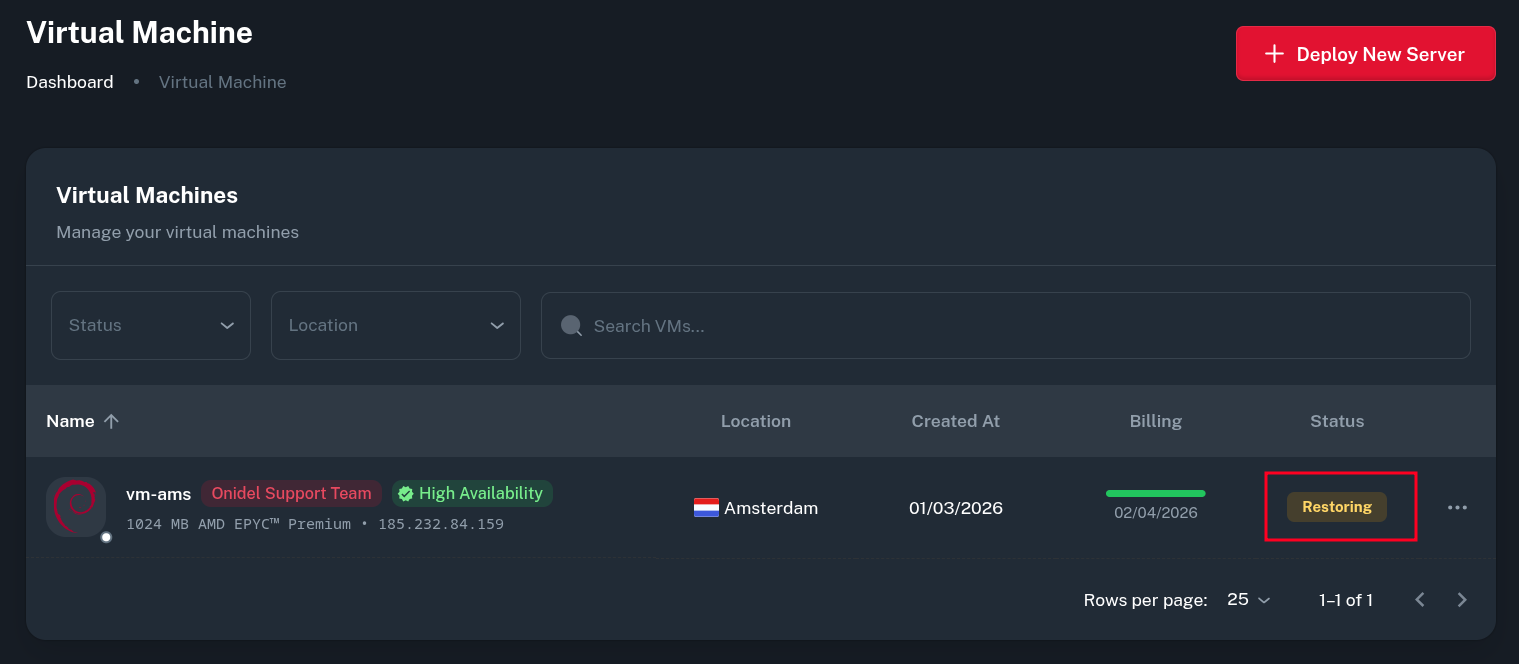
-
Then you should see the status of your VM changed to Restoring. The VM will become offline and locked until it's fully restored.
Downloading a Backup
Backups of your VMs can be downloaded. This could be useful to easily recreate/migrate the VM into other environment or just to keep local backup of the data.
-
To download a backup, go to Storage > Backups and click the Download button.
-
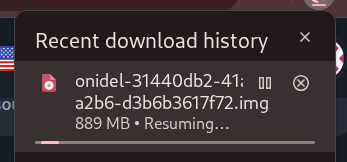
The download should now start. Backups are not compressed so the download process could take a while.
Converting Backup to Snapshot
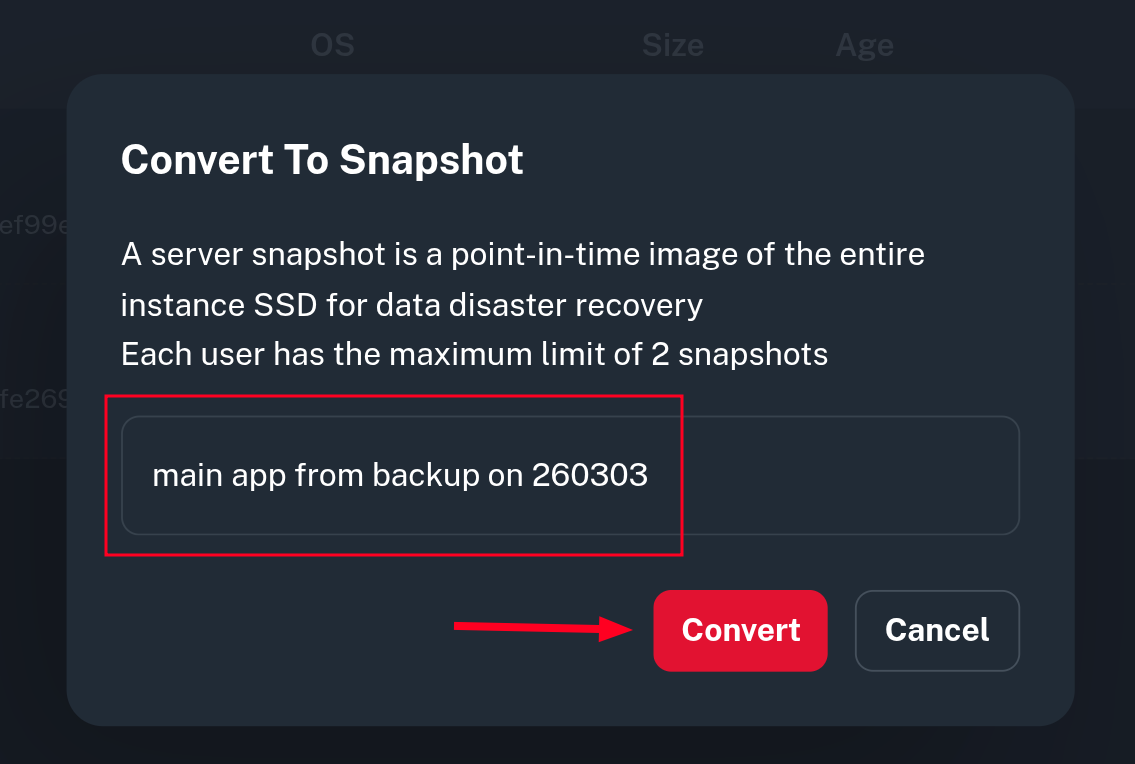
It is possible to convert a Backup to a Snapshot. This allows for a new Virtual Machine instance to be created using the backed up state of your Virtual Machine.
-
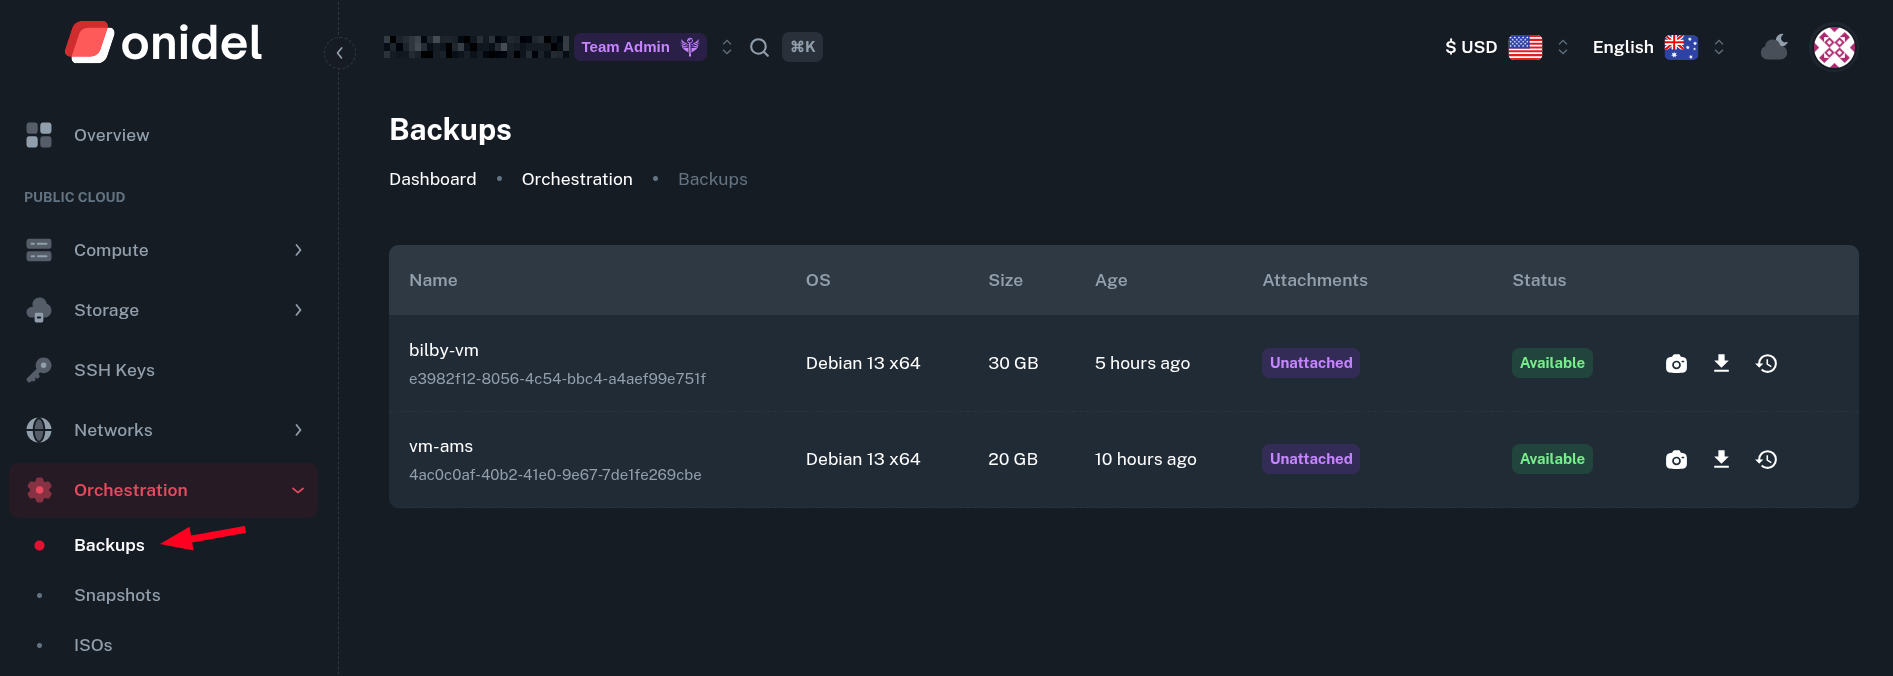
Go to Orchestration > Backups. There you will see the list of current backups from all VMs.
-
There, besides the previously showcased actions to Restore or Download the backup image, there is also an option to convert the Backup image to a Snapshot.
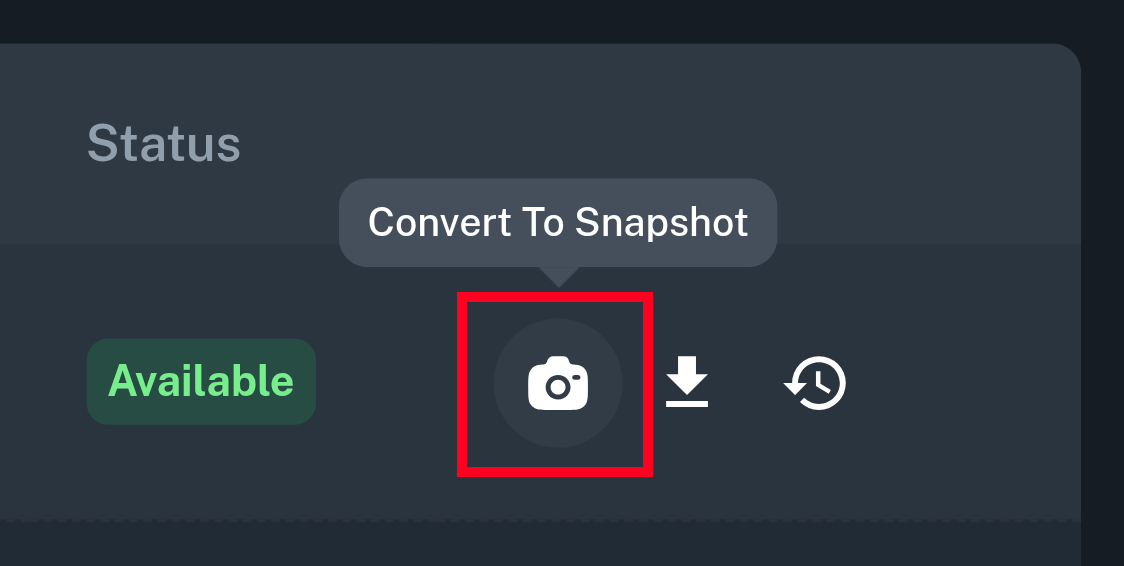
-
After you click on it, you will be asked to name the snapshot.

-
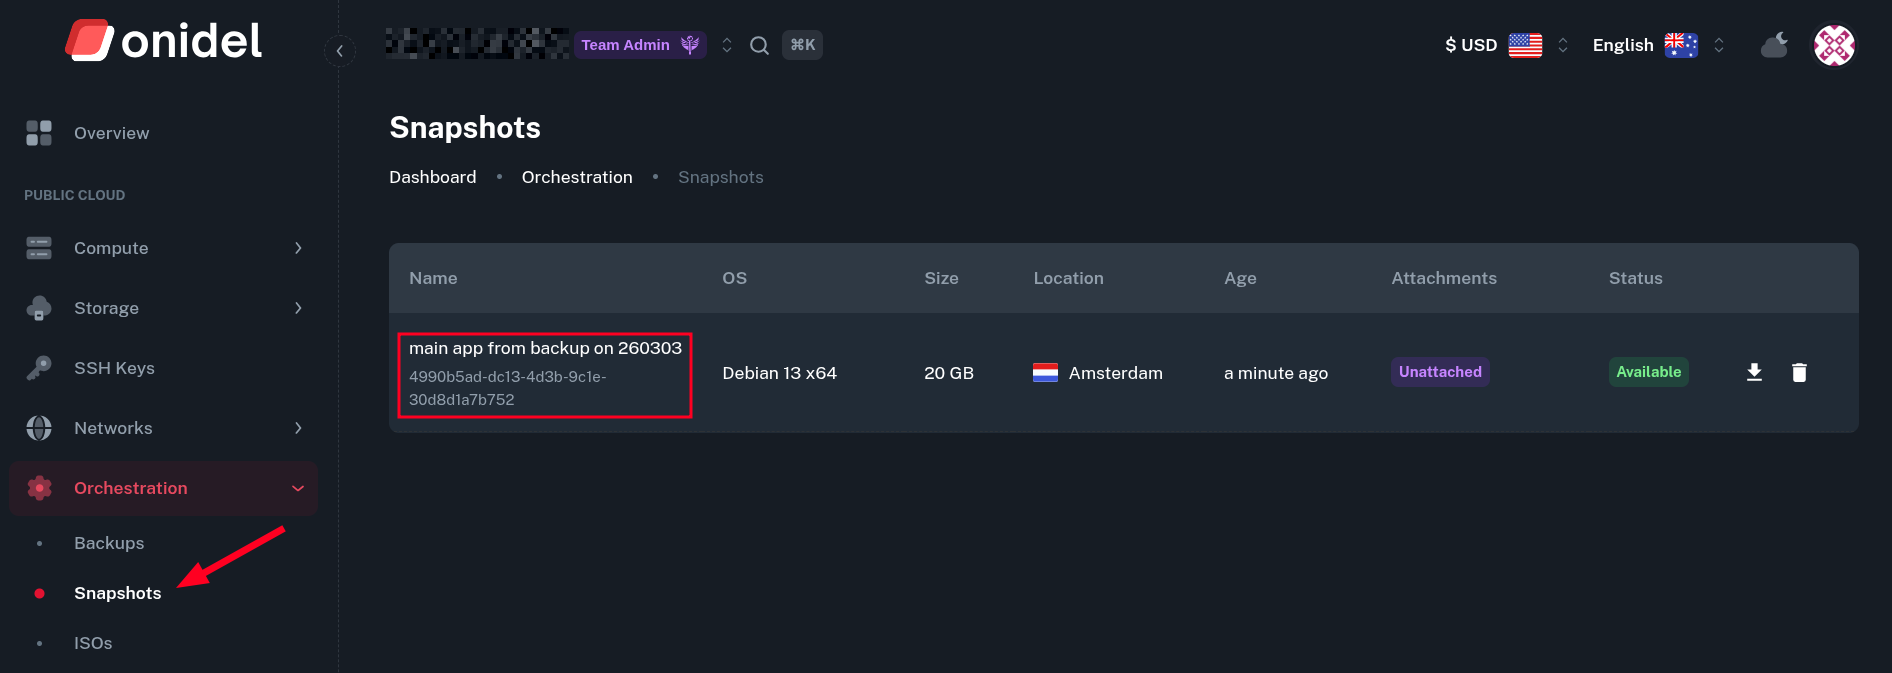
You should now see the Snapshot in the Orchestration > Snapshots view.
-
You can read more on Snapshots in this guide.
Disabling and Re-enabling
You can disable automatic backups at any time if they're no longer needed. However, to re-enable the feature after disabling it, you'll need to contact customer support for assistance.
Retention
Currently, we store 2 most recent versions of your VM backup regardless of backup frequency.
For example, if your backup frequency is daily - backups older than 2 days will be deleted, if weekly - older than 2 weeks and so on.