This tutorial explains how to import a disk image into Onidel Cloud. It also explains how to obtain a full root disk image copy of your current cloud instance to be restored into Onidel VM later.
The guide is divided into the following sections:
-
Entering a Live/Recovery Environment: Booting your source server without mounting the root drive.
-
Obtaining the Disk Image: Extracting the raw disk image securely over SSH.
-
Importing the Image: Uploading and restoring the image via the Onidel Cloud Panel.
If you already have a raw disk image ready to upload, you can skip directly down to the importing section.
Entering Live/Rescue Environment
To ensure data integrity and avoid corruption, a root disk should never be copied while the operating system is actively using it.
When a system is running, files are constantly shifting, logs are being written, and data is sitting in memory caches. Copying an active disk often results in an inconsistent state, causing corrupted databases or unbootable operating systems.
Instead, we will boot the server into a temporary "Live" or rescue environment. A live environment runs entirely from memory (RAM) and leaves your actual root drive completely untouched and unmounted. This allows us to safely read the raw disk bit-by-bit and safely extract a pristine, completely frozen-in-time replica of your drive.
Method 1: Using Provider's Rescue Mode
Many cloud providers offer a Rescue Mode. We can leverage it to boot into live environment and transfer the image of root disk over SSH. In this example, we showcase how to activate the rescue mode of VirtFusion panel, however the steps should be pretty similar for other panels as well.
-
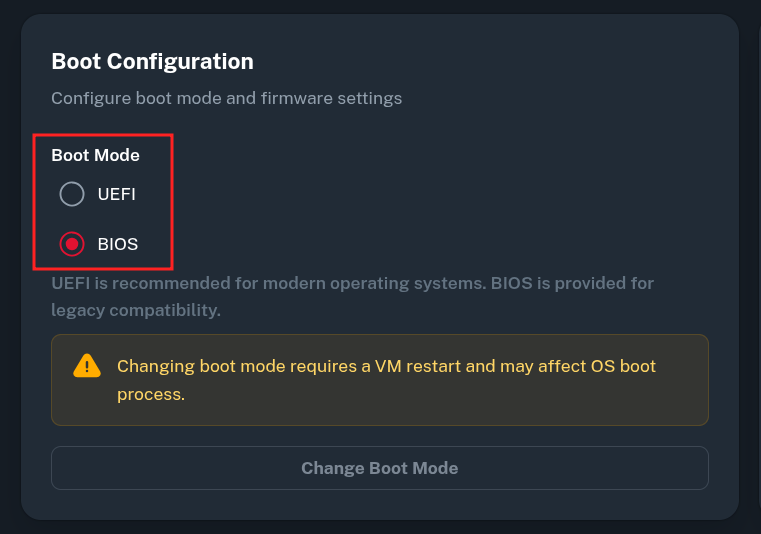
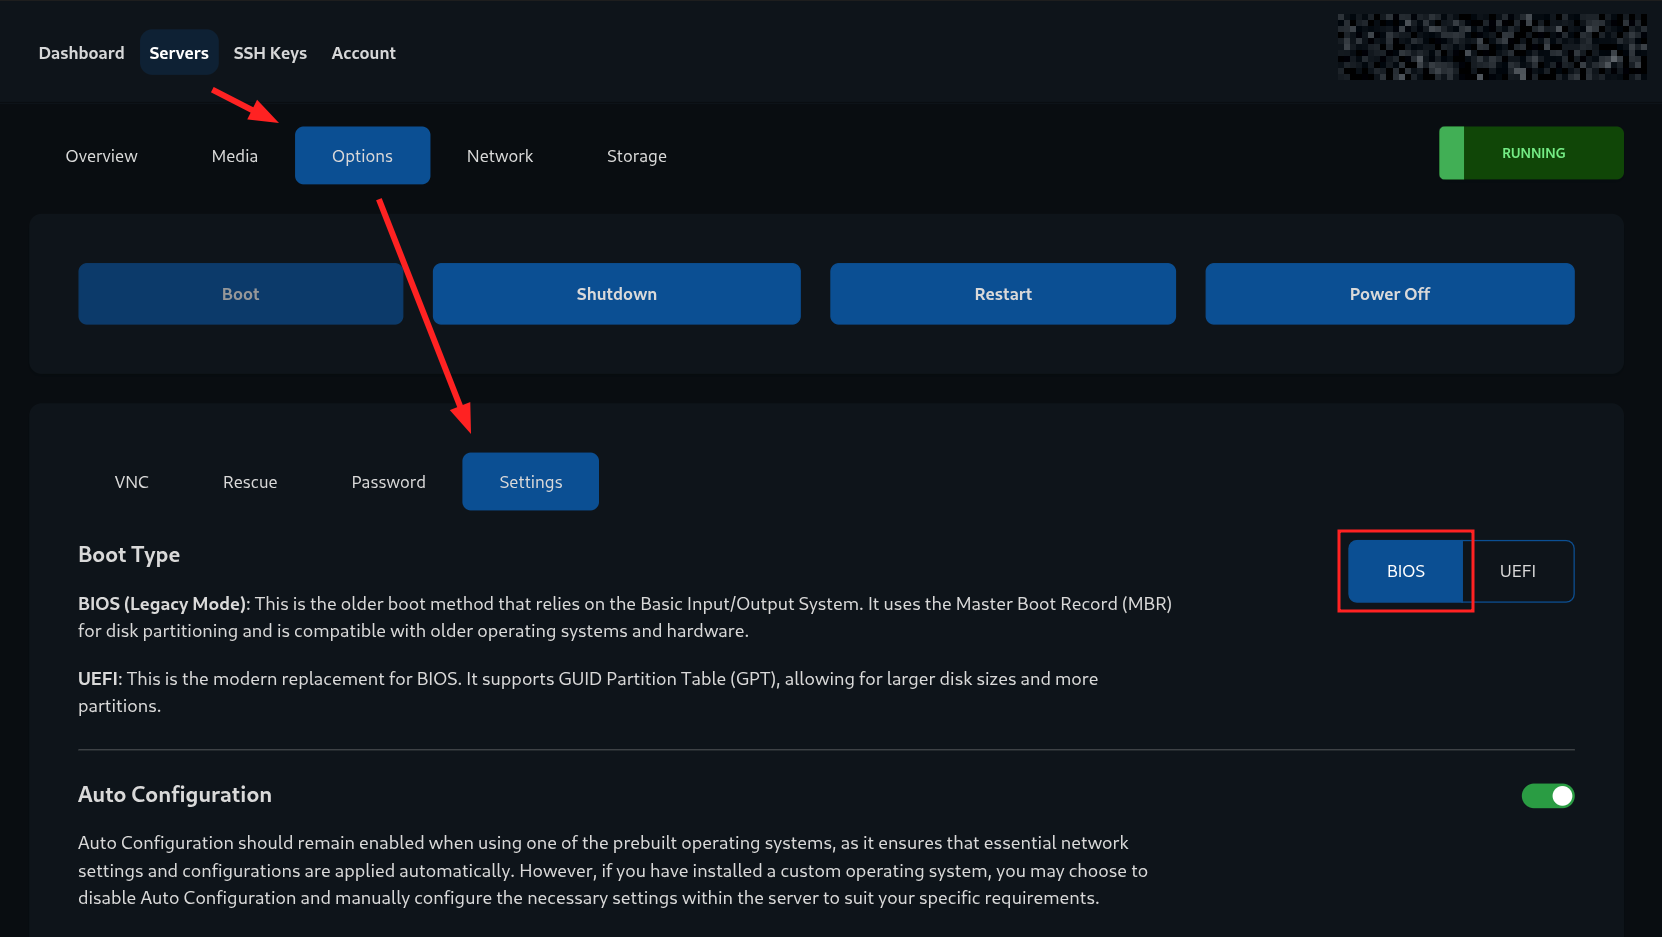
Check and write down the current VM Boot Mode by going to Options > Settings (BIOS in our case).
-
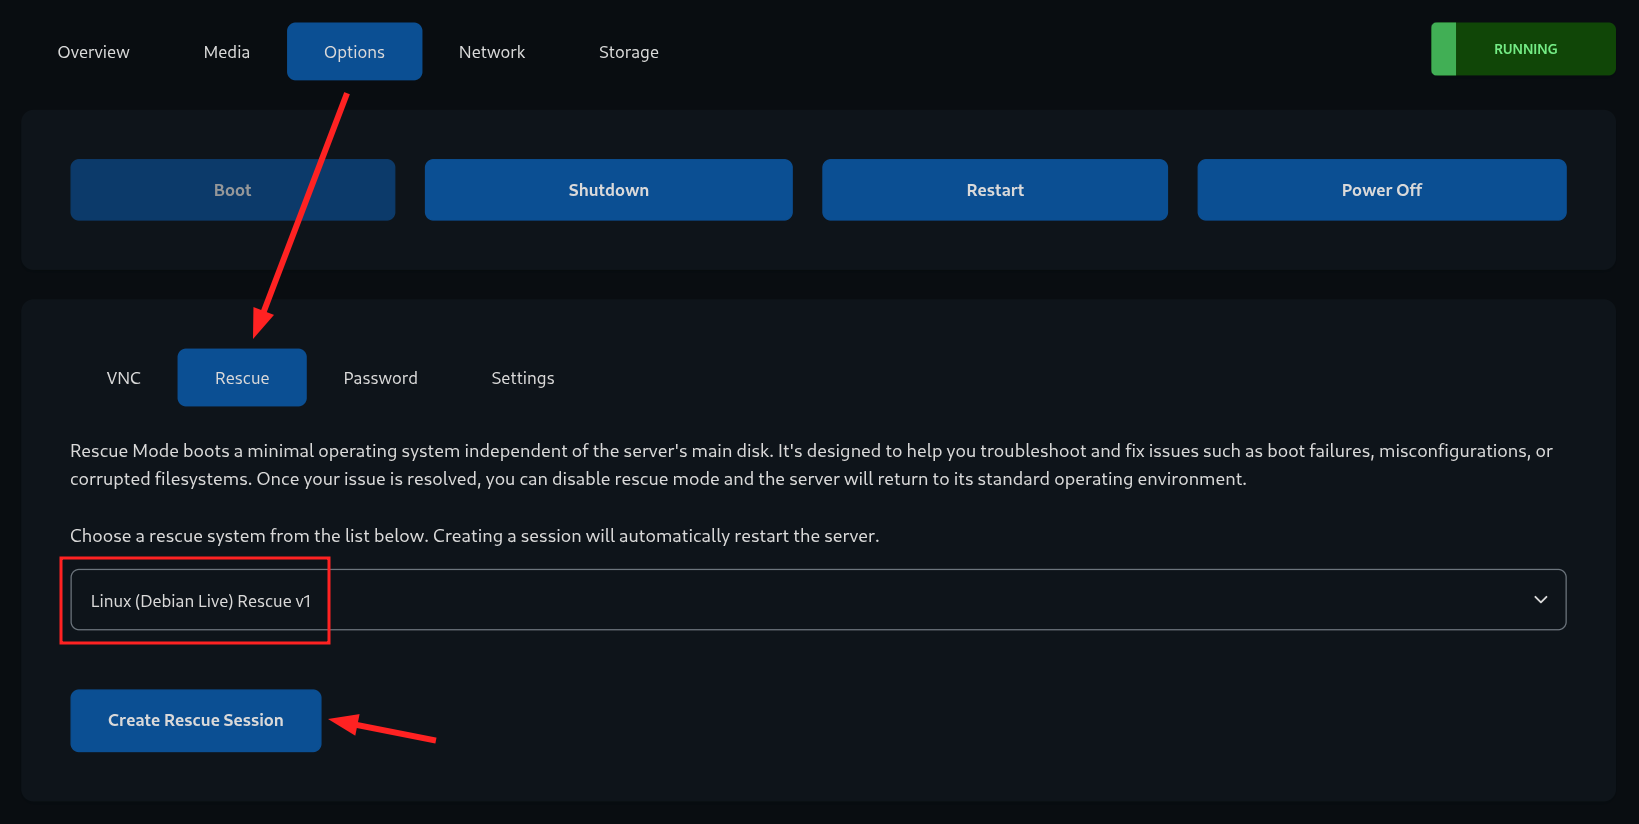
Create a Rescue Session by going to Options > Rescue then clicking on Create Rescue Session.
-
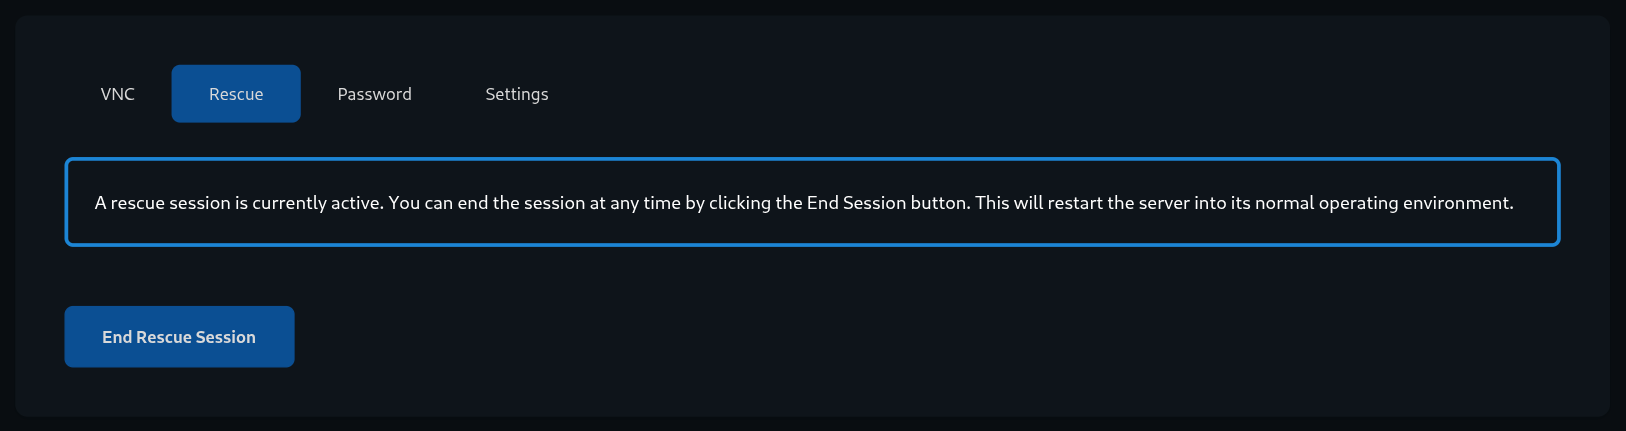
Once activated, your VM should get rebooted to Rescue environment.
-
 You will get an email with temporary login details and instructions on how to connect.
 -
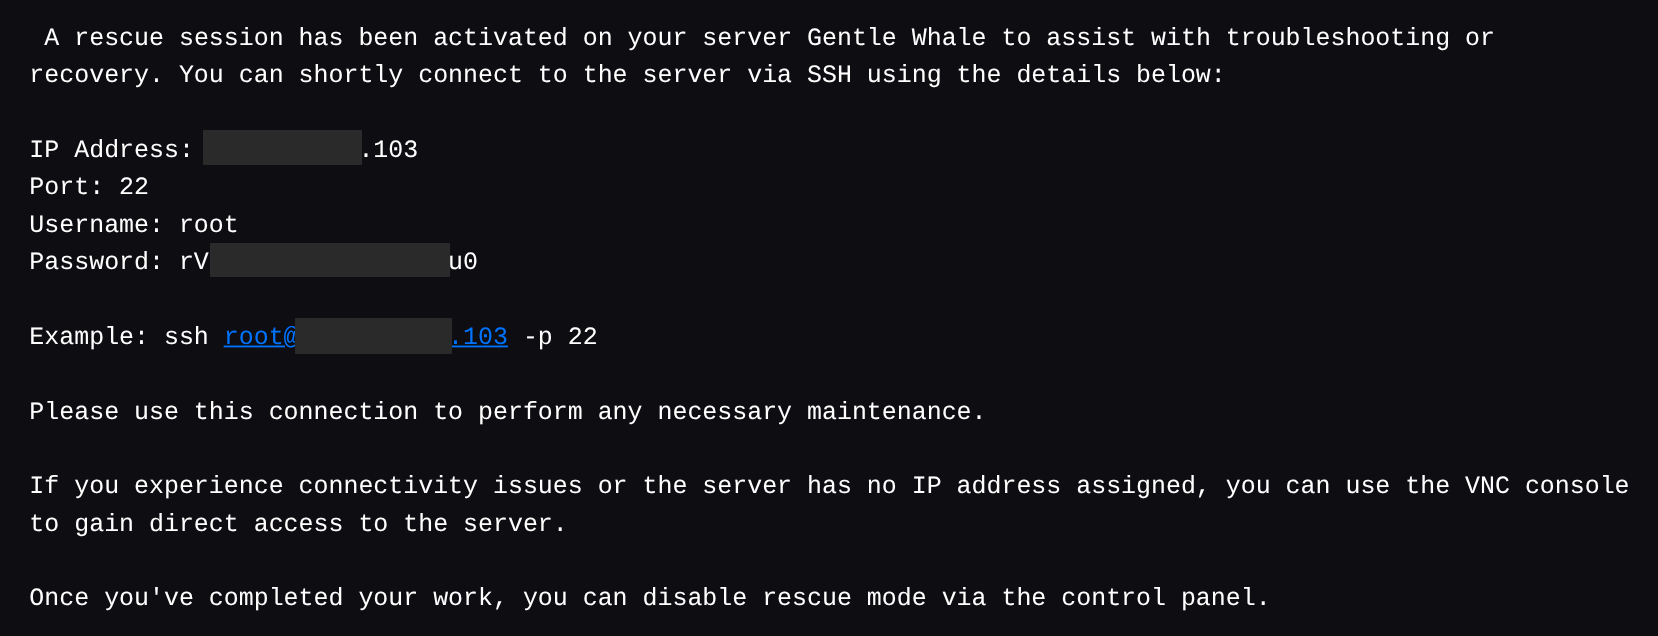 After logging in over SSH, you should be dropped into a dedicated rescue shell.
root@rescue:~#
Method 2: Booting GRML Linux via ISO (Live CD)
If your cloud provider does not have a dedicated rescue mode, but allows you to upload and boot custom ISO images, Grml is an good lightweight Linux distribution that runs entirely from RAM. We will use it as a rescue environment to perform disk image dump.
-
Mount the ISO: Download the Grml ISO and attach it to your instance's virtual CD-ROM drive via your provider's control panel.
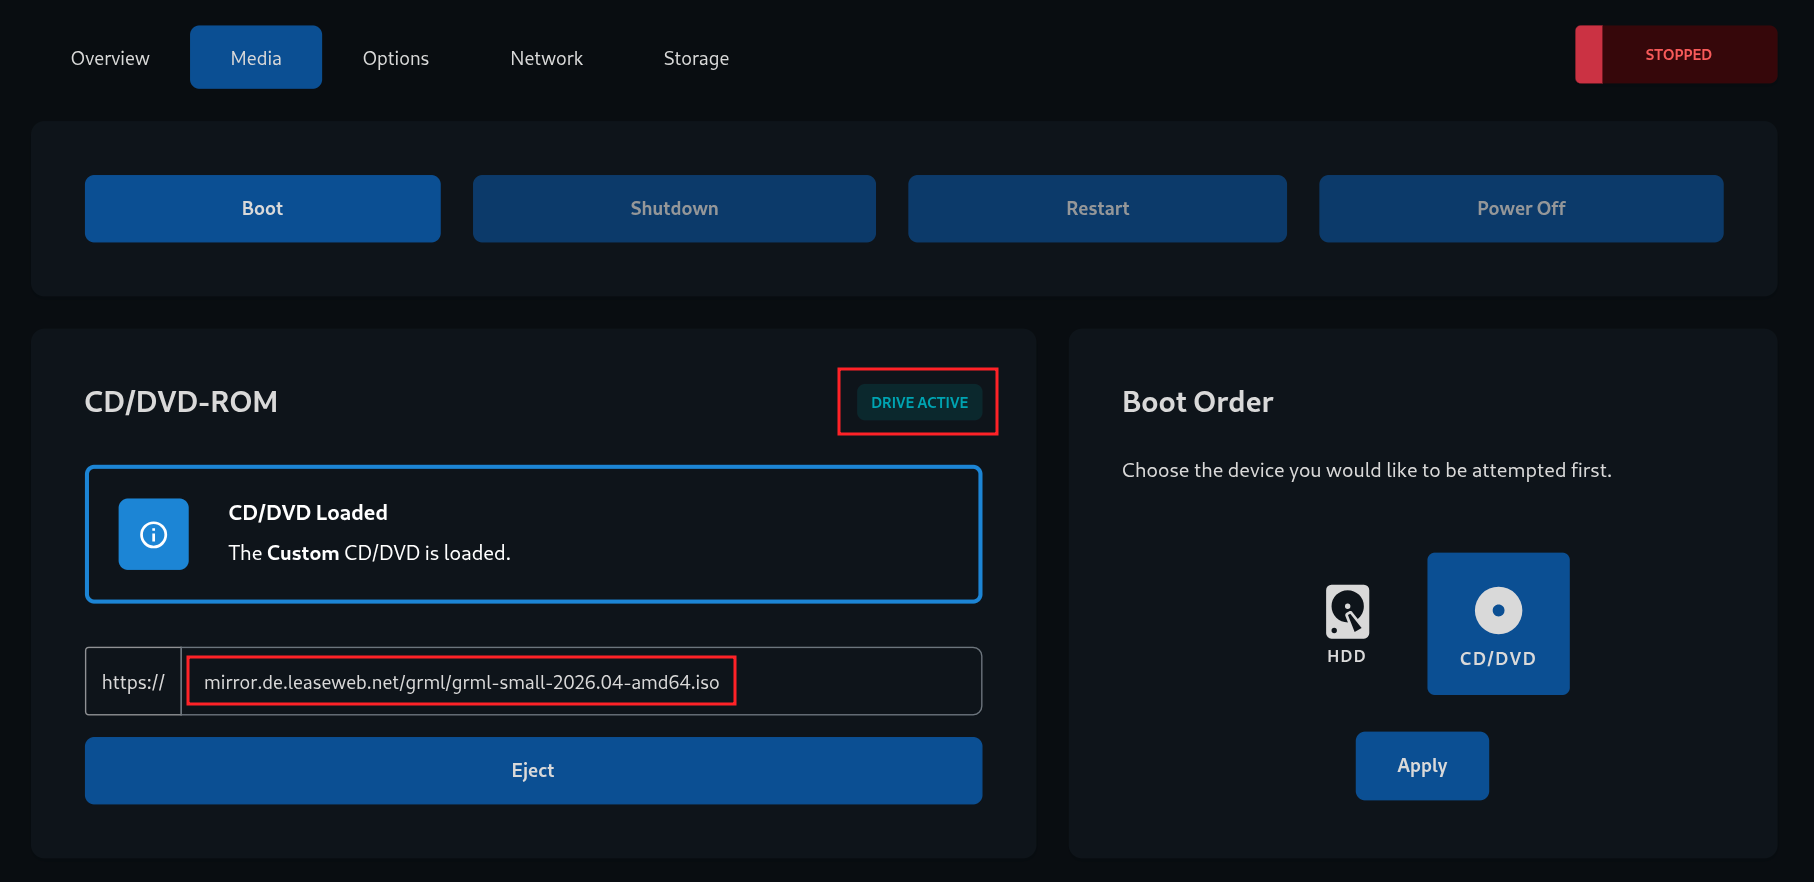
-
Boot from ISO: Force the server to restart and boot from the ISO. You may need to use the cloud provider's VNC/Web console. In there, you will also see the currently active boot method that you should take a note of.

-
Start the SSH Server: Once booted into Grml (username
root, no password by default on physical console), set the temporary password, configure the network and start SSH daemon.$ passwd # set a temporary root password $ grml-network # configure network via TUI (netcardconfig) $ systemctl start ssh
Obtaining the Disk Image
Once your server has successfully booted into your chosen Live/Rescue environment and you have confirmed SSH network access, you can proceed to create the disk image.
First, make sure your Live/Rescue environment has lsblk and zstd compression tools installed.
root@rescue:~# apt update && apt install zstd util-linux -y
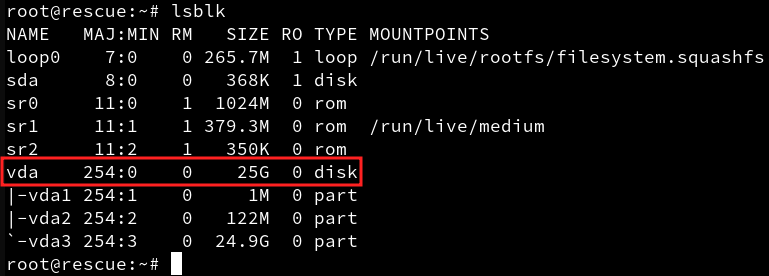
Then, using lsblk find the drive containing the root filesystem of your VM (/dev/vda in our case).
 Then start the transfer process. From your local machine, run the following command to pull the disk image over SSH, compress it on the fly using all CPU cores (
-T0), and save it locally. The progress will be indicated by the stderr output of dd command.
$ ssh root@<server_ip> "dd if=/dev/vda bs=4M status=progress | zstd -T0 -3 -c" > vm-image.img.zst
root@<server_ip>'s password:
26566721536 bytes (27 GB, 25 GiB) copied, 347 s, 76.6 MB/s
6400+0 records in
6400+0 records out
26843545600 bytes (27 GB, 25 GiB) copied, 347.652 s, 77.2 MB/s
Be sure to replace <server_ip> with your actual server IP and /dev/vda with the actual root disk identified during the live boot.
Importing the Disk Image into Onidel Cloud
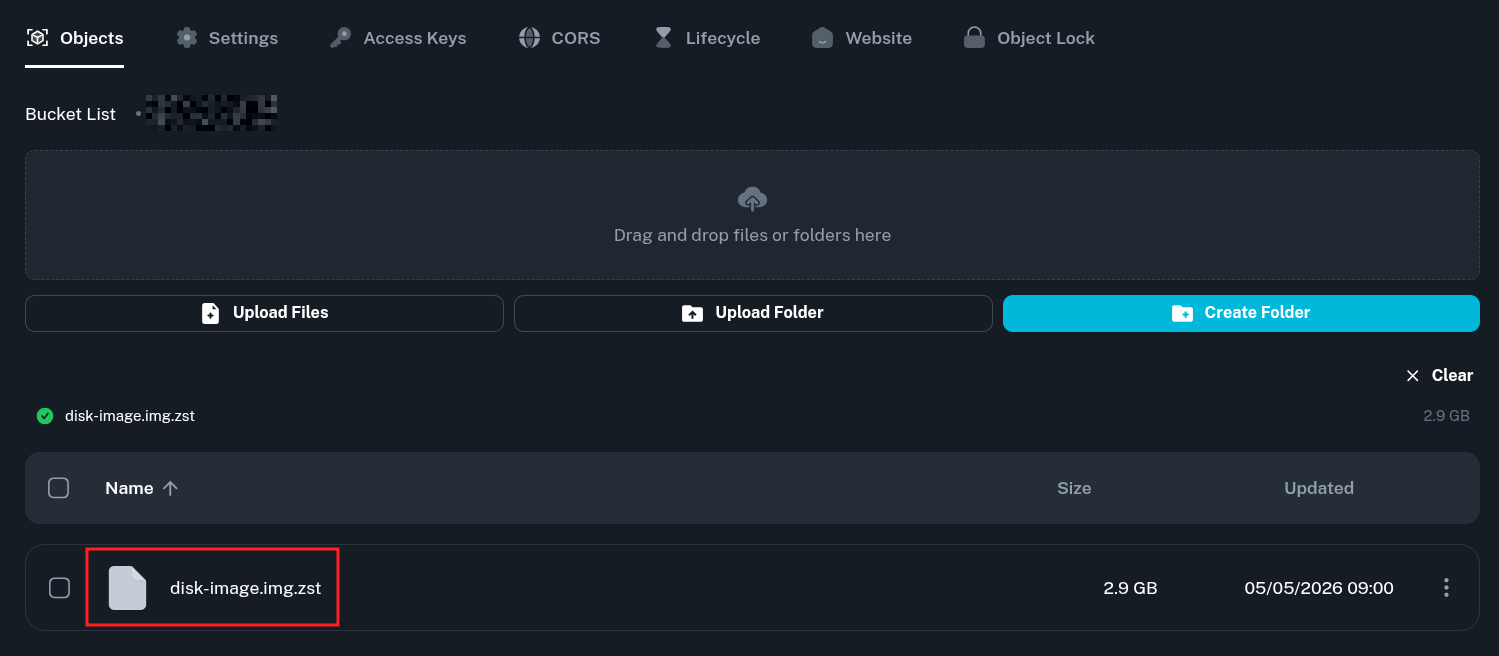
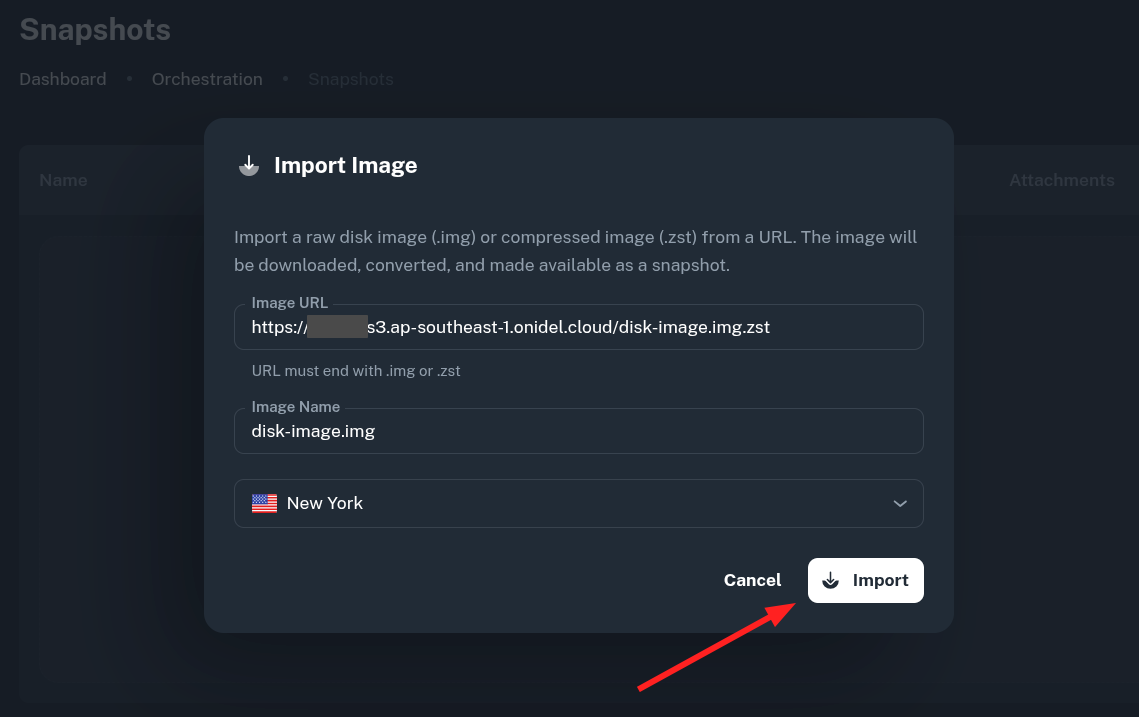
Onidel Cloud Panel only takes the URL address of the image. You will need to temporarily upload it somewhere. In this example, we have uploaded the compressed disk image onto Onidel Object storage.
Since the image will be downloaded over the internet, it is strongly recommended to only serve it over an encrypted HTTPS connection.
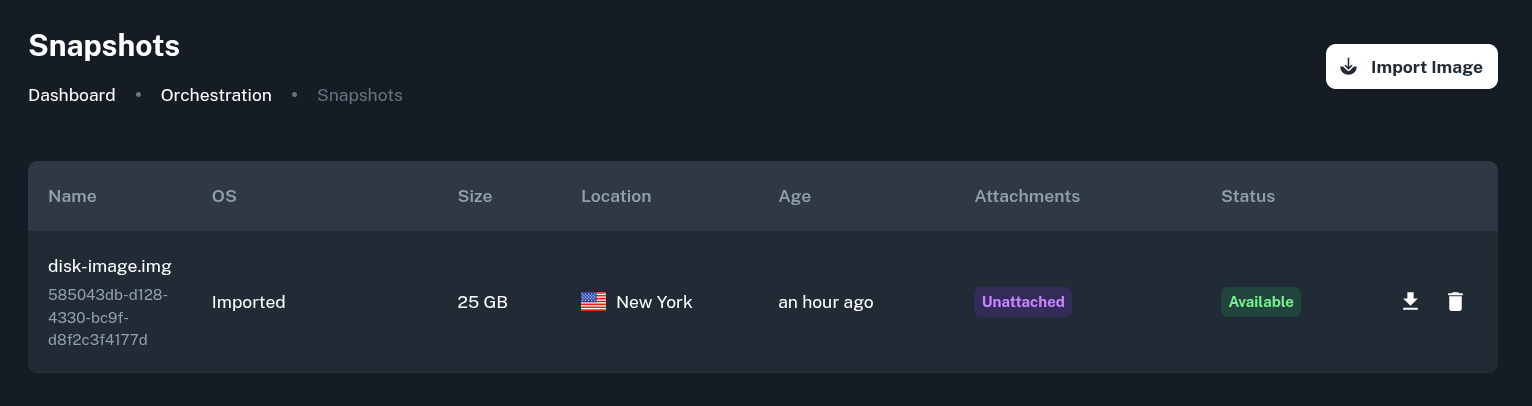
Imported images follow the same scheme as VM snapshots. After the image is successfully added, you are able to restore existing VMs from it or provision new ones which will use the provided disk image.
To import an image, go to Orchestration > Snapshots and then click the Import Image button.
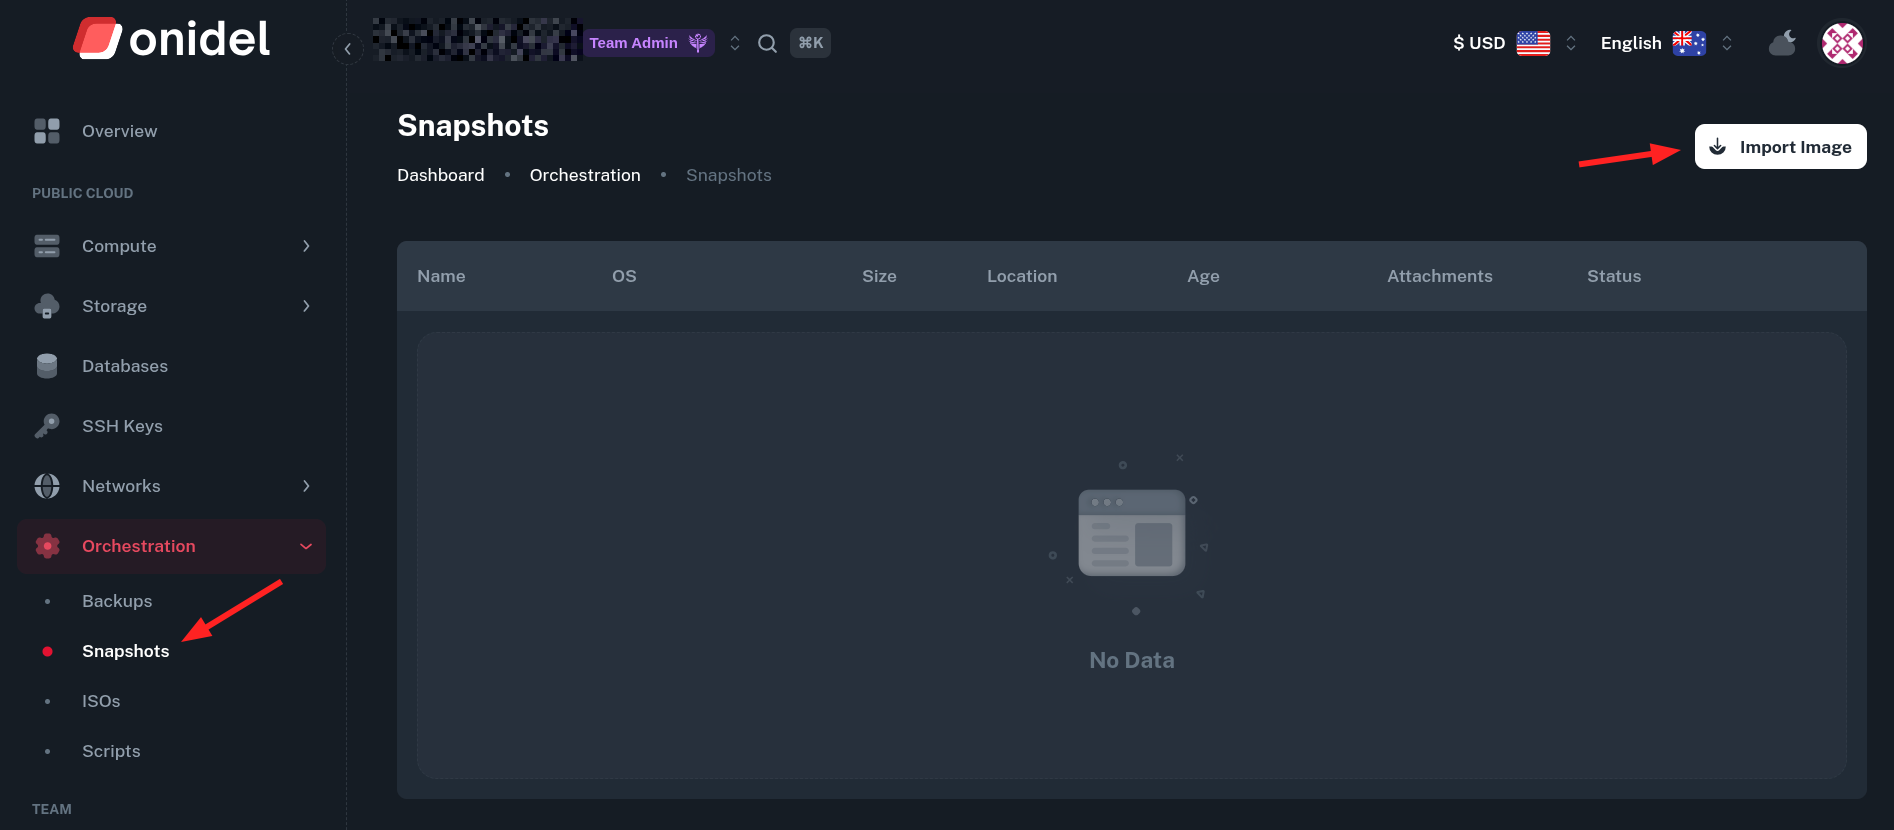
You will be asked to provide an URL to the disk image - either raw (.img) or compressed (.zst), the imported name and location where the image should be imported.
After you click Import, the downloading process should begin.
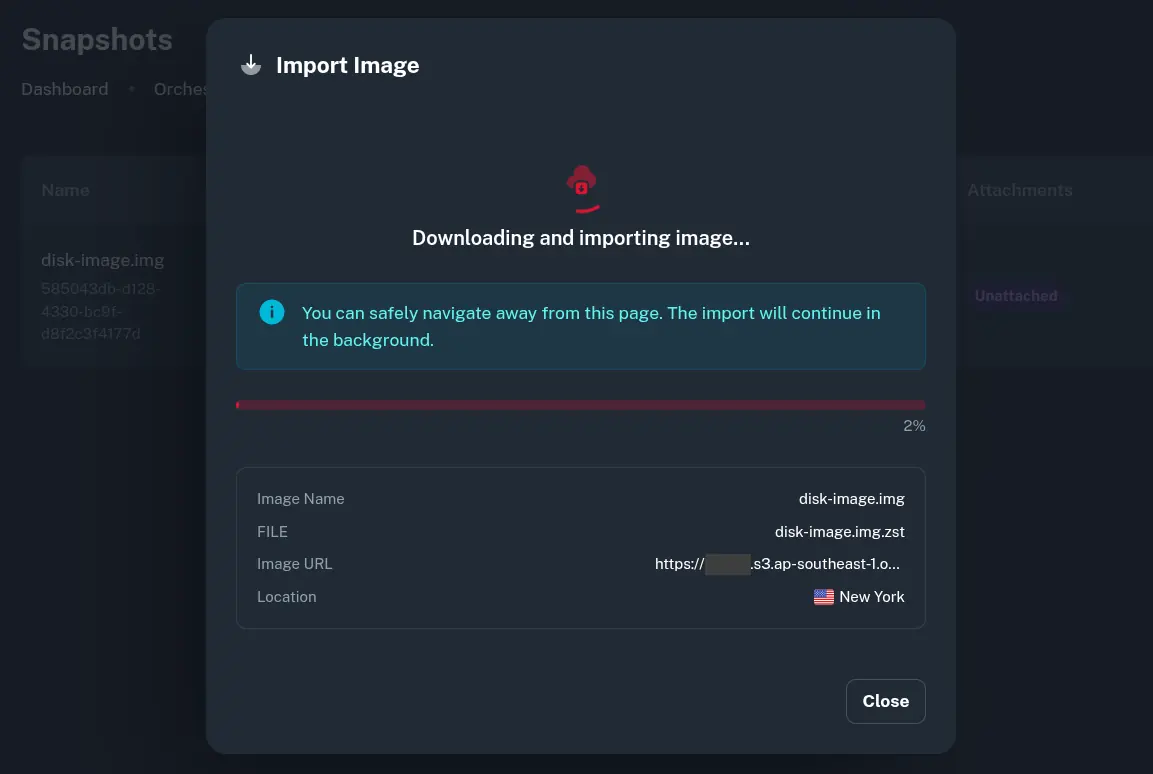
Once the Import process is complete, the image was be retrieved and stored as a Snapshot within the selected location.
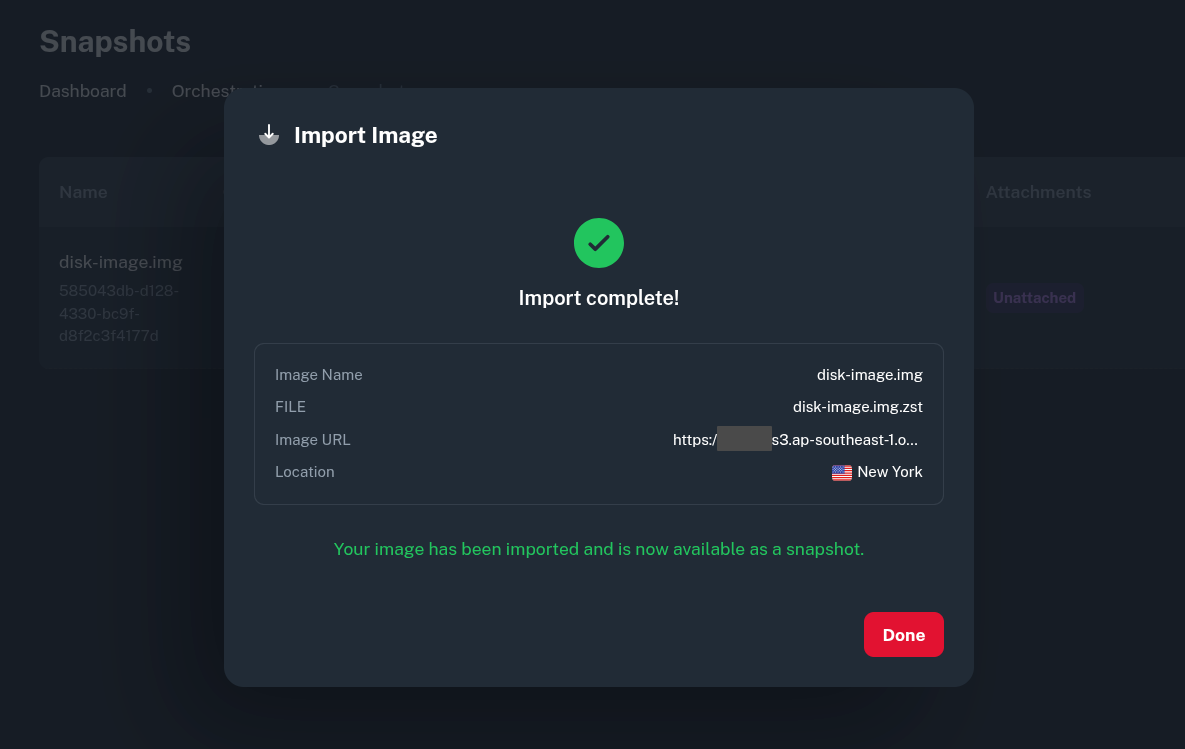
In the Snapshots List, imported image will have the OS field set as Imported.
Creating a VM from Imported Image
Since disk images are imported as snapshots, you can deploy a new VMs selecting the imported snapshot as template in the Software tab.
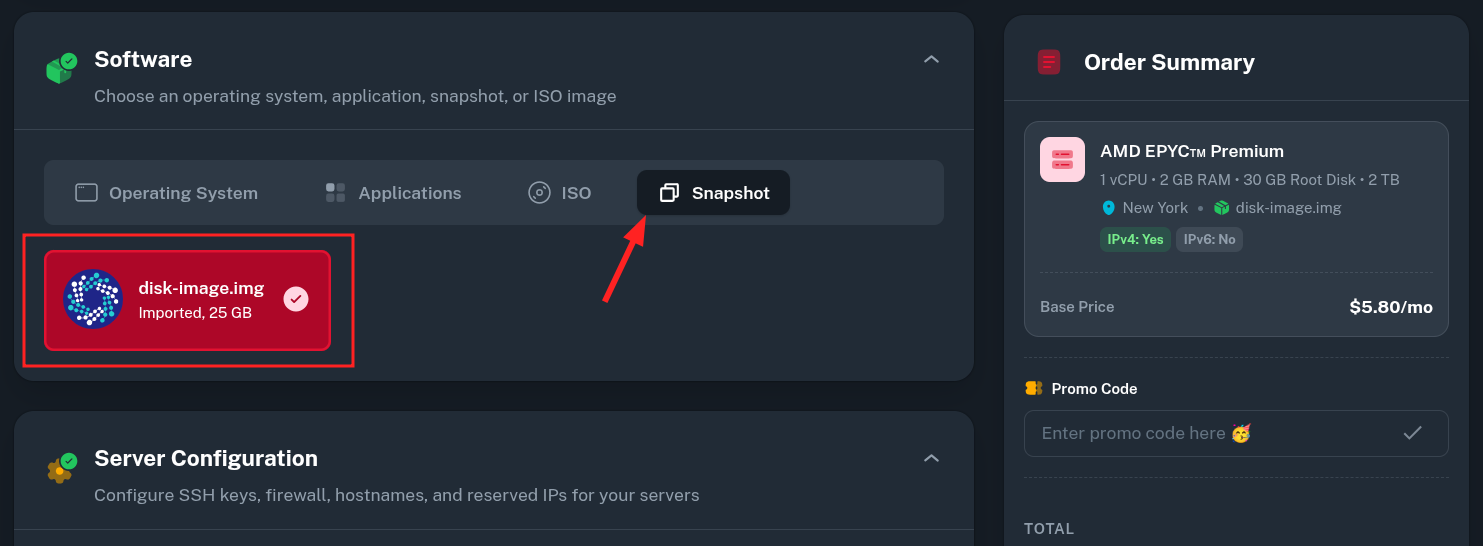
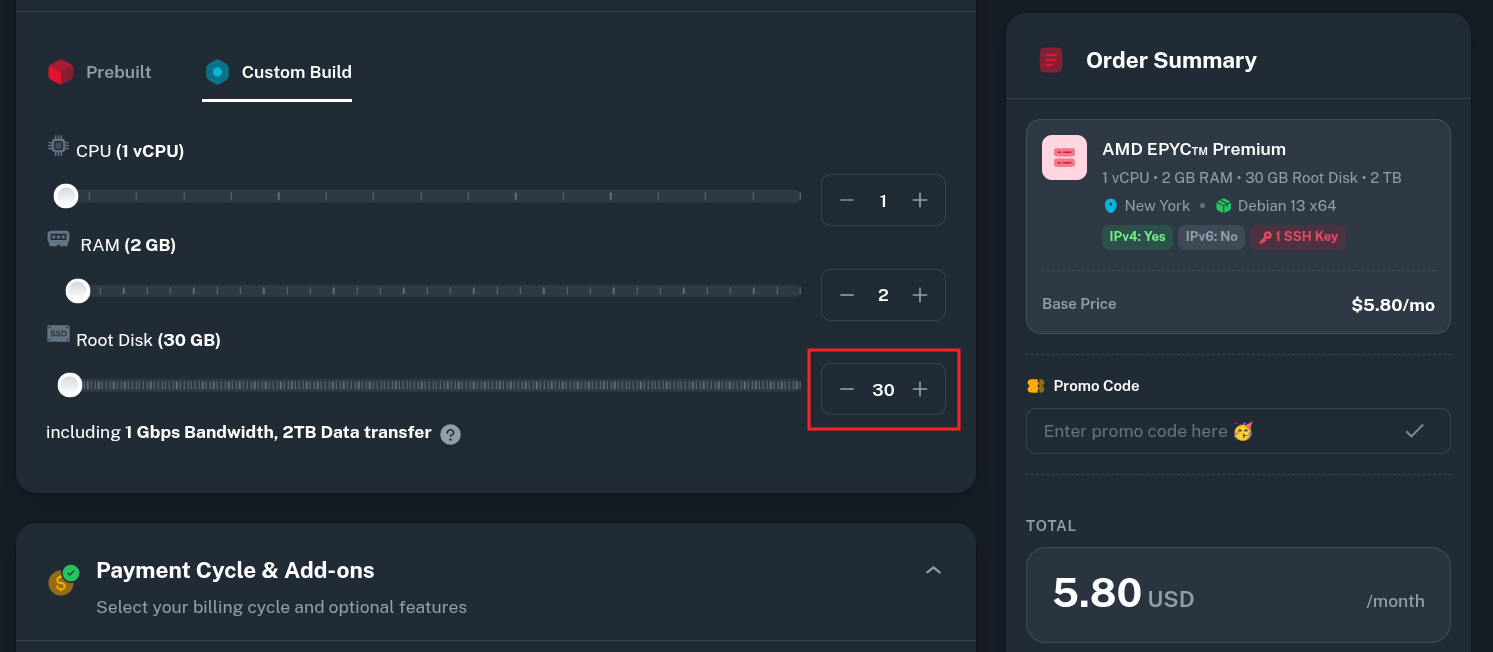
Make sure the Root Disk size is greater or equal the real (uncompressed) size of your imported image.
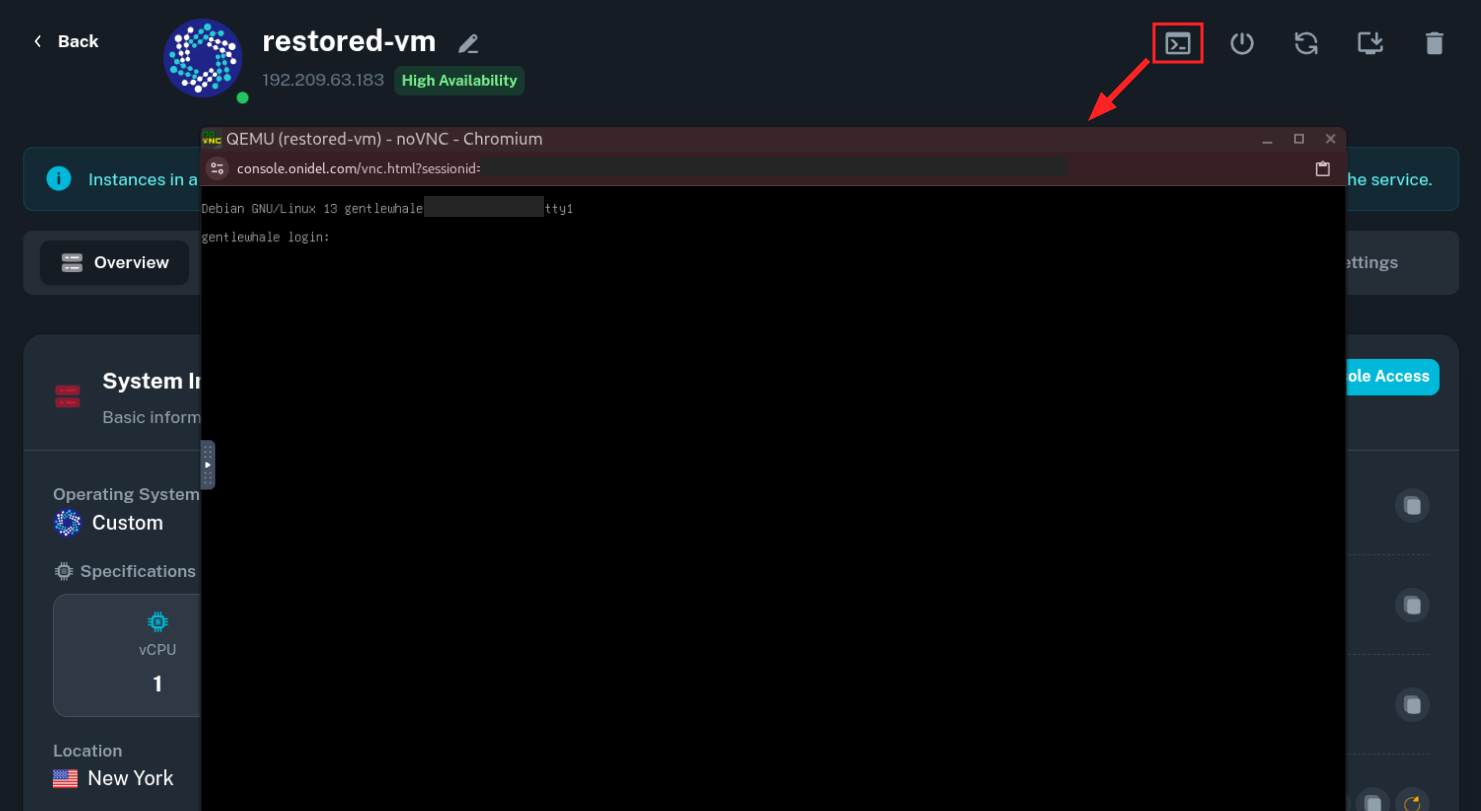
After the VM is provisioned, it should boot from the provided image. If it does not, see the Troubleshooting section below. In most cases you will need to use the VNC console first to perform manual network configuration (changing static IP address, unless DHCP was used previously).
Troubleshooting
If your VM gets stuck before the bootloader is loaded, it is likely a boot mode incompatibility. Make sure you are booting with the same boot mode your VM expects by changing the Boot Mode option in the VM Settings tab.