
Team Management is a built-in organizational feature used to group users who collaborate on shared resources and projects. They let you share resources, billing and control with other Onidel users. Each Team has an owner and members with predefined roles.
Creating a new Team
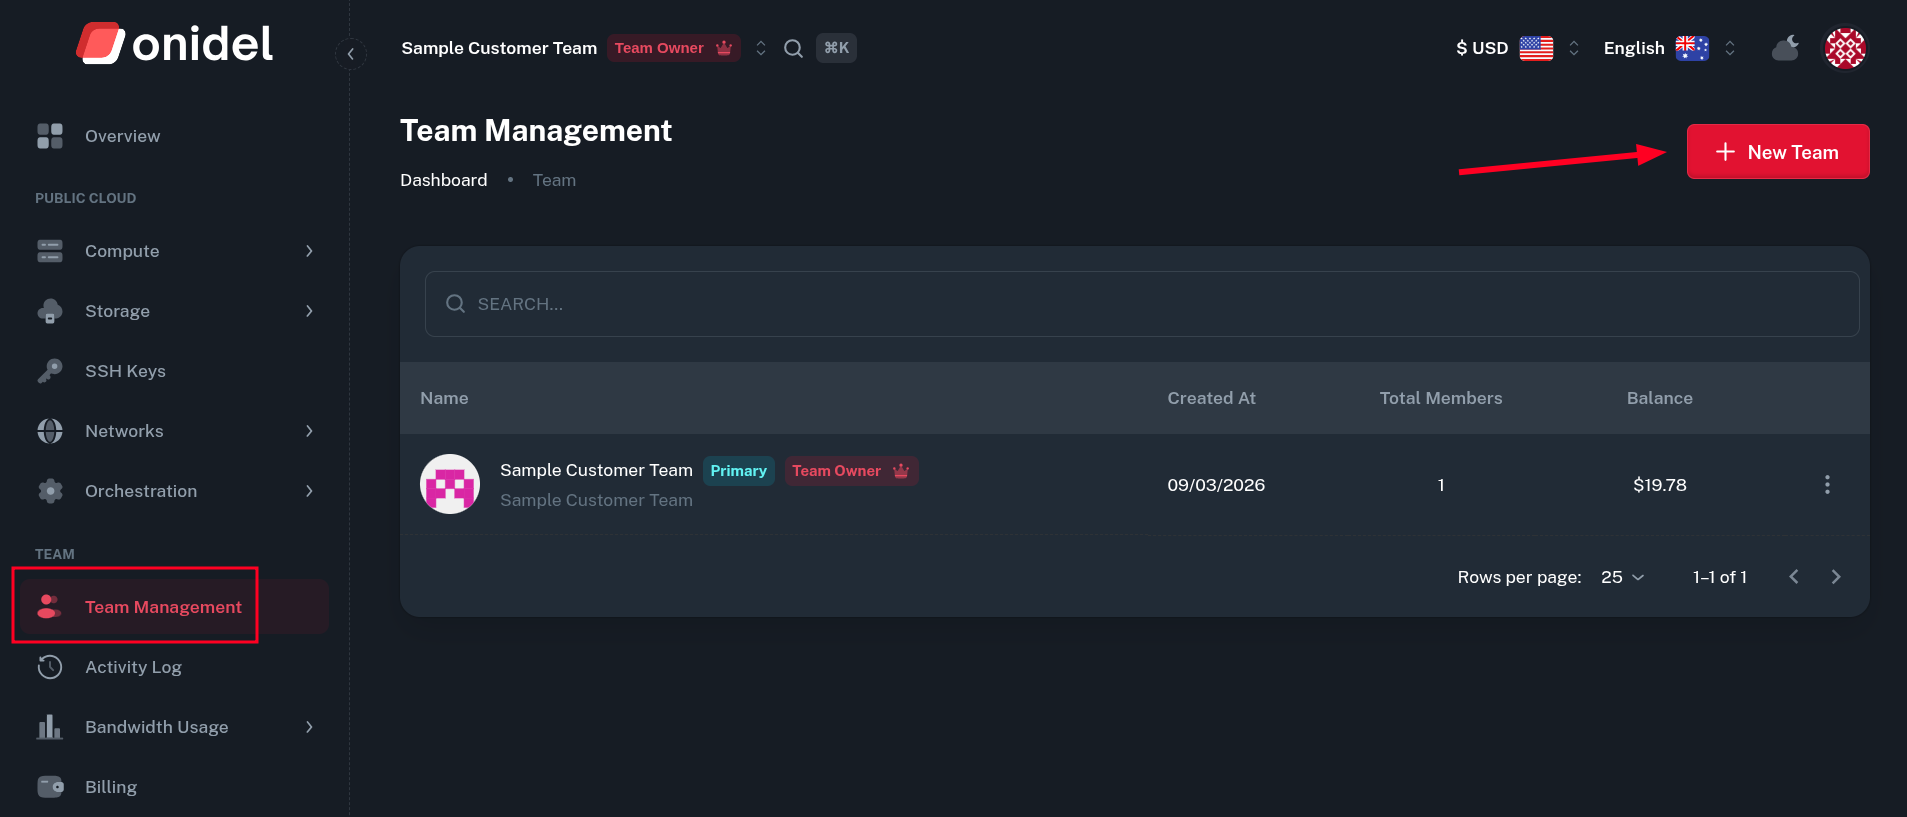
Teams can be created by any Onidel user, right from the Cloud Panel. To create a new team, navigate to Teams > Team Management and click the New Team button.
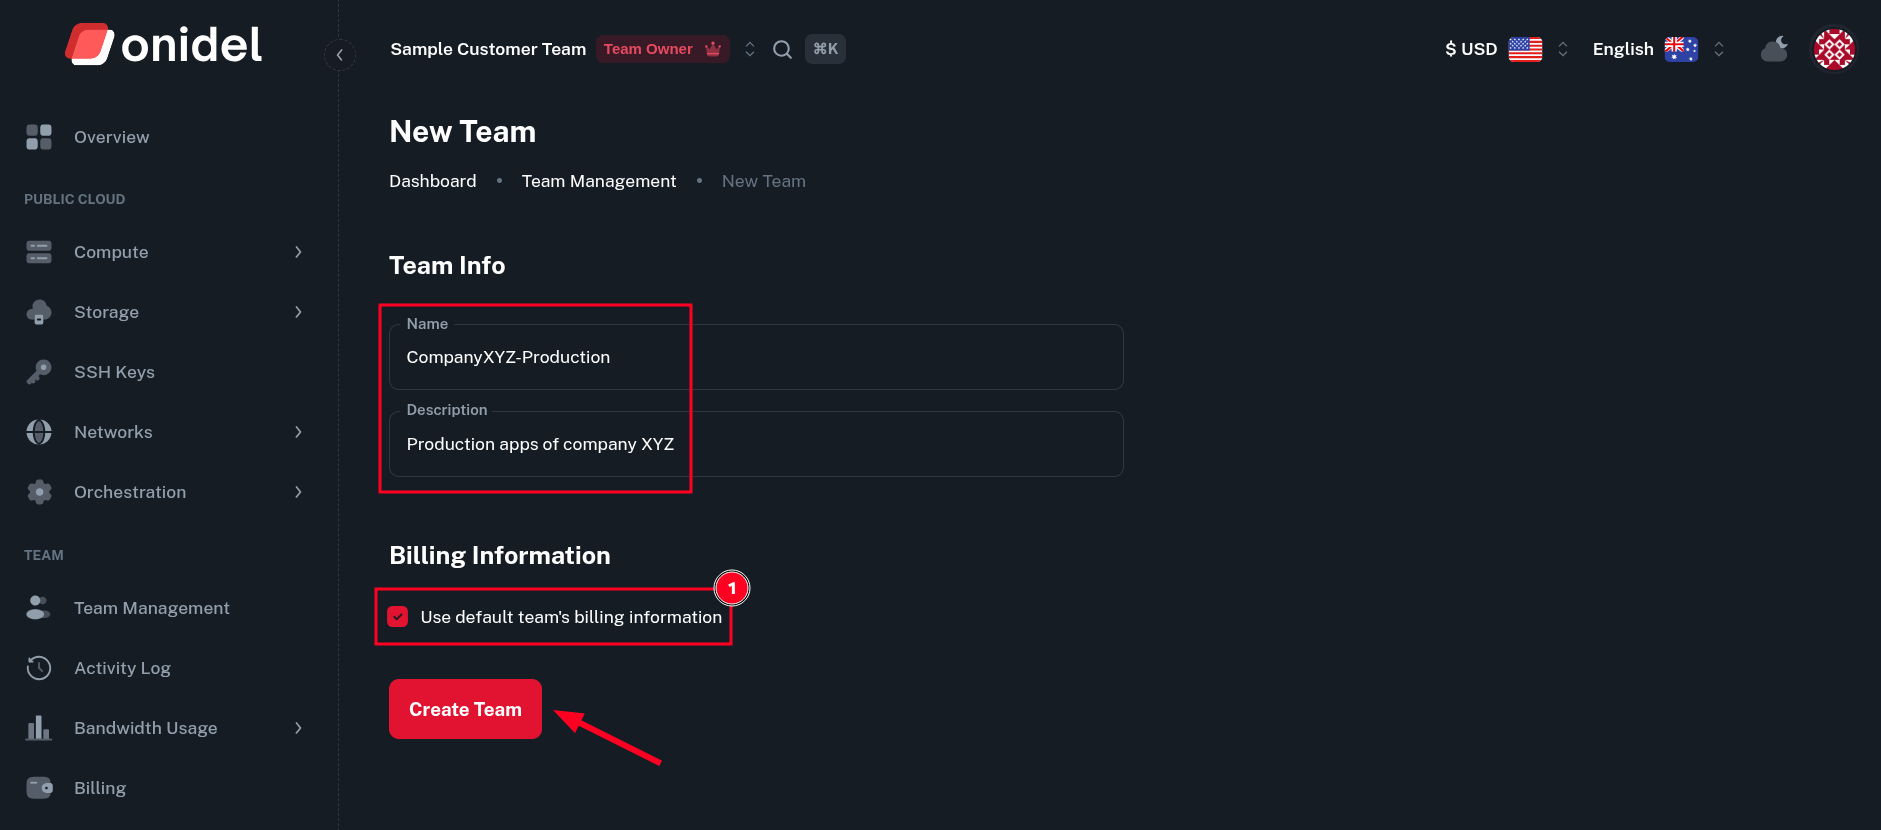
You will be asked to provide a Name and Description for the team. You may use either default team's billing information (1) - usually the billing information of you as a customer, or provide per-team billing details.
After that, click the Create Team button and the team should get created.
Team Billing Information
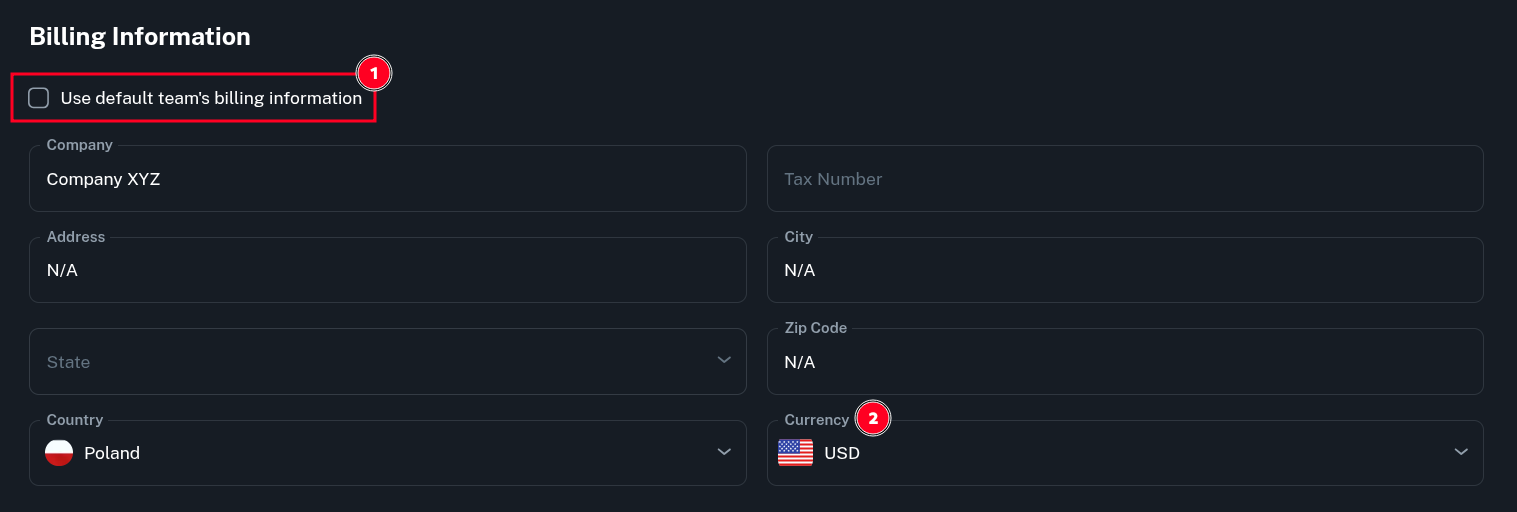
When you uncheck the default team's billing information checkbox, you will be asked to provide team specific details. Here, you may also choose the currency used within team (2).
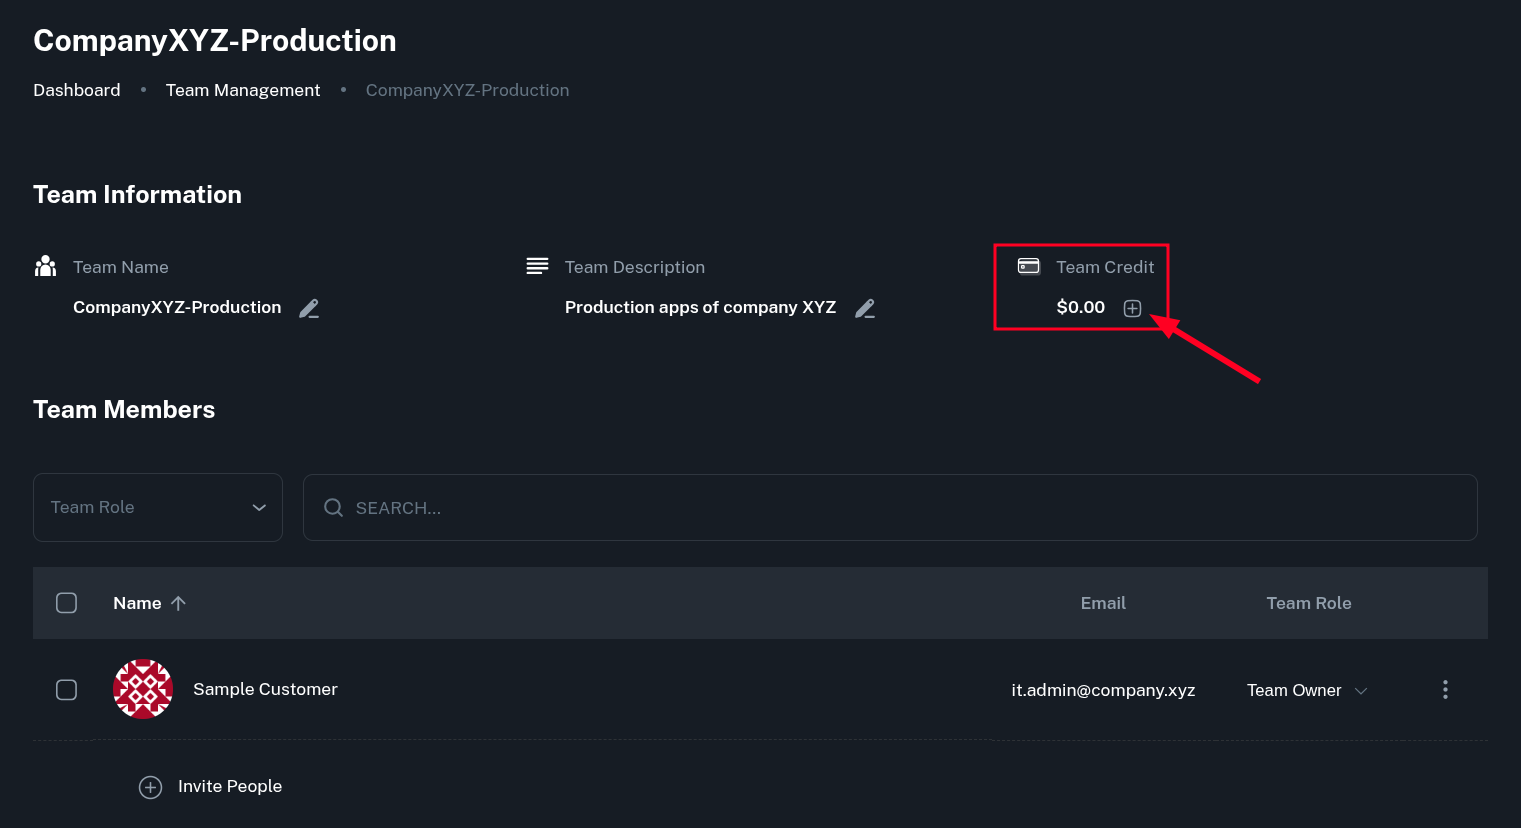
Team Overview
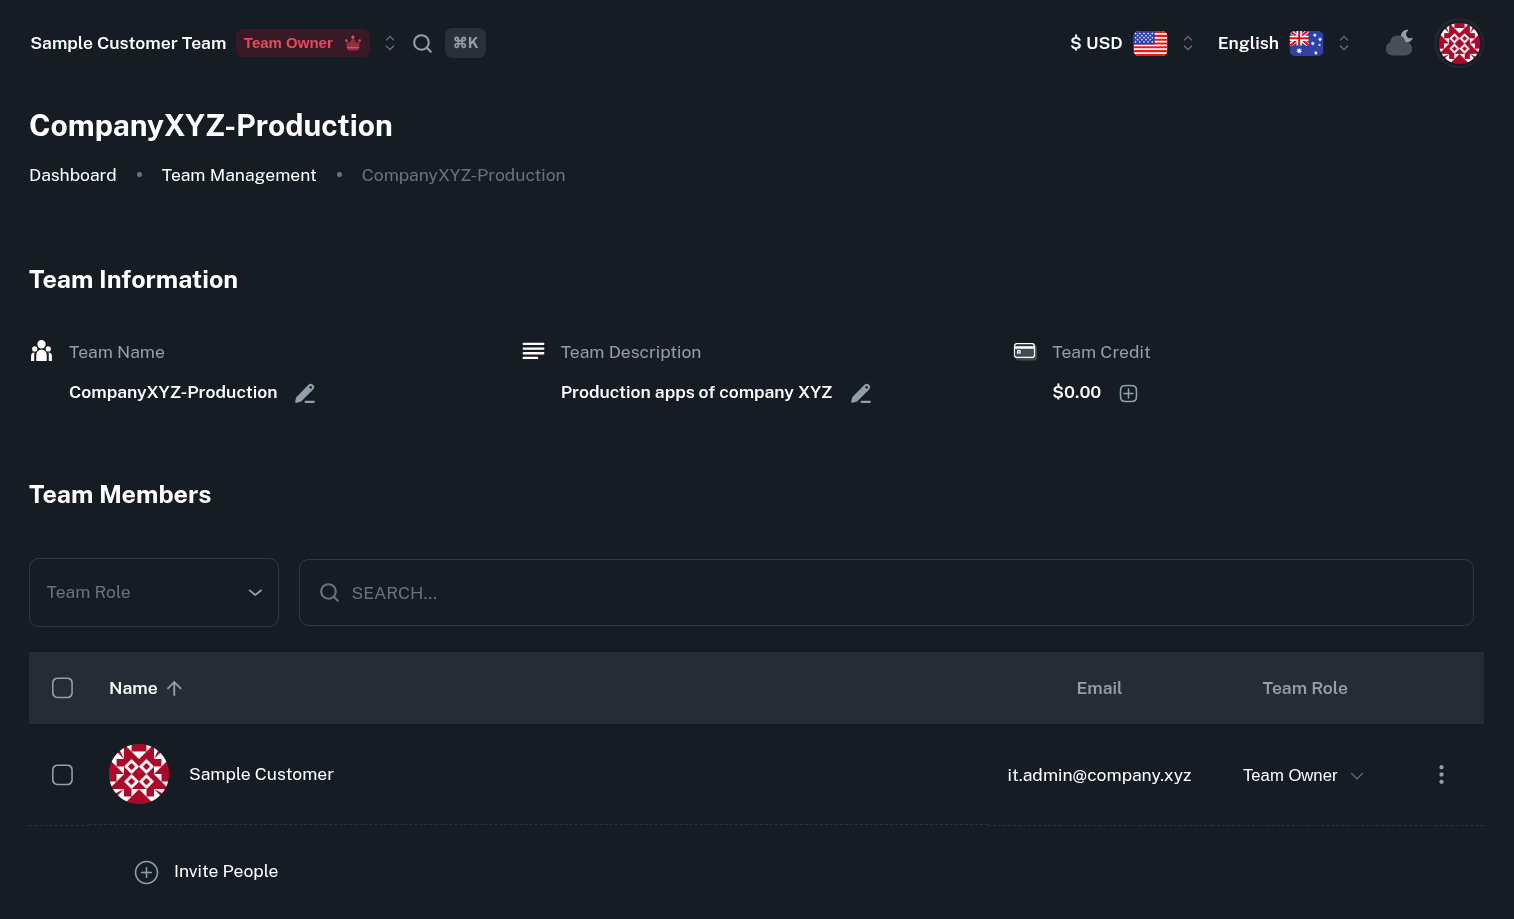
In a newly created team, you will see yourself as a Team Owner and the only member. Team details (name, description) can be changed at any time.
Transferring Funds to a Team
As a Team Admin or Owner, you may add Team Credits. Those funds can be spent by every member of the team without affecting their own account balance.
To make a transfer, select the source Team which you want to get the funds taken from. In our case, this will just be the default user's team, which had account credits topped up before.
To transfer those funds to newly created team, just type in the amount into the input and press the Transfer button.
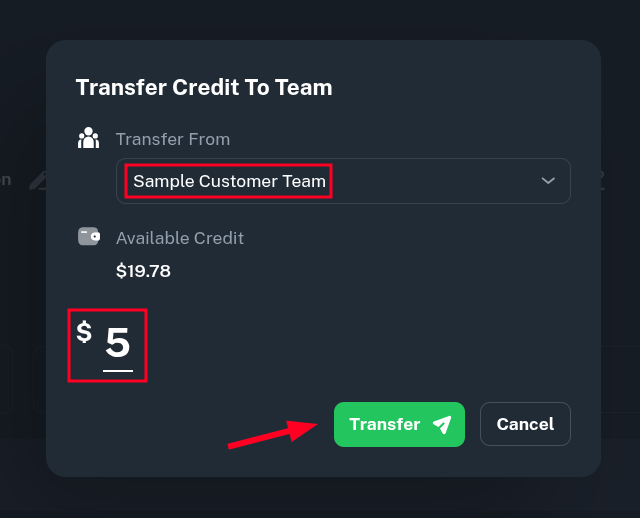
Instantly after that, the credits should appear in the destination team.

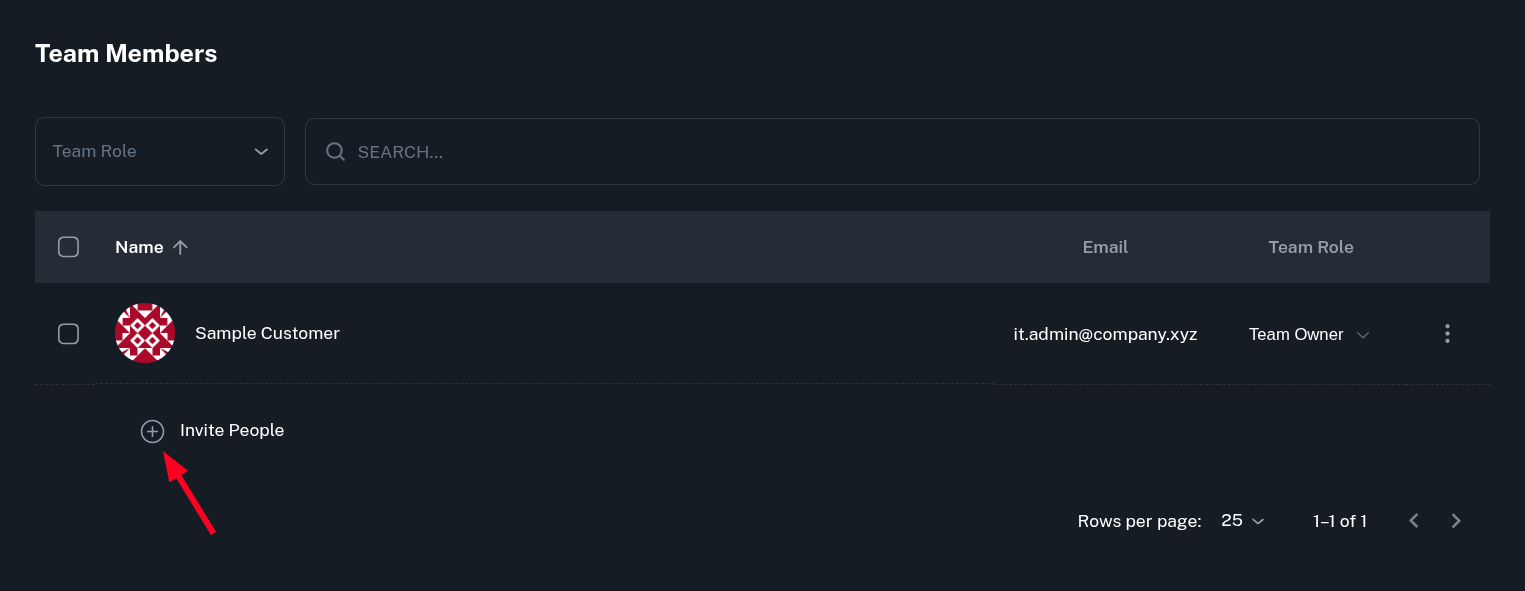
Inviting People
While a team with one person can exist and certainly has some uses (for example changing currency, or just better grouping resources), you may want to invite some collaborators to your team. To do that, as a Team Owner or Admin, click the Invite People at the bottom of the list.
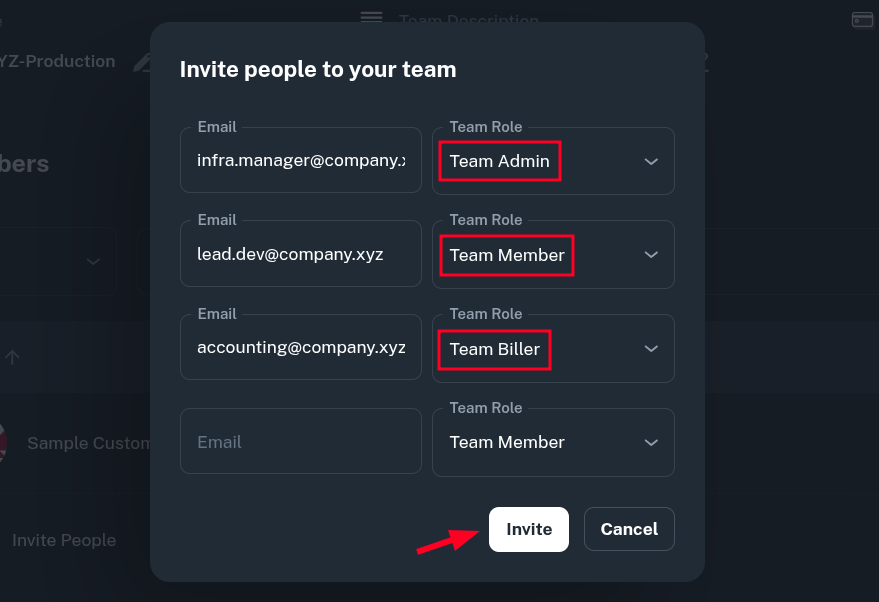
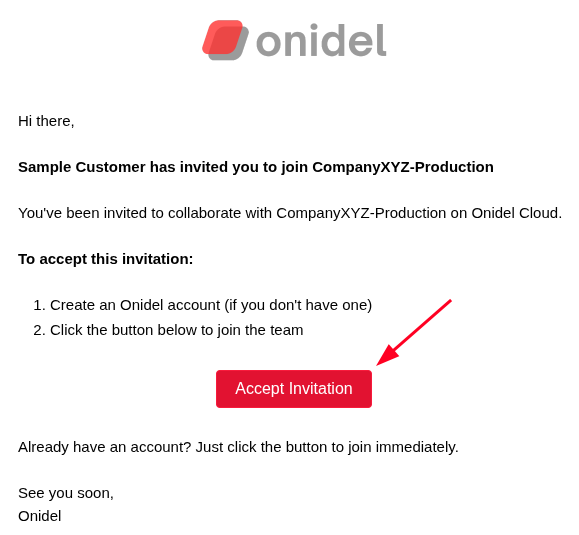
From there, you may invite one or more people by providing their email address and assigning them a role. Even if the person does not currently have an active Onidel account, they will get an email with your invitation to register.
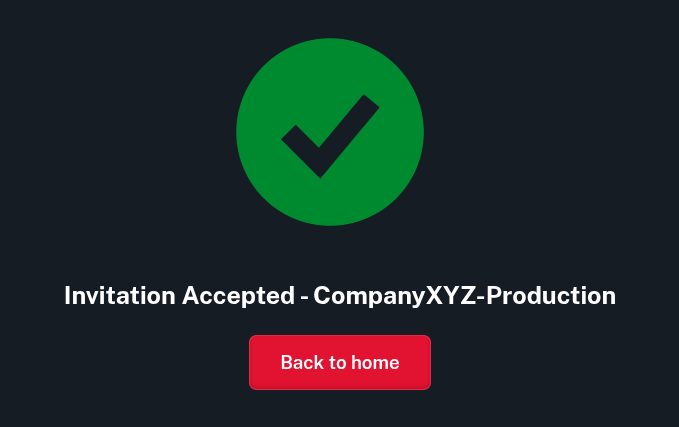
Here is how the invitation email looks like. The invited person, just needs to Accept Invitation and from now they will be a part of your team.
Roles
In the Team, each user has a role. These roles define what actions a user can perform, what resources they can access, and how they interact with the cloud environment. Below listed are all 4 currently available roles from least to most privileged.
Team Biller
Person responsible for billing within a team - the one who pays invoices and manages costs.
Team Biller can:
-
View the active services
-
Pay Invoices
-
Access Activity Log
Team Member
Member of the team, they can create manage shared VM instances and other services within the team.
Team Member can also:
-
Create and manage services (VMs, Storage, Reserved IPs, etc.)
-
Configure Firewall Rules
-
Create and use the VPC network
Team Admin
Person managing the team.
Team Admin can also:
-
Manage users and permissions within team (levels lower than Admin)
-
Add funds to the team
Team Owner
The user who originally created the team.
Team Owner can also:
- Add or remove Team Admins
Each team role has access to what the roles above them have + a new set of permissions listed.
Activity Log
The Activity Log is a centralized audit trail that records all actions performed by members of a team on the Onidel Cloud. It is designed to provide transparency, traceability, and accountability across all team operations.
The Activity Log enables teams to:
-
Monitor user activity in real time or retrospectively
-
Investigate issues and anomalies
-
Support compliance and auditing requirements
-
Track operational and financial events
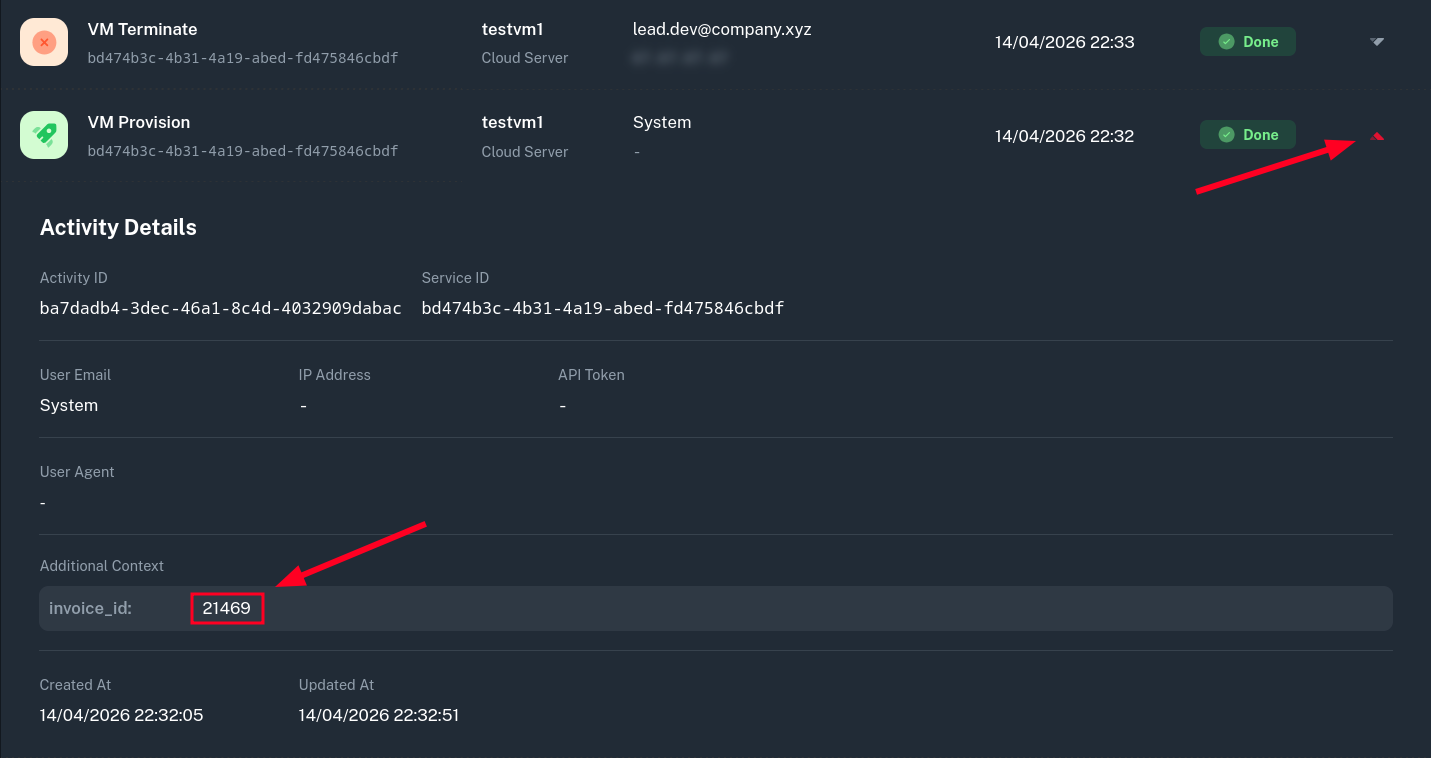
You can access it by going to Team > Activity Log in Onidel Cloud Panel. There is a list of all actions and events in chronological order.
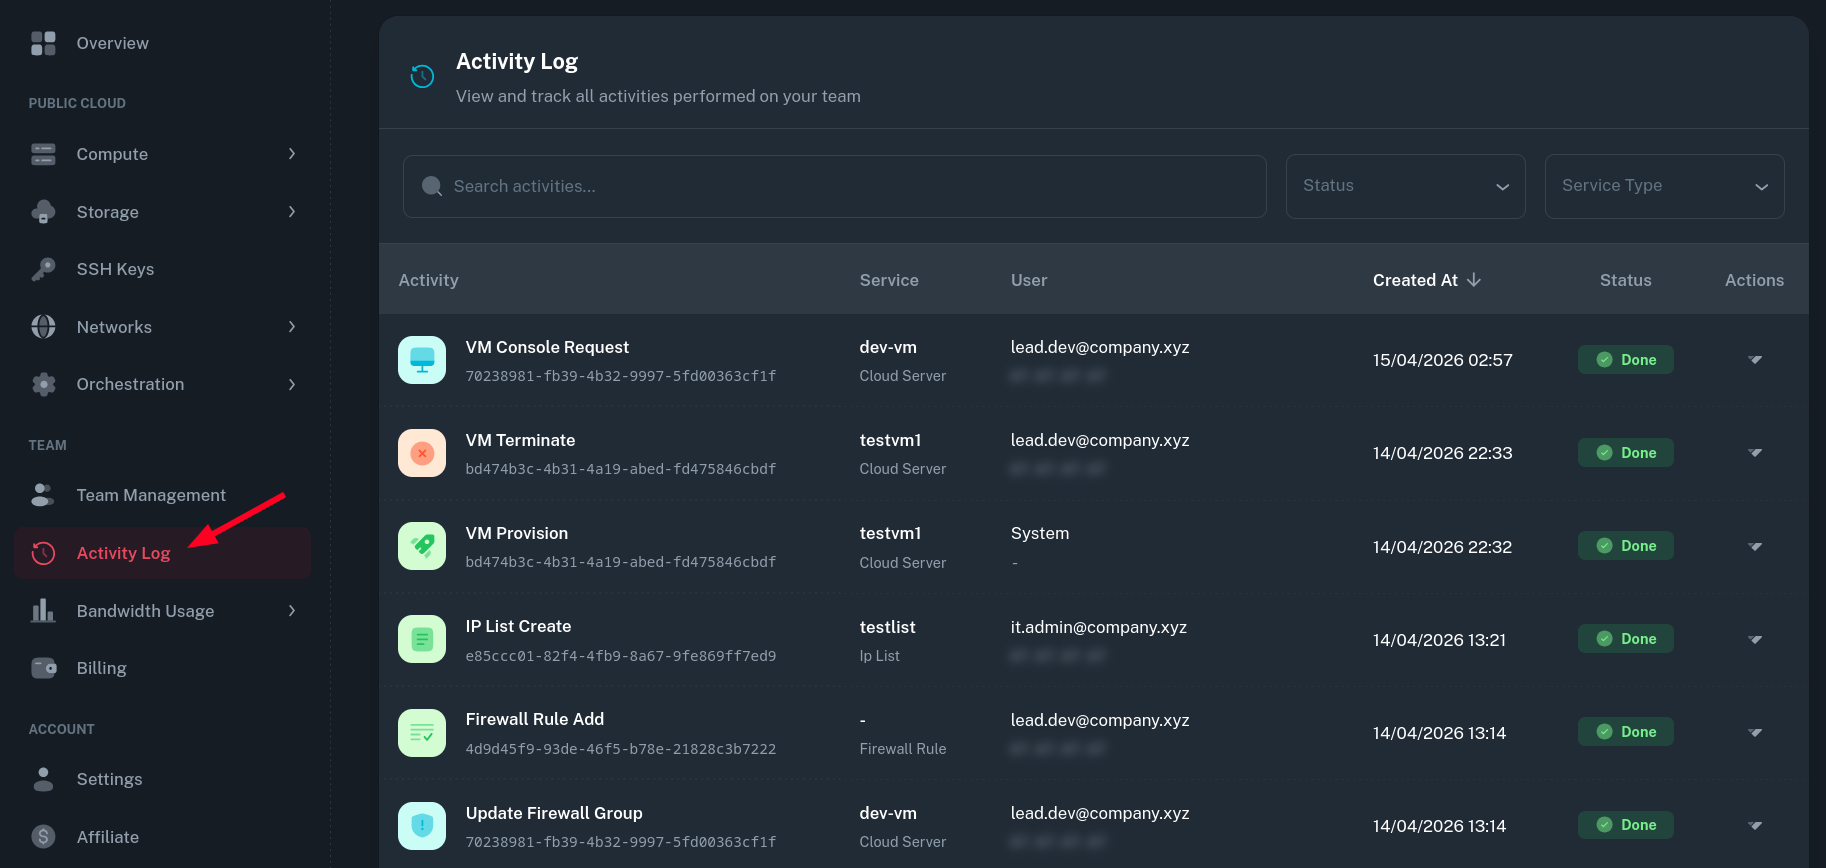
Each Activity has its own associated details. It contains necessary data about the environment the action was performed from and the additional context which may be helpful to trace it.
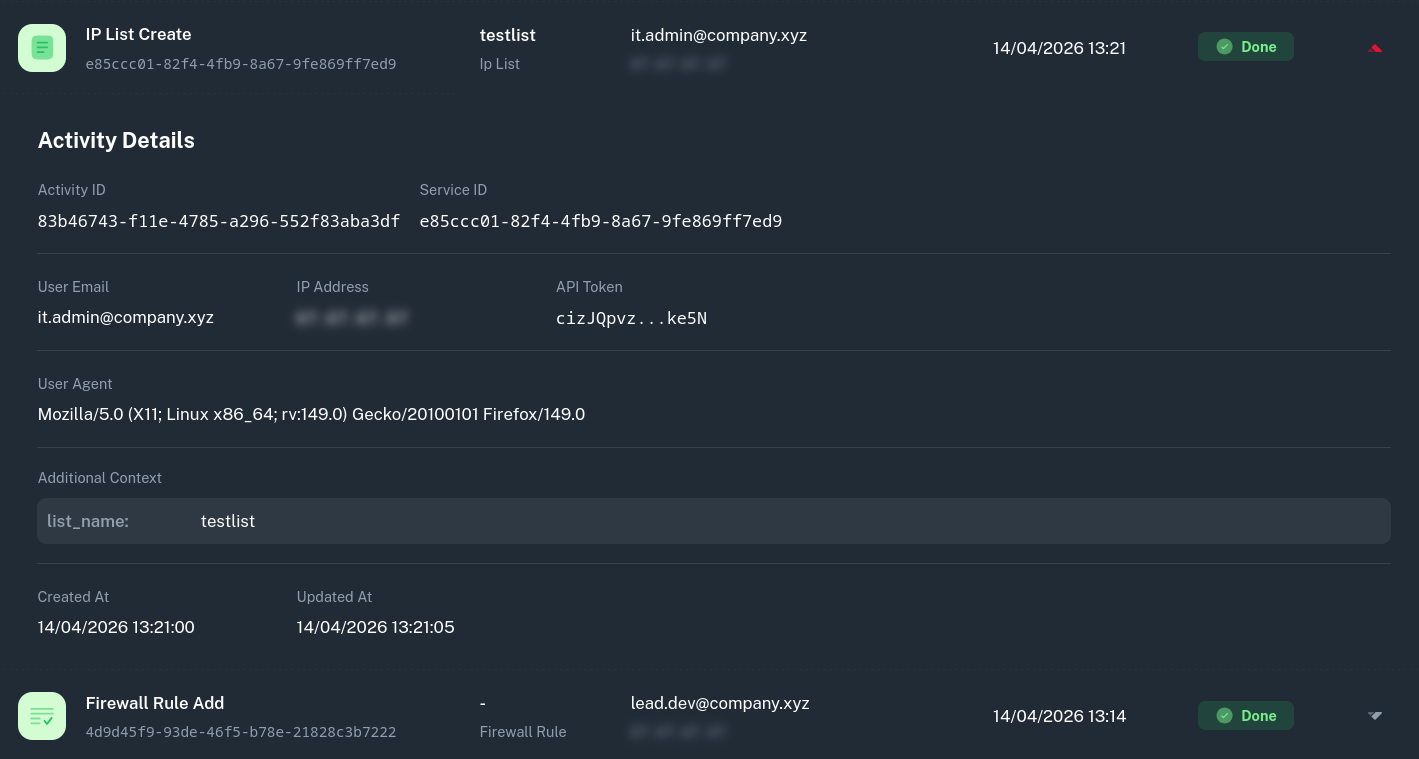
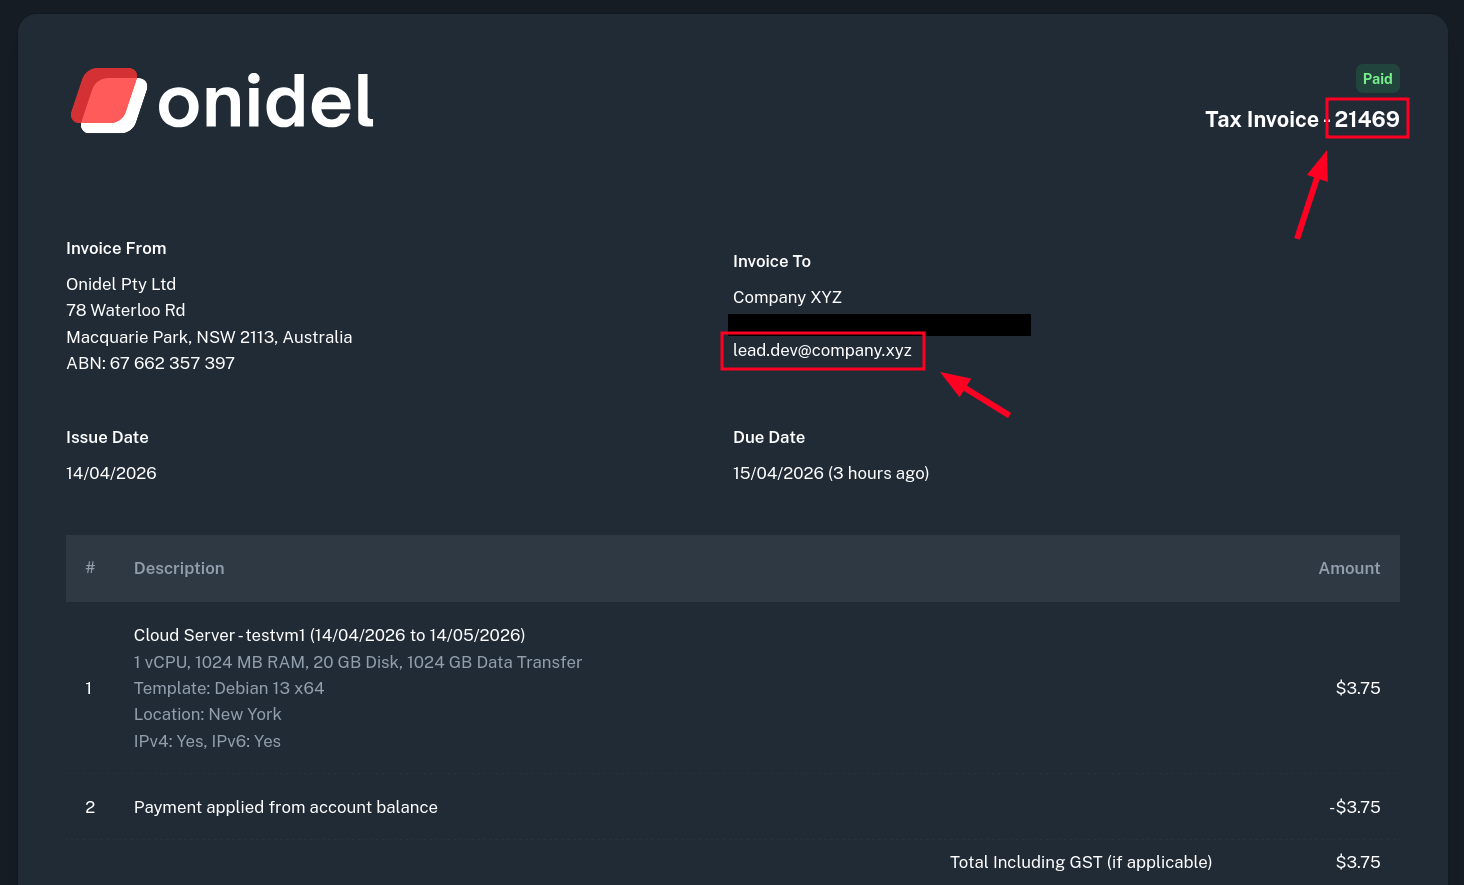
Some activities (like VM provisioning after the invoice is paid) are performed by System. You may use the Additional Context to find relevant invoice which triggered the operation.
Changing Primary Team
You may want your new team to become the default one. It is especially useful when the account is intended for mostly collaboration (for example within a company or organization) rather than for personal use. The steps required to change it are already described as part of a different tutorial.
Moving Services Between Teams
While moving services between different teams is not generally possible from the panel, you may ask for the resource to be moved by opening a ticket. You need to be an owner of both the source and destination teams for the transfer to be performed.