
It is now possible to change the primary IPv4 address of your Onidel Cloud instance and the process is fully automated.
Price
The IP change has a one time fee associated:
-
$3 - change to a different, random IPv4 address
-
$6 - change to an IPv4 address in a specific subnet
Preparation
In order to minimize downtime caused by IP change, we will have the VM Console opened beforehand. This allows to quickly modify and apply the static IPv4 configuration once IP gets switched.
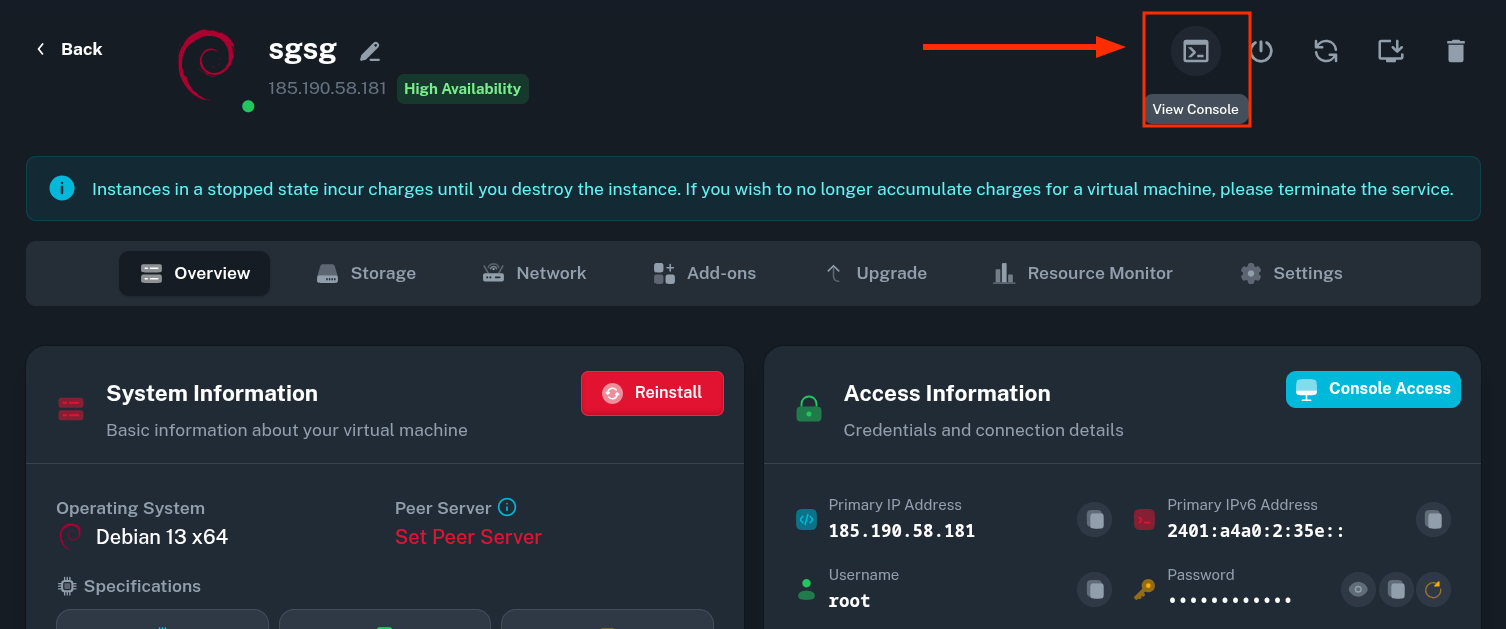
To open the console, find your VM instance in the panel and click View Console / Console Access button.
There, log in as root and open relevant network configuration file in nano (or other text editor).
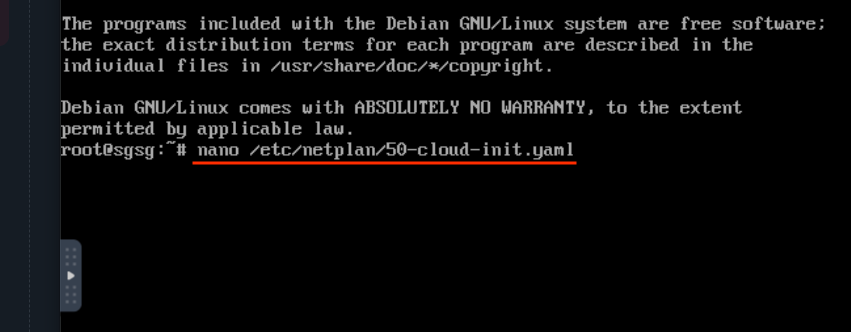
In our default templates, the network configuration is managed by netplan and generated automatically using cloud-init. The path is /etc/netplan/50-cloud-init.yaml.
Changing IPv4 address
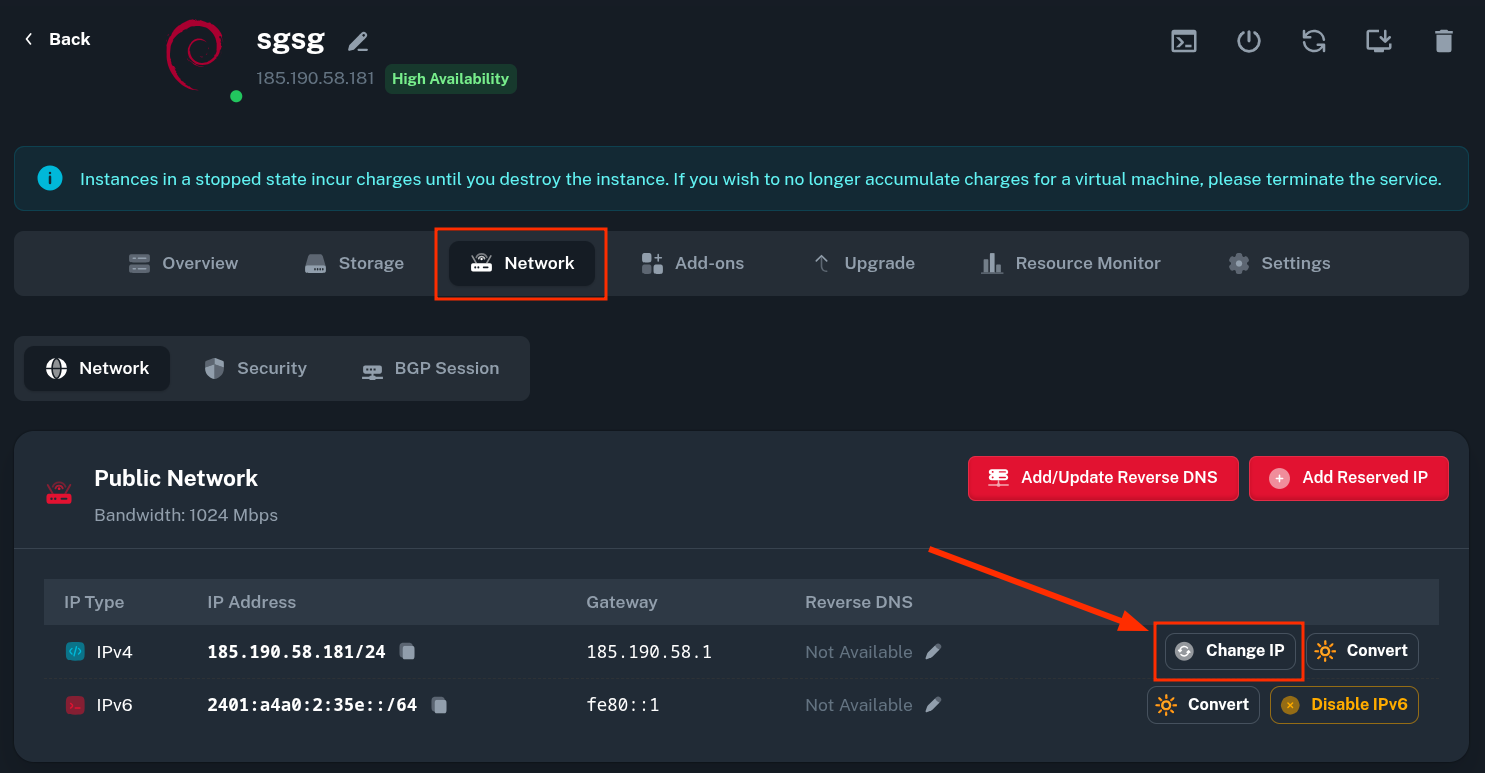
The IP can be changed by going to your instance's Network tab and clicking the Change IP button next to primary IPv4 listed.
The modal should open and ask whether you wish to change the IP to a random one, or pick a subnet yourself.
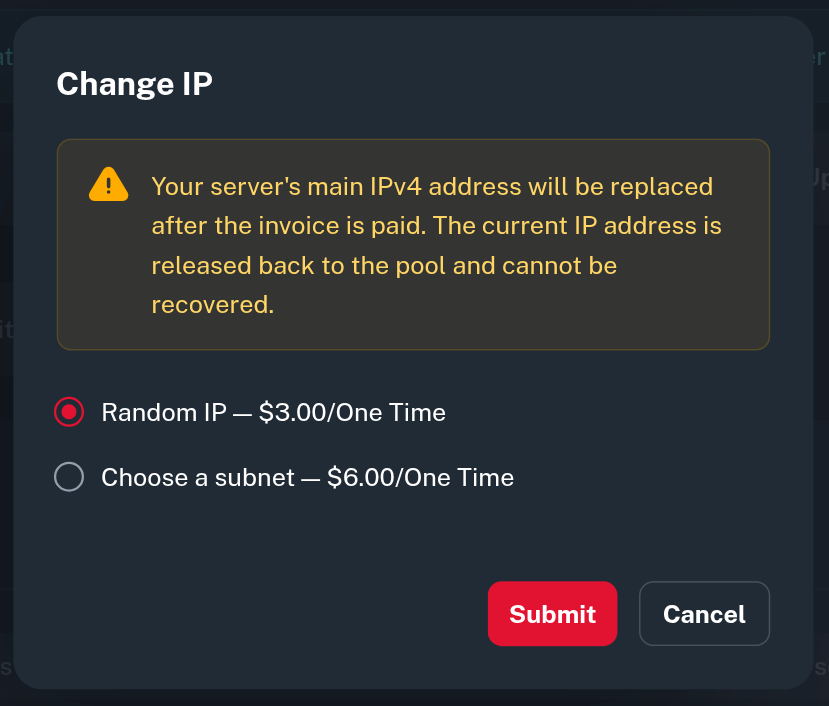
In this guide, we will choose a specific subnet.
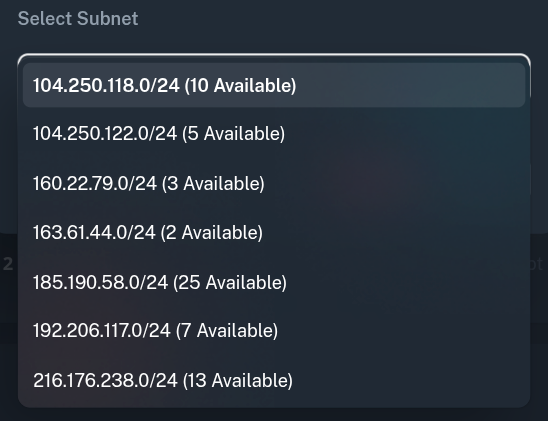
You can also see current availability of IP addresses in each of listed prefixes.
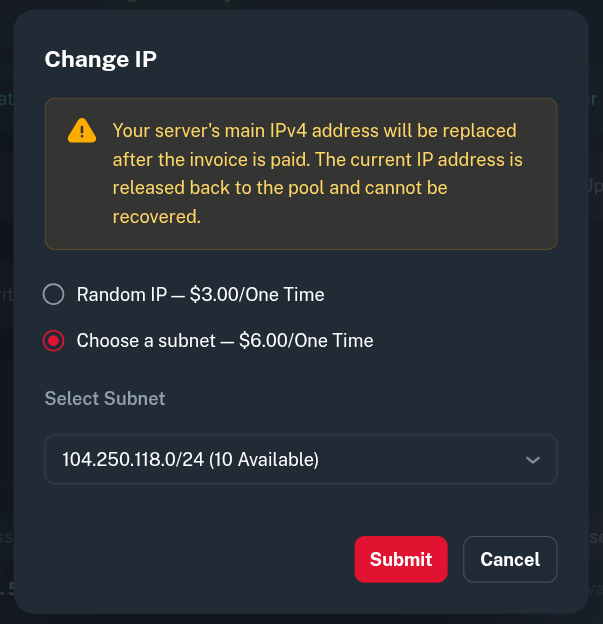
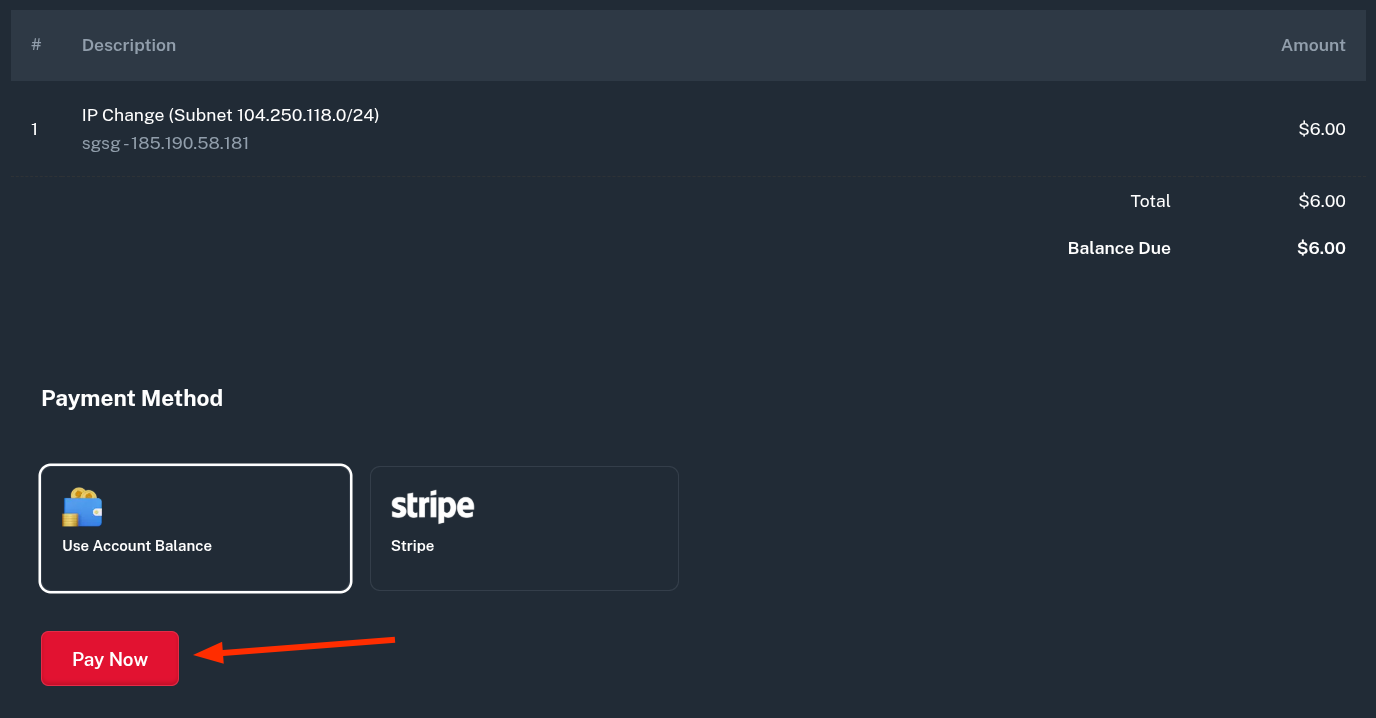
Once you click Submit, a new invoice will be generated.
After it is paid, the IP address should be changed within a few seconds.
Applying the new network configuration
Now, going back to the VM Console with network configuration opened, you should edit and apply the static IPv4 network configuration of your Operating System.
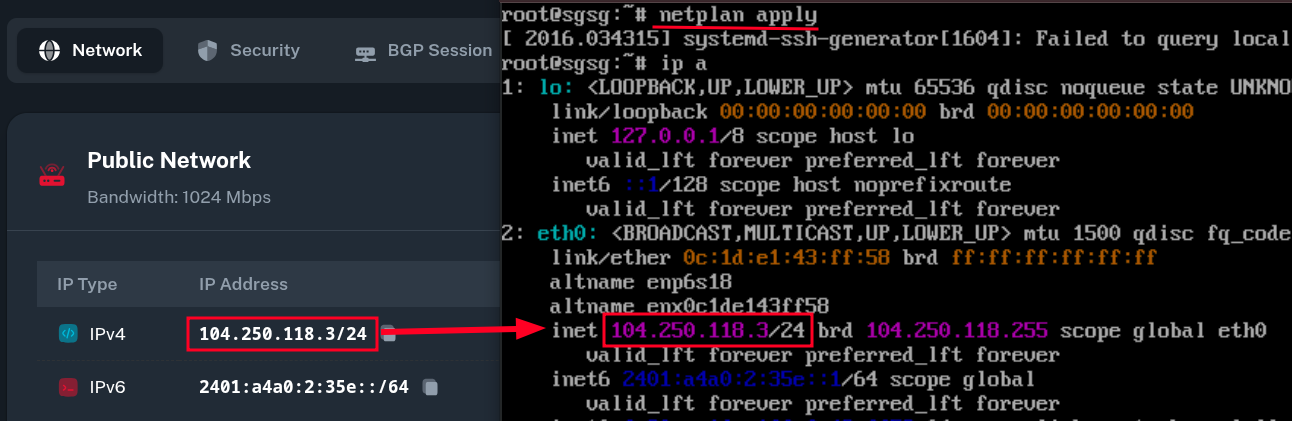
Change the IPv4 address and gateway to the new ones, visible in Onidel Panel under your VM's Network tab.
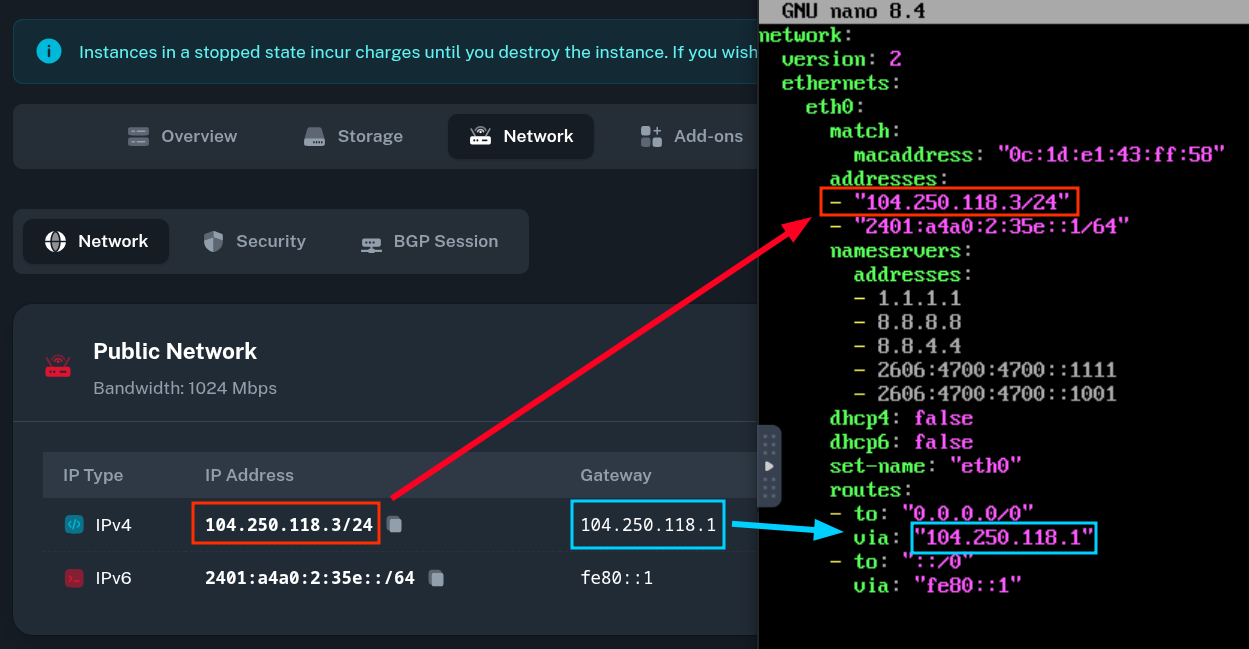
After this, save the configuration file and exit nano (Ctrl+S, Ctrl+X).
Lastly, apply new network configuration using issuing the netplan apply command. Once this is done, your VM should have the new IPv4 address assigned and working.
Final / Troubleshooting steps
Usual steps to perform after the IP change:
-
Ensure all the software is configured to use the new IP of your VM (applies to services running inside the VM as well as external CDNs like Cloudflare).
-
Use the new IP address to SSH into the VM and trust SSH fingerprint (the fingerprint and host keys should remain unchanged).
-
Modify DNS records if necessary.